On this page
Spring in Amsterdam is not a serious season. Some mornings feel like jacket weather, then five minutes later you're standing in the sun wondering why you dressed for November.
So for week two in the Schematik workshop, I built a small weather station that answers the only question I really care about before leaving the house: what should I wear today?
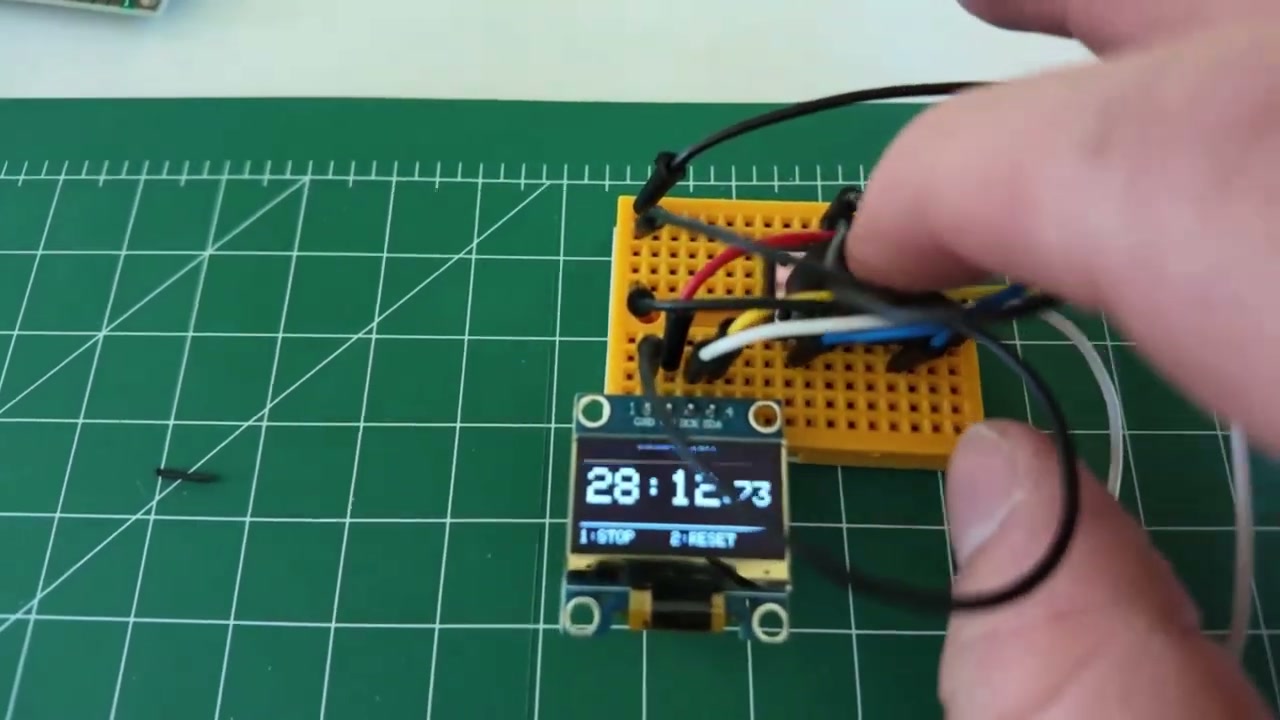
Watch the full build on YouTube. It took 28 minutes and 13 seconds, including a few changes along the way.
We built a custom weather station in less than 30 minutes, and we did not make it especially easy for ourselves.
The idea
Last week, I built a stopwatch. This week, I used that stopwatch to time the next build. A bit silly, but useful. I want these videos to show the real speed of building with Schematik, not a polished after-the-fact version where all the awkward bits disappear.
The first prompt was simple:
An ESP32-based weather station that shows the weather and temperature.
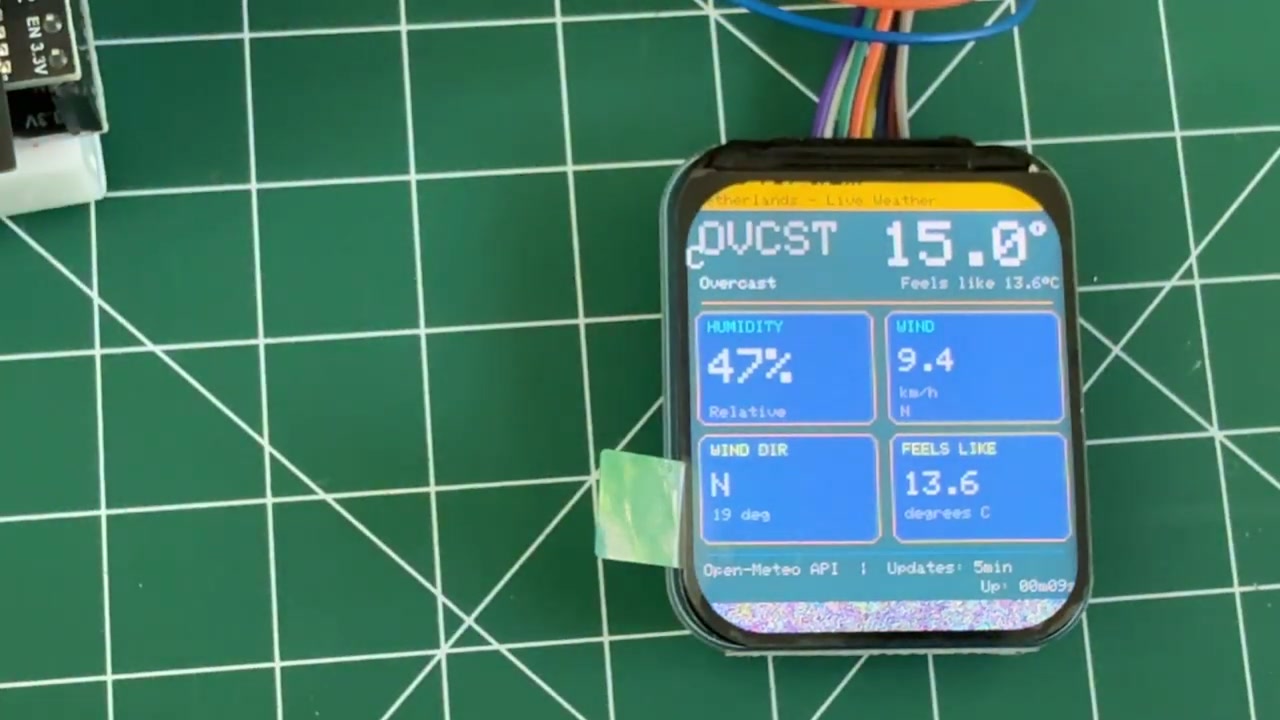
Schematik generated the first version quickly. It picked an ESP32, a humidity sensor, a barometric sensor, and an OLED display. That was a perfectly reasonable weather station if the goal was to measure the room around me.
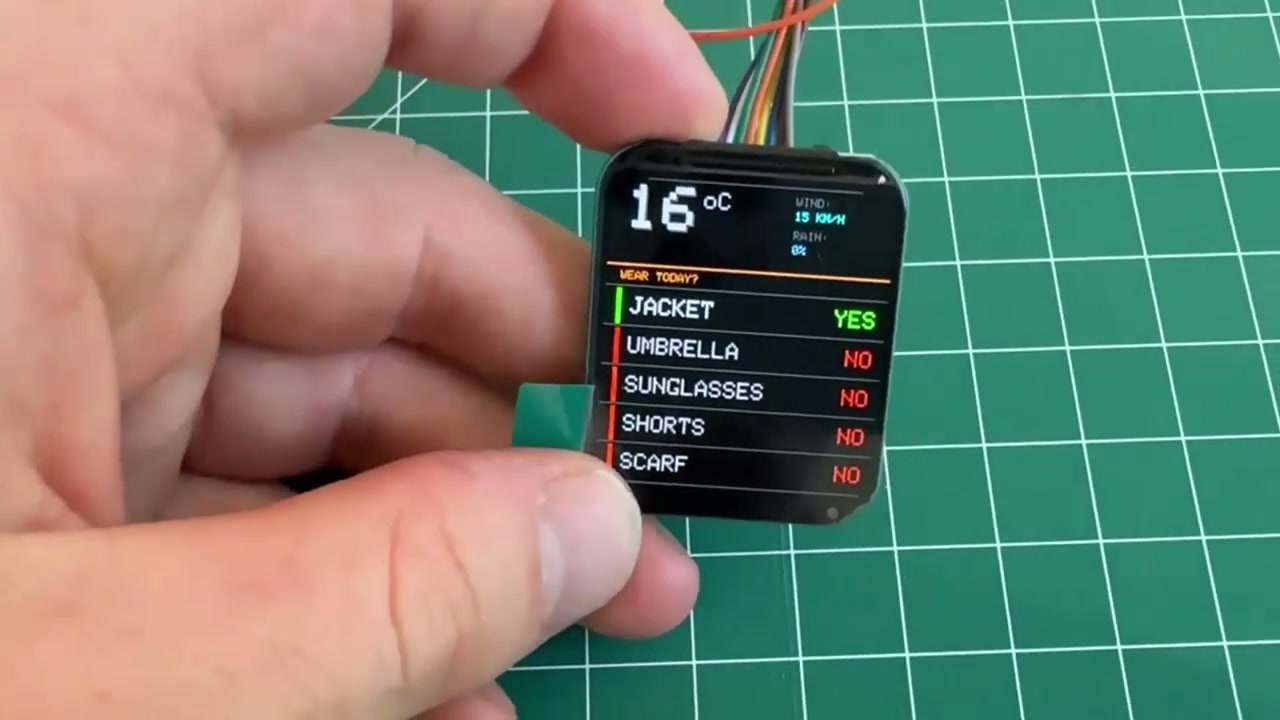
But that was not the thing I wanted. I wanted the forecast. I wanted to know whether I should bring a jacket, umbrella, sunglasses, shorts, or a scarf before walking out the door.
So I reprompted it.
Changing the build as we went
The best part of this workflow is that the first answer does not need to be perfect. You can steer it.
I asked Schematik to use Wi-Fi instead of physical weather sensors, then fetch the weather data online. I also swapped the display. The first OLED was fine, but I had a small Waveshare colour display that looks a bit like an Apple Watch, and that felt much better for this project.

After that change, the project became much simpler:
- ESP32 dev board
- Waveshare colour display
- Wi-Fi connection
- Forecast data from the internet
- A small interface that turns weather into clothing advice
No soldering. No enclosure. Just the prototype on the bench, wired up and working.
One small API problem
The generated code initially used OpenWeather, which meant I needed an API key. API keys are fine in real projects, but they are a bit annoying for a quick workshop build. I did not want people following along to stop, sign up for a service, create a key, paste it into the code, then hope they copied it correctly.
So I asked Schematik to use an API that does not require a key.
It switched the project to Open-Meteo. That left only two things to configure in the code: my Wi-Fi name and password.
That is also the kind of rough edge we want to catch in these videos. If a default choice makes a beginner's build harder than it needs to be, we should improve the product. Weekly builds are partly content, partly product testing.
Deploying from the browser
Once the code looked right, I hit deploy. Schematik flashed the ESP32 from the browser, so I did not need to install the Arduino IDE or set up a separate toolchain.
The first version worked, but it showed too much. It had the weather data, but it felt more like a dashboard than something I would actually glance at every morning.
So I changed the prompt again. I asked it to keep the interface simple and focus on what I should bring.
That final version was much better.
The result
The finished prototype shows the temperature and a short list of useful decisions:
- Jacket, yes
- Umbrella, no
- Sunglasses, no
- Shorts, no
- Scarf, no
It is still very much a prototype. The wires are too long. It needs a case. I would probably make it smaller, clean up the cable routing, and maybe 3D print something for the display.
But as a working first version, I love it. It answers a real question, it is easy to understand, and it took less than half an hour.
What this taught us
This was a small build, but it had the right shape:
- Start with a normal-language idea.
- Let Schematik produce the first version.
- Notice what is wrong or too complicated.
- Reprompt until the hardware, code, and UI match the actual job.
- Deploy and test it on the real board.
That loop matters more than the weather station itself. Hardware usually gets painful when every change means reading docs, rewiring pins, fixing libraries, and trying to remember which tool uploads to which board. If we can make iteration feel normal, more people will build real things.
Next week, I want to make the build a bit more ambitious again. If you have an idea for what I should build, leave it in the YouTube comments. Wireless speakers are high on my list, but I am open to being talked into something stranger.
If you want to try your own build, open Schematik, describe what you want to make, and keep steering it until it gives you the right parts, wiring, code, and deploy path. If you want to recreate this one, follow the step-by-step ESP32 weather station guide. You can also download Schematik and run it locally on macOS.
Keep building from here
Jump into a step-by-step build, or open Schematik and turn your own idea into code, wiring, and assembly instructions.

