Community project
ESP32 WiFi Game Controller
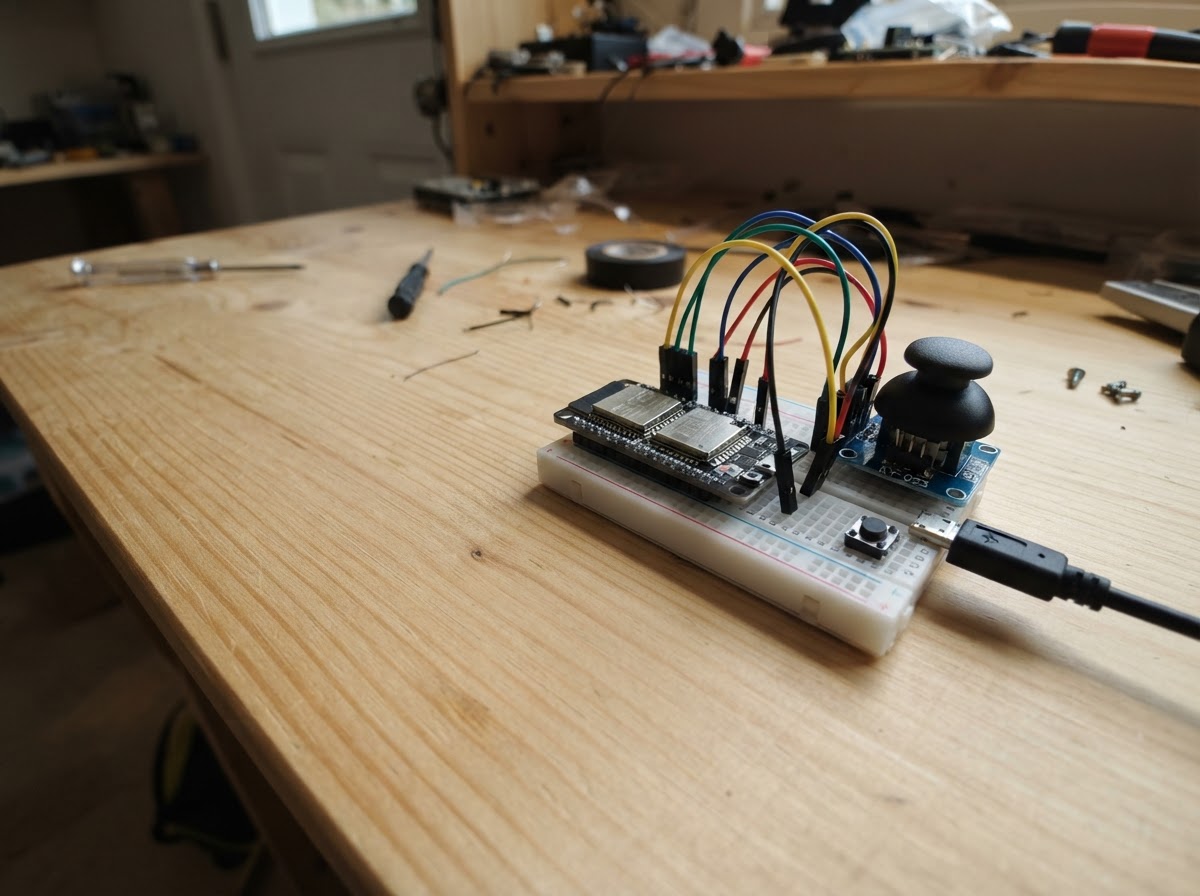
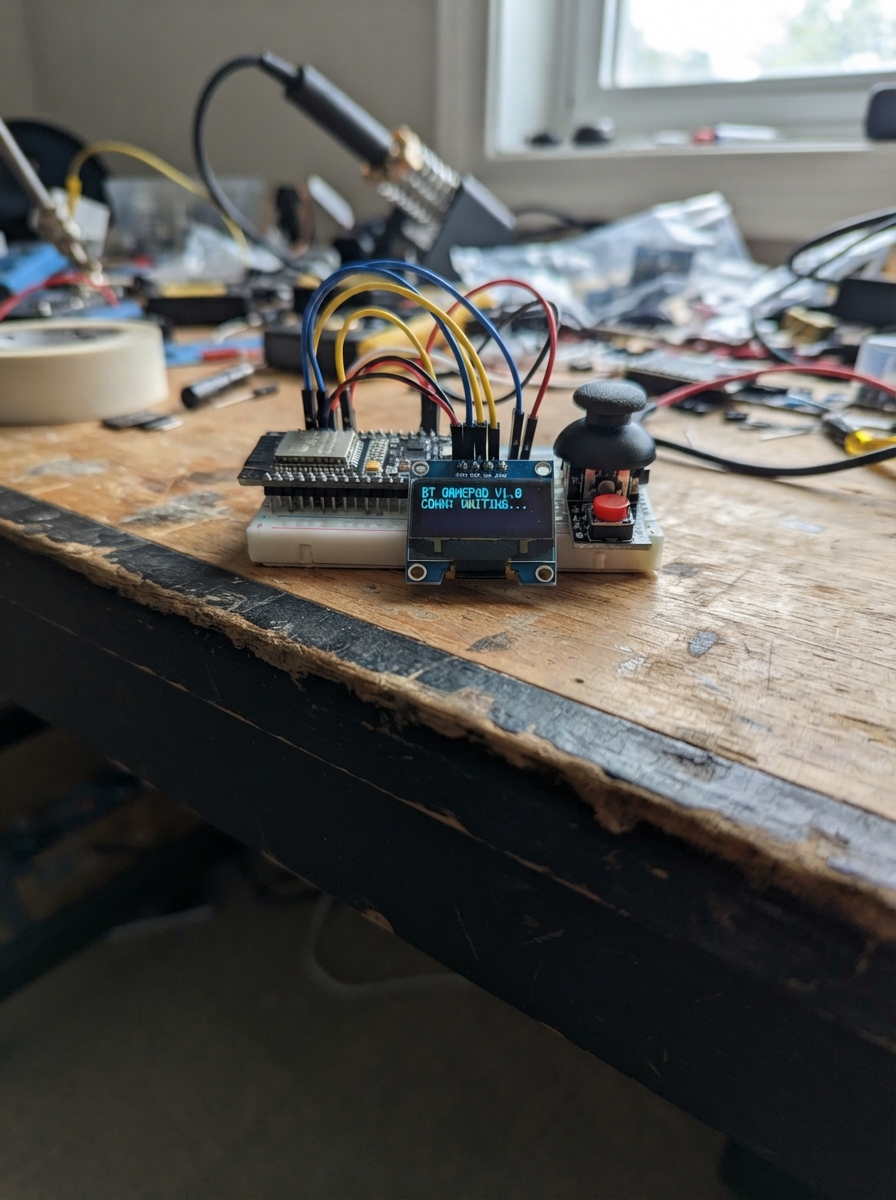
Build a WiFi-enabled game controller using an ESP32 and a dual-axis joystick module. The controller connects to a local WiFi network and streams joystick input (X and Y axes plus button press) as JSON data over HTTP, making it perfect for wireless gaming projects, remote control applications, or custom game interfaces.
This guide provides a complete wiring diagram, parts list, and ready-to-upload firmware that turns the ESP32 into a web-based gamepad. The included HTML interface lets you test the controller immediately in a web browser, and the normalized axis output with configurable dead zone makes it suitable for precise control in games or robotics applications.
Wiring diagram

Gather all the parts
Assemble it in 4 steps
1. Power down before wiring
Unplug the ESP32 DevKit v1 USB cable before attaching the joystick.
- Keep the board on a non-conductive surface while wiring.
- Do not wire or rewire while the board is powered.
2. Connect joystick power safely
Wire joystick_1 VCC to the ESP32 3V3 pin and joystick_1 GND to an ESP32 GND pin.
- Use the pins labelled 3V3 and GND on the ESP32.
- Do not connect the joystick VCC to ESP32 5V/VIN. Supplying this joystick at 3.3 V keeps its analog signals safe for the ESP32.
3. Connect the joystick controls
Connect joystick_1 VRx to GPIO34, VRy to GPIO35, and SW to GPIO27. The SW pin is the push switch built into the joystick cap.
- GPIO34 and GPIO35 are analog-input pins used for horizontal and vertical movement.
- The firmware enables an internal pull-up on GPIO27, so the joystick switch connects it to ground when pressed.
- Check each wire against its printed joystick label: VRx, VRy, and SW are different connections.
4. Power and play
Connect the ESP32 by USB. Join the ESP32-Gamepad Wi-Fi network with password gamepad123, then open http://192.168.4.1/ in a browser. Move the joystick to steer Snake; press the joystick cap to start or restart.
- The game sound is played through the phone or computer browser; tap/click the page once if the browser asks to enable audio.
- Use Schematik's Deploy button to flash the firmware before playing.
Review all connections
1. Connections between "joystick_1" and "ESP32"
Deploy the firmware
#include <Arduino.h>
#include <WiFi.h>
#include <WebServer.h>
// Forward declarations
int normalizeAxis(int raw);
String controllerJson();
constexpr int JOY_X_PIN = 34;
constexpr int JOY_Y_PIN = 35;
constexpr int JOY_SW_PIN = 27;
const char *AP_SSID = "ESP32-Gamepad";
const char *AP_PASSWORD = "gamepad123";
WebServer server(80);
int normalizeAxis(int raw) {
const int value = raw - 2048;
const int deadZone = 260;
if (abs(value) < deadZone) return 0;
return value > 0 ? map(value, deadZone, 2047, 1, 100)
: map(value, -2048, -deadZone, -100, -1);
}
String controllerJson() {
const int x = normalizeAxis(analogRead(JOY_X_PIN));
const int y = normalizeAxis(analogRead(JOY_Y_PIN));
String json = "{\"x\":" + String(x) + ",\"y\":" + String(y);
json += ",\"joy\":" + String(digitalRead(JOY_SW_PIN) == LOW ? "true" : "false") + "}";
return json;
}
const char INDEX_HTML[] PROGMEM = R"SNAKE(
<!doctype html><html lang="en"><head><meta charset="utf-8"><meta name="viewport" content="width=device-width,initial-scale=1"><title>ESP32 Snake</title><style>*{box-sizing:border-box}body{margin:0;min-height:100vh;background:#09120d;color:#e9ffe9;font-family:Arial,sans-serif;display:grid;place-items:center}main{width:min(94vw,460px);text-align:center;padding:18px}h1{margin:0 0 7px;color:#76f58b;font-size:28px}p{margin:6px;color:#b8cfbb;font-size:14px}canvas{width:100%;max-width:420px;aspect-ratio:1;border:4px solid #4ccd69;background:#101d13;image-rendering:pixelated;margin:12px 0 8px}.bar{display:flex;justify-content:space-between;gap:8px;font-weight:bold}.hint{min-height:20px;color:#ffdb70}.offline{color:#ff8585}</style></head><body><main><h1>ESP32 Snake</h1><p>Joystick: steer • press joystick: play again</p><canvas id="game" width="420" height="420"></canvas><div class="bar"><span id="score">Score: 0</span><span id="connection">Controller connecting...</span></div><p class="hint" id="message">Press the joystick to begin</p></main><script>const canvas=document.getElementById('game'),ctx=canvas.getContext('2d'),scoreEl=document.getElementById('score'),messageEl=document.getElementById('message'),connectionEl=document.getElementById('connection');let audioContext;const enableAudio=()=>{audioContext=audioContext||new (window.AudioContext||window.webkitAudioContext)();audioContext.resume()};const beep=(frequency,duration,type='square',volume=.035)=>{if(!audioContext||audioContext.state!=='running')return;const oscillator=audioContext.createOscillator(),gain=audioContext.createGain();oscillator.type=type;oscillator.frequency.value=frequency;gain.gain.setValueAtTime(volume,audioContext.currentTime);gain.gain.exponentialRampToValueAtTime(.001,audioContext.currentTime+duration);oscillator.connect(gain);gain.connect(audioContext.destination);oscillator.start();oscillator.stop(audioContext.currentTime+duration)};document.addEventListener('pointerdown',enableAudio,{once:true});document.addEventListener('keydown',enableAudio,{once:true});const cells=21,size=20;let snake=[],food={x:0,y:0},dx=1,dy=0,nextDx=1,nextDy=0,score=0,running=false,lastStep=0,lastPoll=0,lastStart=false;const draw=()=>{ctx.fillStyle='#101d13';ctx.fillRect(0,0,420,420);ctx.strokeStyle='#1d3621';for(let i=0;i<=cells;i++){ctx.beginPath();ctx.moveTo(i*size,0);ctx.lineTo(i*size,420);ctx.moveTo(0,i*size);ctx.lineTo(420,i*size);ctx.stroke()}ctx.fillStyle='#ff5f62';ctx.fillRect(food.x*size+3,food.y*size+3,size-6,size-6);snake.forEach((p,i)=>{ctx.fillStyle=i?'#67df76':'#b9ffc2';ctx.fillRect(p.x*size+2,p.y*size+2,size-4,size-4)});if(!running){ctx.fillStyle='rgba(0,0,0,.48)';ctx.fillRect(0,0,420,420);ctx.fillStyle='#e9ffe9';ctx.font='bold 25px Arial';ctx.textAlign='center';ctx.fillText(score?'GAME OVER':'SNAKE',210,195);ctx.font='16px Arial';ctx.fillText(score?'Press joystick':'Press joystick to play',210,224)}};const placeFood=()=>{do{food={x:Math.floor(Math.random()*cells),y:Math.floor(Math.random()*cells)}}while(snake.some(p=>p.x===food.x&&p.y===food.y))};const reset=()=>{snake=[{x:10,y:10},{x:9,y:10},{x:8,y:10}];dx=1;dy=0;nextDx=1;nextDy=0;score=0;running=true;placeFood();scoreEl.textContent='Score: 0';messageEl.textContent='';beep(440,.07,'square');setTimeout(()=>beep(660,.09,'square'),80);draw()};const setDirection=(x,y)=>{if(x&&dx===0){nextDx=x;nextDy=0}else if(y&&dy===0){nextDx=0;nextDy=y}};const step=()=>{dx=nextDx;dy=nextDy;const h={x:snake[0].x+dx,y:snake[0].y+dy};if(h.x<0||h.x>=cells||h.y<0||h.y>=cells||snake.some(p=>p.x===h.x&&p.y===h.y)){running=false;messageEl.textContent='Game over - press joystick';beep(220,.16,'sawtooth');setTimeout(()=>beep(120,.28,'sawtooth'),150);draw();return}snake.unshift(h);if(h.x===food.x&&h.y===food.y){score++;scoreEl.textContent='Score: '+score;beep(880,.06,'square');placeFood()}else snake.pop();draw()};const poll=async()=>{try{const r=await fetch('/state',{cache:'no-store'});if(!r.ok)throw Error();const s=await r.json();connectionEl.textContent='Controller connected';connectionEl.className='';if(Math.abs(s.x)>Math.abs(s.y))setDirection(s.x>35?1:s.x<-35?-1:0,0);else setDirection(0,s.y>35?-1:s.y<-35?1:0);const start=s.joy;if(start&&!lastStart&&!running)reset();lastStart=start}catch(e){connectionEl.textContent='Controller reconnecting...';connectionEl.className='offline'}};const loop=now=>{if(now-lastPoll>=50){lastPoll=now;poll()}if(running&&now-lastStep>=145){lastStep=now;step()}requestAnimationFrame(loop)};draw();requestAnimationFrame(loop);</script></body></html>
)SNAKE";
void setup() {
Serial.begin(115200);
analogReadResolution(12);
pinMode(JOY_SW_PIN, INPUT_PULLUP);
WiFi.mode(WIFI_AP);
WiFi.softAP(AP_SSID, AP_PASSWORD);
server.on("/", HTTP_GET, []() { server.send_P(200, "text/html", INDEX_HTML); });
server.on("/state", HTTP_GET, []() { server.send(200, "application/json", controllerJson()); });
server.onNotFound([]() { server.send(404, "text/plain", "Use / or /state"); });
server.begin();
}
void loop() { server.handleClient(); }Remix this project
Make it yours in one click
Open a full copy of this project in your own Schematik workspace — diagram, code, parts, and assembly steps included. Swap the sensor, add features, or redesign the whole thing with AI. The author's original stays untouched.