Community project
Nir Sensor
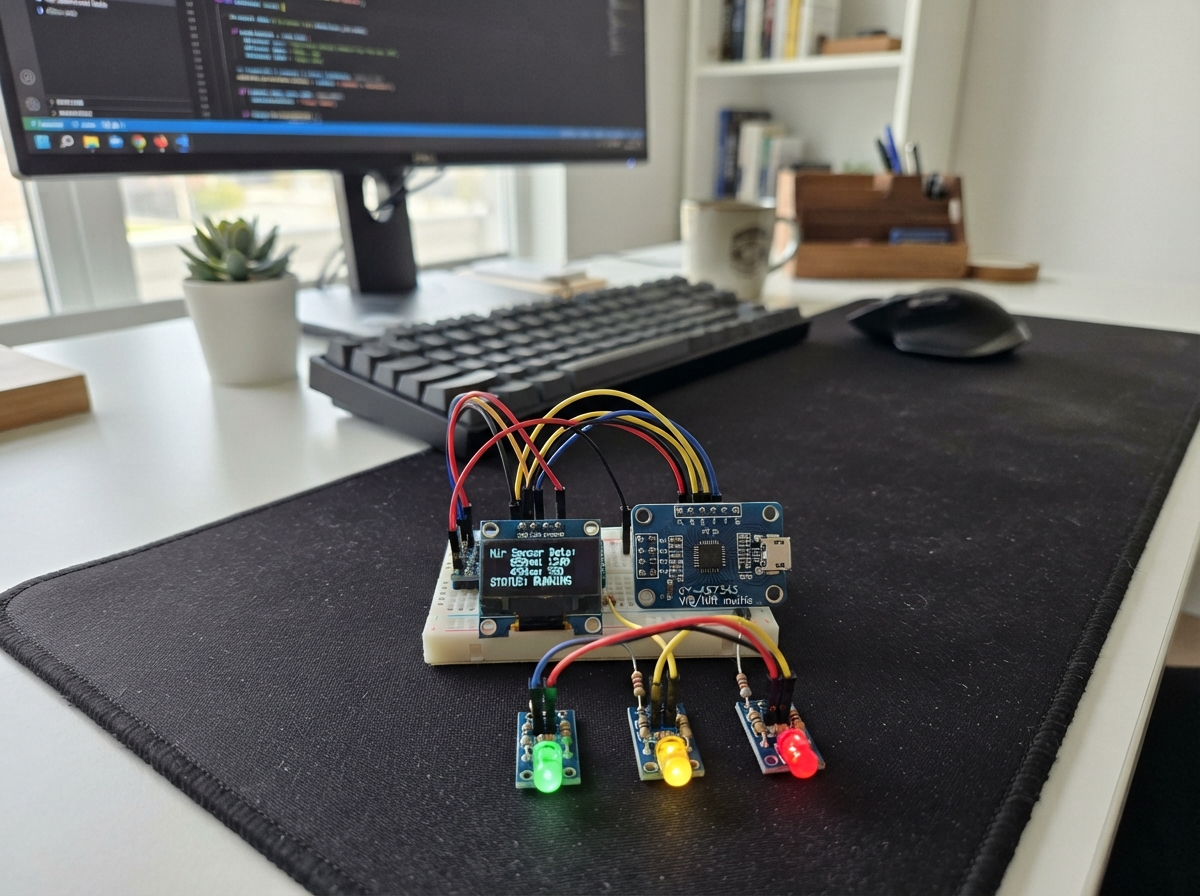
This project builds a multispectral light analyzer using the GY-AS7343 sensor, which captures 14 channels across visible and near-infrared wavelengths. The ESP32 microcontroller processes the spectral data, displays readings on an SSD1306 OLED screen, and uses three indicator LEDs to show measurement status. The guide includes a complete wiring diagram, parts list, and Arduino firmware that establishes a baseline reference before taking measurements.
Builders will learn how to interface a multispectral sensor with an ESP32, implement I2C communication for both the sensor and display, and create a practical tool for analyzing light composition. The firmware handles baseline calibration, continuous sampling at regular intervals, and visual feedback through the status LEDs. This foundation can be adapted for applications like material analysis, plant health monitoring, or light quality assessment.
Wiring diagram

Gather all the parts
Assemble it in 5 steps
1. วางบอร์ดและเตรียมรางไฟ
วางบอร์ด ESP32-S3 UNO บนเบรดบอร์ด แล้วใช้สายสีแดงพาไฟจากขา 3V3 ไปยังรางบวก และสายสีดำจากขา GND ไปยังรางลบ เพื่อให้ทุกโมดูลใช้กราวด์เดียวกัน.
- ยังไม่ต้องเสียบ USB ระหว่างต่อสาย เพื่อป้องกันสายแตะกันโดยไม่ตั้งใจ.
- อย่าสลับขา 3V3 และ GND เพราะไฟเลี้ยงกลับขั้วอาจทำให้เซนเซอร์หรือจอเสียหายได้.
2. ต่อเซนเซอร์ GY-AS7343
ต่อ VCC ของ GY-AS7343 ไป 3V3 (ไฟเลี้ยง), GND ไป GND (กราวด์), SDA ไป GPIO8 (ข้อมูล), และ SCL ไป GPIO9 (จังหวะข้อมูล). วางหน้าเซนเซอร์ให้หันเข้าหาภาชนะตัวอย่างในกล่องทึบแสง.
- โมดูลขายทั่วไปบางรุ่นพิมพ์ขา VIN แทน VCC; สำหรับโครงงานนี้ให้จ่าย 3V3 เท่านั้น.
- ห้ามจ่าย 5V ให้โมดูลที่ไม่มีระบุชัดเจนว่ารับ 5V ได้ เพราะขา I²C ของ ESP32-S3 รับสัญญาณได้เพียง 3.3V.
3. ต่อจอ OLED
ต่อ VCC ของ OLED ไป 3V3 (ไฟเลี้ยง), GND ไป GND (กราวด์), SDA ไป GPIO8 (ข้อมูล), และ SCL ไป GPIO9 (จังหวะข้อมูล). สาย SDA และ SCL ใช้ร่วมกับเซนเซอร์ได้.
- จอจะแสดงช่วงรอ 5 วินาทีเพื่อบันทึกค่าน้ำสะอาดโดยอัตโนมัติหลังเปิดเครื่อง.
- ตรวจให้แน่ใจว่า VCC และ GND ไม่สลับกัน เพราะต่อไฟกลับขั้วอาจทำให้จอเสียหายได้.
4. ต่อไฟสถานะสามดวง
สำหรับ LED โมดูลทุกดวง ต่อ VCC ไป 3V3 (ไฟเลี้ยง) และ GND ไป GND (กราวด์). ต่อ IN ของโมดูลสีเขียวไป GPIO1 (สัญญาณ), IN ของโมดูลสีเหลืองไป GPIO2 (สัญญาณ), และ IN ของโมดูลสีแดงไป GPIO3 (สัญญาณ).
- LED โมดูลชนิดนี้มีตัวต้านทานจำกัดกระแสบนบอร์ดอยู่แล้ว จึงไม่ต้องใส่ตัวต้านทานเพิ่ม.
- เขียวหมายถึงค่าคล้ายตัวอย่างอ้างอิง, เหลืองหมายถึงเปลี่ยนไปควรตรวจซ้ำ, แดงหมายถึงความเปลี่ยนแปลงมาก.
- ใช้เฉพาะ LED module แบบ 3 ขา VCC/GND/IN ที่มีตัวต้านทานในตัว; LED เปล่า 10 mm ต้องมีตัวต้านทานอนุกรมเพิ่ม มิฉะนั้น LED หรือขาบอร์ดอาจเสียหายได้.
5. ตั้งค่าตัวอย่างอ้างอิงก่อนเปิดไฟ
ใส่น้ำสะอาดในภาชนะเดิม วางภาชนะและเซนเซอร์ในกล่องทึบแสง แล้วเสียบบอร์ดผ่าน USB. อย่าขยับภาชนะใน 5 วินาทีแรก เพราะโปรแกรมจะเก็บค่านี้เป็นค่าอ้างอิงอัตโนมัติโดยไม่ต้องใช้ปุ่ม.
- ใช้ตำแหน่งภาชนะ ระยะห่าง และแหล่งกำเนิดแสงเดิมทุกครั้ง เพื่อให้เปรียบเทียบการวัดได้ยุติธรรม.
- ผลเป็นเพียงการคัดกรองจากรูปแบบแสง ไม่ยืนยันว่ามีไมโครพลาสติกหรือระบุชนิดพลาสติกได้; การยืนยันต้องใช้วิธีห้องปฏิบัติการ.
Review all connections
1. Connections between "oled_1" and "ESP32"
2. Connections between "as7343_1" and "ESP32"
3. Connections between "led_green_1" and "ESP32"
4. Connections between "led_yellow_1" and "ESP32"
5. Connections between "led_red_1" and "ESP32"
Deploy the firmware
#include <Arduino.h>
#include <Wire.h>
#include <Adafruit_AS7343.h>
#include <Adafruit_GFX.h>
#include <Adafruit_SSD1306.h>


// Forward declarations
void setIndicator(bool green, bool yellow, bool red);
void showLines(const String &line1, const String &line2, const String &line3, const String &line4);
bool readSpectrum(uint16_t readings[18]);
float spectralDifference(const uint16_t sample[18]);
void saveAutomaticBaseline();

constexpr int I2C_SDA_PIN = 8;
constexpr int I2C_SCL_PIN = 9;
constexpr int LED_GREEN_PIN = 1;
constexpr int LED_YELLOW_PIN = 2;
constexpr int LED_RED_PIN = 3;
constexpr uint8_t OLED_ADDRESS = 0x3C;
constexpr int SCREEN_WIDTH = 128;
constexpr int SCREEN_HEIGHT = 64;
constexpr unsigned long BASELINE_WAIT_MS = 5000;
constexpr unsigned long SAMPLE_INTERVAL_MS = 800;
constexpr float MIN_SIGNAL = 20.0f;

Adafruit_AS7343 spectralSensor;
Adafruit_SSD1306 display(SCREEN_WIDTH, SCREEN_HEIGHT, &Wire, -1);
uint16_t baseline[14] = {0};
bool baselineSaved = false;
unsigned long startedMs = 0;
unsigned long lastSampleMs = 0;
String previousScreen = "";

void setIndicator(bool green, bool yellow, bool red) {
  digitalWrite(LED_GREEN_PIN, green ? HIGH : LOW);
  digitalWrite(LED_YELLOW_PIN, yellow ? HIGH : LOW);
  digitalWrite(LED_RED_PIN, red ? HIGH : LOW);
}

void showLines(const String &line1, const String &line2, const String &line3, const String &line4) {
  String screen = line1 + "\n" + line2 + "\n" + line3 + "\n" + line4;
  if (screen == previousScreen) return;
  previousScreen = screen;
  display.clearDisplay();
  display.setTextColor(SSD1306_WHITE);
  display.setTextSize(1);
  display.setCursor(0, 0); display.println(line1);
  display.setCursor(0, 16); display.println(line2);
  display.setCursor(0, 30); display.println(line3);
  display.setCursor(0, 44); display.println(line4);
  display.display();
}

bool readSpectrum(uint16_t readings[18]) {
  return spectralSensor.readAllChannels(readings);
}

float spectralDifference(const uint16_t sample[18]) {
  float sum = 0.0f;
  for (int i = 0; i < 14; i++) {
    float divisor = baseline[i] > MIN_SIGNAL ? baseline[i] : MIN_SIGNAL;
    float change = (static_cast<float>(sample[i]) - baseline[i]) / divisor;
    sum += change * change;
  }
  return sqrtf(sum / 14.0f) * 100.0f;
}

void saveAutomaticBaseline() {
  uint16_t reading[18] = {0};
  if (!readSpectrum(reading)) {
    showLines("Read failed", "Check AS7343 wires", "SDA GPIO8", "SCL GPIO9");
    setIndicator(false, true, false);
    return;
  }
  for (int i = 0; i < 14; i++) baseline[i] = reading[i];
  baselineSaved = true;
  setIndicator(true, false, false);
  showLines("Reference saved", "Clean water stored", "Insert sample", "Green = similar");
  Serial.println("Automatic clean-water reference saved.");
}

void setup() {
  Serial.begin(115200);
  pinMode(LED_GREEN_PIN, OUTPUT);
  pinMode(LED_YELLOW_PIN, OUTPUT);
  pinMode(LED_RED_PIN, OUTPUT);
  setIndicator(false, false, false);

  Wire.begin(I2C_SDA_PIN, I2C_SCL_PIN);
  if (!display.begin(SSD1306_SWITCHCAPVCC, OLED_ADDRESS)) {
    while (true) delay(100);
  }
  showLines("Microplastic scan", "Starting AS7343...", "Put clean water in", "the dark chamber");

  if (!spectralSensor.begin(0x39, &Wire)) {
    showLines("Sensor not found", "Check AS7343 wires", "SDA GPIO8", "SCL GPIO9");
    setIndicator(false, false, true);
    while (true) delay(100);
  }
  startedMs = millis();
  showLines("Ready to calibrate", "Keep clean water", "in the chamber", "Wait 5 seconds");
}

void loop() {
  if (!baselineSaved) {
    unsigned long elapsed = millis() - startedMs;
    if (elapsed >= BASELINE_WAIT_MS) {
      saveAutomaticBaseline();
    } else {
      unsigned long secondsLeft = (BASELINE_WAIT_MS - elapsed + 999) / 1000;
      showLines("Calibrating soon", "Clean water in place", "Wait " + String(secondsLeft) + " seconds", "No button needed");
    }
    return;
  }

  if (millis() - lastSampleMs < SAMPLE_INTERVAL_MS) return;
  lastSampleMs = millis();

  uint16_t sample[18] = {0};
  if (!readSpectrum(sample)) {
    setIndicator(false, true, false);
    showLines("Read failed", "Keep sensor still", "Check I2C wires", "Try again");
    return;
  }

  float difference = spectralDifference(sample);
  String result;
  if (difference < 12.0f) {
    result = "Similar";
    setIndicator(true, false, false);
  } else if (difference < 30.0f) {
    result = "Changed: recheck";
    setIndicator(false, true, false);
  } else {
    result = "Strong change";
    setIndicator(false, false, true);
  }

  String differenceText = String(difference, 1) + "%";
  showLines("NIR screening only", result, "Difference: " + differenceText, "G/Y/R status light");
  Serial.printf("difference=%.2f%%, F1=%u, NIR=%u, result=%s\n", difference, sample[0], sample[3], result.c_str());
}
Remix this project
Make it yours in one click
Open a full copy of this project in your own Schematik workspace — diagram, code, parts, and assembly steps included. Swap the sensor, add features, or redesign the whole thing with AI. The author's original stays untouched.
Related projects

Create A Complete Electrical Schematic Esp32 Sma
ESP32 · September 17, 2026Ayansh Agrawal
ESP32 Kare Ekran Projeleri
ESP32 · September 16, 2026Seref Ai
Component Qty --------------------------- ------
ESP32 · September 16, 2026Yathartha Chakrawal