Community project
Plant Moisture Monitor
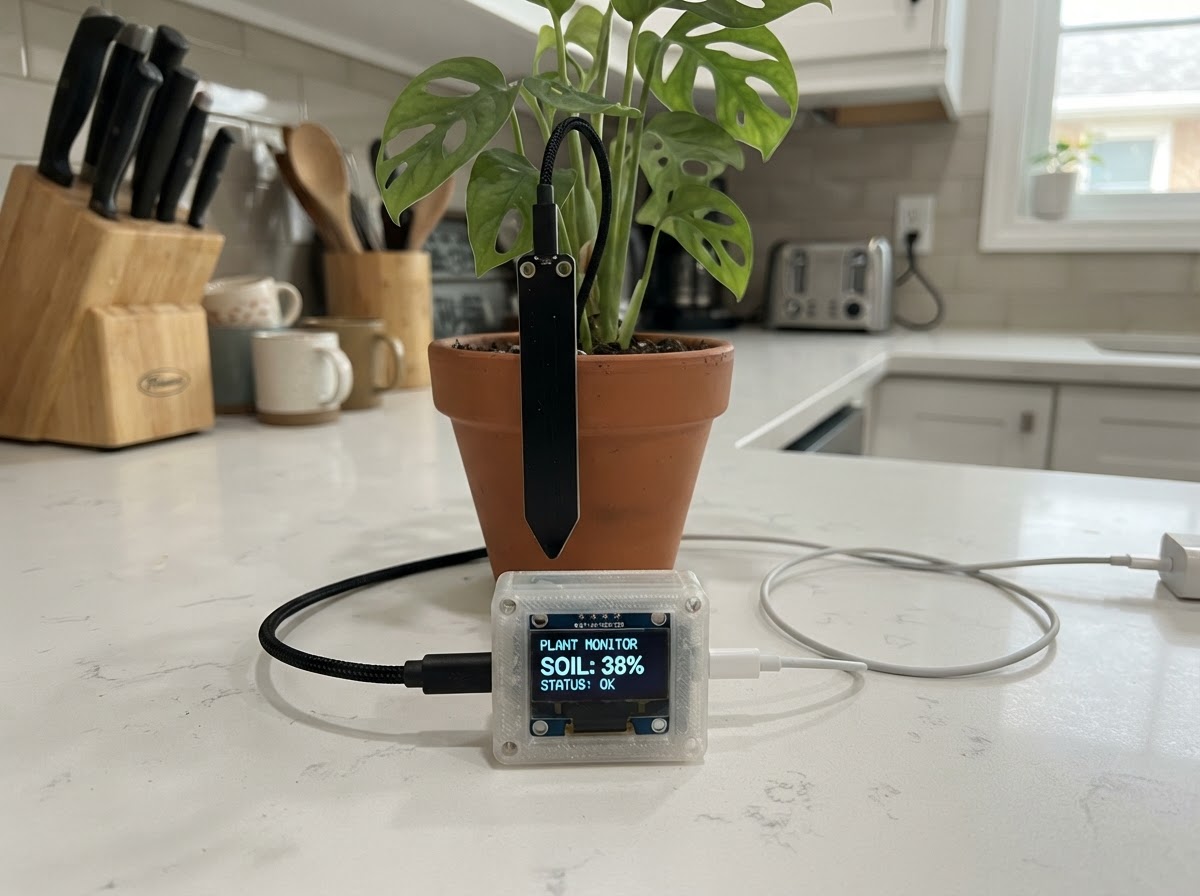
This plant moisture monitor uses an ESP32 microcontroller to continuously measure soil moisture with a capacitive sensor and display the results on a small OLED screen. The capacitive probe resists corrosion and works reliably in wet soil, while the IP65-rated design keeps electronics protected from moisture.
The guide provides a complete wiring diagram, parts list, and step-by-step assembly instructions for positioning the probe in soil and mounting the display where you can see it. Firmware is included with calibration guidance so the monitor accurately reports moisture percentage and alerts when watering is needed.
Wiring diagram

Gather all the parts
Assemble it in 4 steps
1. Keep the electronics dry
Place the ESP32 DevKit V1 and the OLED outside the plant pot, where they cannot get wet. Only the sealed sensing blade of soil_sensor_1 goes into the potting soil.
- Route the sensor cable downward first to form a drip loop, so water cannot run along it into the electronics.
- Do not submerge the sensor's connector or cable end. Do not place the ESP32 or OLED on wet soil.
2. Wire the capacitive soil probe
With the ESP32 unplugged, connect soil_sensor_1 VCC to the ESP32 3V3 pin, GND to an ESP32 GND pin, and AOUT to GPIO34 (often labeled 34).
- Use 3.3 V, not 5 V: this keeps the analog output within the ESP32's safe 3.3 V input range.
- Insert the flat sensing end into the root zone; keep the circuit board and connector above soil level.
- Never connect AOUT directly to a 5 V supply or use a 5 V sensor output with GPIO34.
3. Wire the OLED display
Connect oled_1 VCC to ESP32 3V3, GND to ESP32 GND, SDA to GPIO21, and SCL to GPIO22. The OLED and soil sensor share the ESP32's 3.3 V and ground rails.
- Most 0.96-inch SSD1306 I2C displays use address 0x3C, which the included firmware expects.
- Keep SDA and SCL wires short if possible.
- Check the labels on the OLED module carefully; reversing VCC and GND can damage it.
4. Power and position the monitor
Connect the ESP32 to a normal USB power source through its USB connector. Position the OLED where it can be read and secure the wires so they are not pulled when tending the plant.
- The monitor refreshes its sensor reading every 15 seconds and redraws the display only when the visible status changes.
- USB power is for the ESP32 only; do not power the probe separately unless every ground remains common.
Review all connections
1. Connections between "soil_sensor_1" and "ESP32"
2. Connections between "oled_1" and "ESP32"
Deploy the firmware
#include <Arduino.h>
#include <Wire.h>
#include <Adafruit_GFX.h>
#include <Adafruit_SSD1306.h>


// Forward declarations
int readSoilRaw();
int moisturePercentFromRaw(int raw);
void drawStatus(int raw, int percent, bool needsWater);
void sampleAndUpdate(bool forceRedraw);

constexpr int SOIL_PIN = 34;
constexpr int I2C_SDA_PIN = 21;
constexpr int I2C_SCL_PIN = 22;
constexpr uint8_t SCREEN_WIDTH = 128;
constexpr uint8_t SCREEN_HEIGHT = 64;
constexpr uint8_t OLED_ADDRESS = 0x3C;
constexpr unsigned long SAMPLE_INTERVAL_MS = 15000UL;

// Calibrate these per probe: record raw readings in dry air and saturated potting soil.
constexpr int DRY_RAW = 3000;
constexpr int WET_RAW = 1400;
constexpr int WATER_THRESHOLD_PERCENT = 35;

Adafruit_SSD1306 display(SCREEN_WIDTH, SCREEN_HEIGHT, &Wire, -1);
int lastPercent = -1;
int lastRaw = -1;
bool lastNeedsWater = false;
unsigned long lastSampleMs = 0;

int readSoilRaw() {
  constexpr int sampleCount = 16;
  uint32_t total = 0;
  for (int i = 0; i < sampleCount; ++i) {
    total += analogRead(SOIL_PIN);
    delay(3);
  }
  return static_cast<int>(total / sampleCount);
}

int moisturePercentFromRaw(int raw) {
  long percent = map(raw, DRY_RAW, WET_RAW, 0, 100);
  return constrain(percent, 0, 100);
}

void drawStatus(int raw, int percent, bool needsWater) {
  display.clearDisplay();
  display.setTextColor(SSD1306_WHITE);
  display.setTextSize(1);
  display.setCursor(0, 0);
  display.println(F("PLANT WATER MONITOR"));
  display.drawLine(0, 10, 127, 10, SSD1306_WHITE);

  display.setTextSize(2);
  display.setCursor(0, 17);
  display.print(percent);
  display.println(F("%"));

  display.setTextSize(1);
  display.setCursor(0, 40);
  if (needsWater) {
    display.println(F("Status: WATER NOW"));
  } else {
    display.println(F("Status: moisture OK"));
  }
  display.setCursor(0, 54);
  display.print(F("Raw ADC: "));
  display.print(raw);
  display.display();
}

void sampleAndUpdate(bool forceRedraw) {
  const int raw = readSoilRaw();
  const int percent = moisturePercentFromRaw(raw);
  const bool needsWater = percent < WATER_THRESHOLD_PERCENT;

  Serial.print(F("Soil raw="));
  Serial.print(raw);
  Serial.print(F(" moisture="));
  Serial.print(percent);
  Serial.println(F("%"));

  if (forceRedraw || percent != lastPercent || needsWater != lastNeedsWater) {
    drawStatus(raw, percent, needsWater);
    lastPercent = percent;
    lastRaw = raw;
    lastNeedsWater = needsWater;
  }
}

void setup() {
  Serial.begin(115200);
  analogReadResolution(12);
  analogSetPinAttenuation(SOIL_PIN, ADC_11db);

  Wire.begin(I2C_SDA_PIN, I2C_SCL_PIN);
  if (!display.begin(SSD1306_SWITCHCAPVCC, OLED_ADDRESS)) {
    Serial.println(F("SSD1306 not found at 0x3C."));
    while (true) {
      delay(1000);
    }
  }

  display.clearDisplay();
  display.setTextColor(SSD1306_WHITE);
  display.setTextSize(1);
  display.setCursor(0, 20);
  display.println(F("Starting monitor..."));
  display.display();
  sampleAndUpdate(true);
  lastSampleMs = millis();
}

void loop() {
  const unsigned long now = millis();
  if (now - lastSampleMs >= SAMPLE_INTERVAL_MS) {
    lastSampleMs = now;
    sampleAndUpdate(false);
  }
}
Remix this project
Make it yours in one click
Open a full copy of this project in your own Schematik workspace — diagram, code, parts, and assembly steps included. Swap the sensor, add features, or redesign the whole thing with AI. The author's original stays untouched.