Community project
Orquidea AI - V 2.2
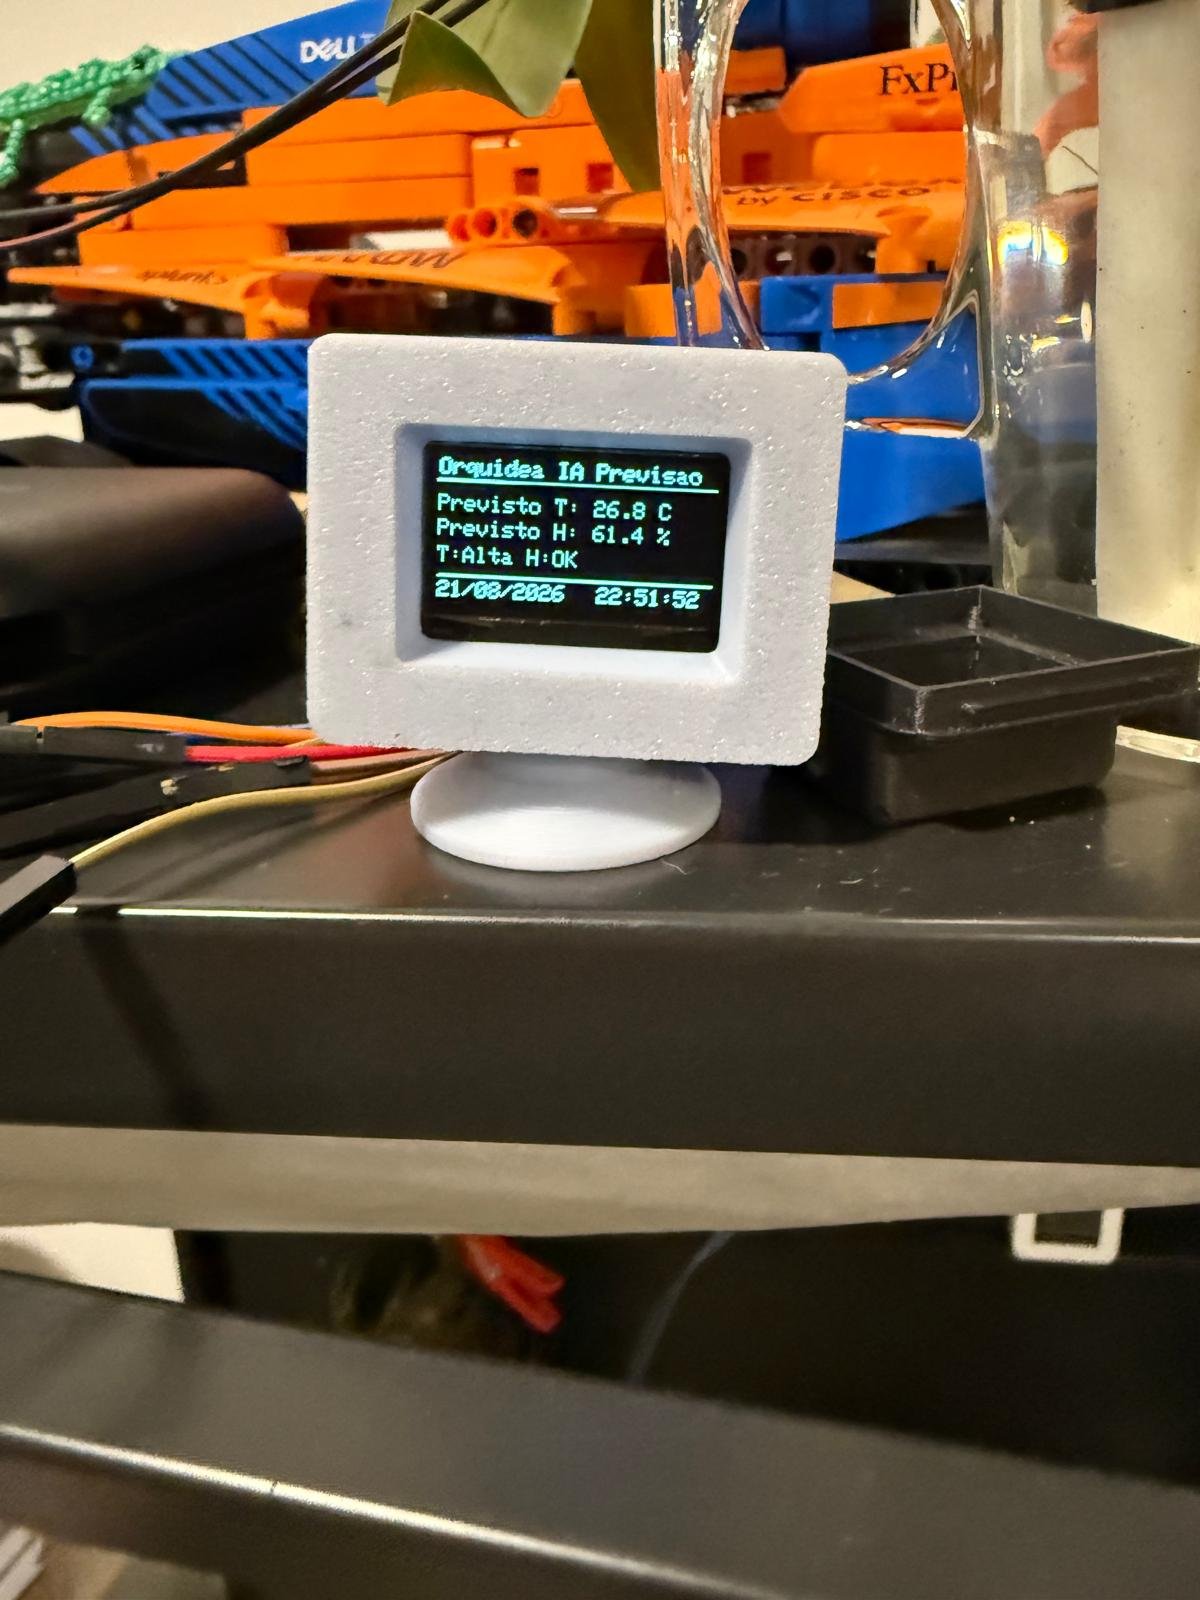
Orquidea AI is an intelligent plant care system built around the ESP32 that automates humidity and temperature control for orchids and other delicate plants. The system monitors environmental conditions with a DHT22 sensor, controls water misting via a Seeed Grove atomization module, tracks water levels, and manages fan cooling with real-time RPM feedback from a Noctua PWM fan.
This guide provides a complete wiring diagram, parts list, and step-by-step assembly instructions for integrating all sensors and actuators with the ESP32 microcontroller. The included firmware handles WiFi connectivity, web-based control, OLED display output, and automated environmental regulation. Builders will learn how to wire PWM fan control with MOSFET drivers, implement water level monitoring, and set up secure remote access for their plant automation system.
Wiring diagram

Gather all the parts
Assemble it in 5 steps
1. Preparar uma única alimentação de 12 V
Usa uma fonte/adaptador DC fechado e certificado de 12 V, com capacidade mínima de 1 A. Desliga-a da tomada antes de fazer qualquer ligação. Esta fonte alimenta a ventoinha diretamente e alimenta o restante circuito através do conversor buck de 12 V para 5 V.
- Monta a ventoinha de 40 mm numa abertura ou suporte que não aperte as pás e orienta-a para retirar o ar húmido do terrário.
- Mantém módulos, uniões e conectores fora de zonas com gotas ou condensação.
- Não trabalhes diretamente com 230 V nem abras a fonte de alimentação.
- Não ligues 12 V à XIAO, ao OLED, ao DHT22, ao sensor de água ou ao nebulizador de 5 V.
2. Regular e verificar o conversor 12 V para 5 V
Liga VIN+ do conversor buck ao +12 V da fonte e VIN− ao GND da fonte. Sem ligar ainda o nebulizador à saída, energiza a fonte e ajusta o potenciómetro até VOUT+–VOUT− medir 5,0 V com o multímetro. Desliga novamente a fonte depois de confirmar o valor.
- Marca o conversor como “5 V” depois de o ajustar.
- Escolhe um módulo e cabos capazes de fornecer pelo menos 2 A a 5 V para o nebulizador.
- A saída deve ser medida e ajustada antes de ligar o nebulizador: um ajuste acima de 5 V pode danificá-lo.
- Não alteres o ajuste do conversor com cargas ligadas.
3. Ligar o Grove pelo pino EN
Com tudo desligado, liga VCC do atomizador Grove a VOUT+ do buck (alimentação de 5 V), GND a VOUT− do buck (retorno) e EN ao GPIO10 da XIAO (comando). Deixa o pino NC sem ligação. Liga também o GND da XIAO ao VOUT− do buck: este fio dá ao GPIO10 a mesma referência elétrica do atomizador.
- O atomizador fica sempre alimentado a 5 V; a XIAO liga e desliga apenas a névoa através do fio EN.
- Confirma a marca GPIO10 na serigrafia da placa antes de inserir o fio.
- Não ligues VCC do atomizador ao pino 3V3 da XIAO — ele precisa de 5 V.
- Não ligues os 5 V do buck ao EN; EN vai apenas ao GPIO10 de 3,3 V.
4. Ligar a Noctua NF-A4x10 PWM
Com a fonte desligada, liga o fio amarelo da Noctua ao +12 V da fonte (alimentação), o fio preto ao GND da fonte (retorno), o fio azul PWM ao drain do 2N7000 (comando de velocidade), e o source do 2N7000 ao GND comum. Liga o gate do 2N7000 ao GPIO3 da XIAO (sinal de comando). Liga o fio verde TACH ao GPIO9 e a uma ponta do resistor de 10 kΩ; liga a outra ponta do resistor ao 3V3 da XIAO (leitura de rotações).
- A NF-A4x10 é a ventoinha compacta de 40 × 40 mm; fixa-a pelas quatro furações e deixa espaço livre dos dois lados para o ar passar.
- Azul é só o comando de velocidade e verde é só a leitura de rotações; amarelo e preto são os fios de alimentação.
- O painel passará a mostrar RPM reais após o Deploy.
- Confirma a posição real de gate, drain e source no datasheet do teu 2N7000.
- Nunca ligues os fios amarelo, azul ou verde diretamente a um GPIO.
- Não encostes cabos às pás: podem ser cortados e parar a ventilação.
5. Conferir sensores e testar com segurança
Confirma as ligações existentes do DHT22, sensor de água, OLED e LED vermelho com resistor de 220 Ω. Verifica polaridades e se não há fios descarnados. Só então liga a fonte de 12 V, faz Deploy e testa primeiro a ventoinha a 100%. Confirma no painel que aparecem rotações; em seguida testa o nebulizador: o comando manual deve levar o GPIO10 a HIGH e criar névoa, e parar deve levá-lo a LOW.
- Testa inicialmente fora do terrário para confirmar névoa, fluxo de extração e ausência de vibração.
- Mantém cabos de sinal afastados dos cabos de potência da ventoinha e nebulizador sempre que possível.
- Desliga a fonte antes de corrigir qualquer ligação.
- Nunca introduzas dedos ou objetos nas pás da ventoinha em funcionamento.
- Não deixes o atomizador trabalhar sem água suficiente: a proteção do projeto desliga-o, mas deves também confirmar o nível físico.
Review all connections
1. Connections between "dht22_1" and "ESP32"
2. Connections between "water_level_1" and "ESP32"
3. Connections between "oled_1" and "ESP32"
4. Connections between "led_red_1" and "ESP32"
5. Connections between "resistor_led" and "ESP32"
6. Connections between "fan_supply_1" and "ESP32"
7. Connections between "fan_pwm_driver_1" and "ESP32"
8. Connections between "fan_1" and "ESP32"
9. Connections between "resistor_tach_pullup" and "ESP32"
10. Connections between "buck_12v_to_5v_1" and "ESP32"
11. Connections between "mist_1" and "ESP32"
Deploy the firmware
#include <Arduino.h>
#include <WiFi.h>
#include <ESPmDNS.h>
#include <AsyncTCP.h>
#include <ESPAsyncWebServer.h>
#include <ArduinoJson.h>
#include <DHT.h>
#include <Wire.h>
#include <Adafruit_GFX.h>
#include <Adafruit_SSD1306.h>
#include <LittleFS.h>
#include <ArduinoOTA.h>
#include <WiFiClientSecure.h>
#include <HTTPClient.h>
#include <time.h>

// Orquidea IA — Seeed Studio XIAO ESP32-S3
#define WIFI_SSID "Vodafone-42D2E7"
#define WIFI_PASS "UcyXUx8aFNg8dTcY"
#define DHT_PIN 8  // XIAO D9 (GPIO8): DHT22 DATA/S
#define MIST_EN_PIN 10 // GPIO10: Grove atomizador EN; LOW desliga, HIGH liga
#define WATER_SIG_PIN 1
#define WATER_PWR_PIN 2
#define OLED_SDA 5
#define OLED_SCL 6
#define LED_RED_PIN 7
#define FAN_PWM_PIN 3
#define FAN_TACH_PIN 9
#define FAN_PWM_HZ 25000
#define FAN_PWM_BITS 8
#define FAN_TACH_PULSES_PER_REV 2
#define FAN_TACH_SAMPLE_MS 5000UL
// A NF-A4x10 PWM está ligada com o fio verde TACH e pull-up externo de 10 kΩ
// para 3,3 V; assim o painel pode mostrar rotações reais e detetar paragem.
#define FAN_TACH_CONNECTED true
#define DHTTYPE DHT22
#define LOW_WATER 20.0f
#define CRITICAL_WATER 10.0f
#define READ_MS 5000UL
#define HISTORY_MS 600000UL


// Forward declarations

// Forward declarations
String telegramEncode(const String& value);

void updateClock();
void saveSettings();
void loadSettings();
void setMist(bool enabled);
void setFanSpeed(int percent);
void IRAM_ATTR onFanTach();
void updateFanRpm();
float readWater();
void saveHistory();
String daysJson();
String historyJson(const String& day);
void broadcast();
void readControl();
void drawMain();
void drawPrediction();
void drawStartup(const String& status);
void maintainWiFi();
void startMdns();
void evaluateTelegramAlerts();
void queueTelegram(const String& message);
void serviceTelegram();
void onWs(AsyncWebSocket*,AsyncWebSocketClient*,AwsEventType type,void*,uint8_t* data,size_t len);

DHT dht(DHT_PIN, DHTTYPE);
Adafruit_SSD1306 oled(128, 64, &Wire, -1);
AsyncWebServer server(80);
AsyncWebSocket ws("/ws");

float tempMin=20, tempMax=28, humMin=60, humMax=70;
float temperature=NAN, humidity=NAN, waterPct=0;
float previousHum=NAN, humTrend=0, previousTemp=NAN, tempTrend=0;
// Valor filtrado para controlo: o DHT22 varia em passos pequenos e não deve
// comutar o relé por uma única leitura de 0,1 %.
float controlHumidity=NAN, controlTemperature=NAN;
int rawEmpty=0, rawFull=3200;
bool mist=false, manual=false, manualMistOn=false, lowWater=false, predictionPage=false;
bool fanManual=false;
int fanSpeed=0, fanManualSpeed=0, fanRpm=0;
volatile uint32_t fanTachPulses=0;
uint32_t lastTachPulses=0;
bool fanFault=false;
unsigned long mistSeconds=0, mistStart=0, lastRead=0, lastHistory=0, lastPage=0, lastTachSample=0;
unsigned long lastMistAutoChange=0;
const unsigned long MIST_MIN_SWITCH_MS=120000UL; // evita ciclos rápidos do atomizador
unsigned long lastWiFiAttempt=0;
bool mdnsRunning=false;
const unsigned long WIFI_RETRY_MS=15000UL;

// Credenciais Telegram guardadas localmente em LittleFS e nunca devolvidas pela API Web.
String telegramToken="", telegramChatId="", telegramPending="", telegramStatus="Não configurado";
bool telegramBusy=false, criticalWaterAlertSent=false, fanAlertSent=false, humidityAlertSent=false, temperatureAlertSent=false, cleaningAlertSent=false;
unsigned long fanFaultSince=0, humidityOutSince=0, temperatureOutSince=0;
const unsigned long PERSISTENT_ALERT_MS=15UL*60UL*1000UL;
char dayKey[11]="", dateText[11]="--/--/----", timeText[9]="--:--:--";

void updateClock(){
  tm info;
  if(getLocalTime(&info)){
    strftime(dayKey,sizeof(dayKey),"%Y-%m-%d",&info);
    strftime(dateText,sizeof(dateText),"%d/%m/%Y",&info);
    strftime(timeText,sizeof(timeText),"%H:%M:%S",&info);
  }
}

// Reposição de rede independente do controlo ambiental. Nunca bloqueia o loop:
// se o router falhar, o humidificador, sensores e histórico continuam ativos.
void startMdns(){
  if(mdnsRunning || WiFi.status()!=WL_CONNECTED)return;
  if(MDNS.begin("orquidea-ia")){
    MDNS.addService("http","tcp",80);
    mdnsRunning=true;
    Serial.print("mDNS ativo em http://orquidea-ia.local — IP: ");
    Serial.println(WiFi.localIP());
  }
}
void maintainWiFi(){
  if(WiFi.status()==WL_CONNECTED){
    startMdns();
    return;
  }
  // mDNS perde a associação juntamente com o Wi-Fi; será criado de novo
  // quando a placa receber outro endereço IP.
  if(mdnsRunning){
    MDNS.end();
    mdnsRunning=false;
  }
  unsigned long now=millis();
  if(now-lastWiFiAttempt>=WIFI_RETRY_MS){
    lastWiFiAttempt=now;
    Serial.println("Wi-Fi desligado; a tentar reconectar...");
    WiFi.disconnect(false, false);
    WiFi.begin(WIFI_SSID,WIFI_PASS);
  }
}
void saveSettings(){
  JsonDocument doc;
  doc["rawEmpty"]=rawEmpty; doc["rawFull"]=rawFull;
  doc["tempMin"]=tempMin; doc["tempMax"]=tempMax;
  doc["humMin"]=humMin; doc["humMax"]=humMax;
  doc["mistSeconds"]=mistSeconds;
  doc["fanManual"]=fanManual; doc["fanManualSpeed"]=fanManualSpeed;
  doc["telegramToken"]=telegramToken; doc["telegramChatId"]=telegramChatId;
  File f=LittleFS.open("/settings.json","w");
  if(f){serializeJson(doc,f);f.close();}
}
void loadSettings(){
  File f=LittleFS.open("/settings.json","r");
  if(!f)return;
  JsonDocument doc;
  if(deserializeJson(doc,f)==DeserializationError::Ok){
    rawEmpty=doc["rawEmpty"]|0; rawFull=doc["rawFull"]|3200;
    tempMin=doc["tempMin"]|20.0f; tempMax=doc["tempMax"]|28.0f;
    humMin=doc["humMin"]|60.0f; humMax=doc["humMax"]|70.0f;
    mistSeconds=doc["mistSeconds"]|0UL;
    fanManual=doc["fanManual"]|false; fanManualSpeed=doc["fanManualSpeed"]|0;
    telegramToken=doc["telegramToken"]|""; telegramChatId=doc["telegramChatId"]|"";
  }
  f.close();
}
// Coloca a mensagem numa fila de uma posição. Assim os alertas não se repetem
// nem bloqueiam a leitura do sensor; o envio é tratado mais tarde no loop.
void queueTelegram(const String& message){
  if(telegramToken.length()<20 || telegramChatId.length()==0){
    telegramStatus="Configure o token e o Chat ID";
    return;
  }
  if(telegramPending.length()==0)telegramPending=message;
}
String telegramEncode(const String& value){
  const char* hex="0123456789ABCDEF"; String out;
  for(size_t i=0;i<value.length();i++){
    uint8_t c=(uint8_t)value[i];
    if((c>='a'&&c<='z')||(c>='A'&&c<='Z')||(c>='0'&&c<='9')||c=='-'||c=='_'||c=='.')out+=(char)c;
    else {out+='%';out+=hex[c>>4];out+=hex[c&15];}
  }
  return out;
}
void serviceTelegram(){
  if(telegramBusy || telegramPending.length()==0 || WiFi.status()!=WL_CONNECTED)return;
  telegramBusy=true;
  String message=telegramPending; telegramPending="";
  WiFiClientSecure client; client.setInsecure(); client.setTimeout(1500);
  HTTPClient http; http.setConnectTimeout(1500); http.setTimeout(1500);
  String url="https://api.telegram.org/bot"+telegramToken+"/sendMessage";
  bool started=http.begin(client,url);
  int result=-1;
  if(started){
    http.addHeader("Content-Type","application/x-www-form-urlencoded");
    result=http.POST("chat_id="+telegramEncode(telegramChatId)+"&text="+telegramEncode(message));
    http.end();
  }
  telegramStatus=result==200?"Último envio Telegram concluído":"Falha Telegram (verifique Wi-Fi, token e Chat ID)";
  telegramBusy=false;
  broadcast();
}
void evaluateTelegramAlerts(){
  unsigned long now=millis();
  if(waterPct<CRITICAL_WATER){
    if(!criticalWaterAlertSent){queueTelegram("Orquidea IA: nivel de agua criticamente baixo ("+String((int)waterPct)+"%). Nebulizador desligado por seguranca.");criticalWaterAlertSent=true;}
  }else criticalWaterAlertSent=false;
  if(fanFault){
    if(fanFaultSince==0)fanFaultSince=now;
    if(now-fanFaultSince>=PERSISTENT_ALERT_MS && !fanAlertSent){queueTelegram("Orquidea IA: falha persistente da ventoinha. Ha comando, mas nao foram detetados RPM durante 15 minutos.");fanAlertSent=true;}
  }else {fanFaultSince=0;fanAlertSent=false;}
  bool humOut=!isnan(humidity)&&(humidity<humMin || humidity>humMax);
  if(humOut){
    if(humidityOutSince==0)humidityOutSince=now;
    if(now-humidityOutSince>=PERSISTENT_ALERT_MS && !humidityAlertSent){queueTelegram("Orquidea IA: humidade fora dos limites durante 15 minutos ("+String(humidity,1)+"%, limites "+String(humMin,0)+"-"+String(humMax,0)+"%).");humidityAlertSent=true;}
  }else {humidityOutSince=0;humidityAlertSent=false;}
  bool tempOut=!isnan(temperature)&&(temperature<tempMin || temperature>tempMax);
  if(tempOut){
    if(temperatureOutSince==0)temperatureOutSince=now;
    if(now-temperatureOutSince>=PERSISTENT_ALERT_MS && !temperatureAlertSent){queueTelegram("Orquidea IA: temperatura fora dos limites durante 15 minutos ("+String(temperature,1)+" C, limites "+String(tempMin,0)+"-"+String(tempMax,0)+" C).");temperatureAlertSent=true;}
  }else {temperatureOutSince=0;temperatureAlertSent=false;}
  float hours=(mistSeconds+(mist?(millis()-mistStart)/1000UL:0))/3600.0f;
  if(hours>=100.0f && !cleaningAlertSent){queueTelegram("Orquidea IA: manutencao recomendada. O nebulizador atingiu 100 horas de funcionamento; limpe-o antes de continuar.");cleaningAlertSent=true;}
}
void setMist(bool enabled){
  if(enabled==mist)return;
  // O EN do Grove tem pull-down interno: LOW pára a névoa e HIGH ativa-a.
  digitalWrite(MIST_EN_PIN, enabled ? HIGH : LOW);
  if(enabled)mistStart=millis();
  else{mistSeconds+=(millis()-mistStart)/1000UL;saveSettings();}
  mist=enabled;
}
void setFanSpeed(int percent){
  percent=constrain(percent,0,100);
  if(percent==fanSpeed)return;
  // O 2N7000 inverte o sinal: GPIO alto puxa PWM a GND.
  uint32_t gateDuty=map(100-percent,0,100,0,(1<<FAN_PWM_BITS)-1);
  ledcWrite(FAN_PWM_PIN,gateDuty);
  fanSpeed=percent;
}
void IRAM_ATTR onFanTach(){
  fanTachPulses++;
}
void updateFanRpm(){
  // Sem uma ventoinha ligada, o pino TACH pode apanhar ruído e parecer que
  // existem rotações. Não apresenta RPM nem assinala avaria até a ligação ser
  // instalada e esta opção ser ativada.
  if(!FAN_TACH_CONNECTED){
    noInterrupts(); fanTachPulses=0; interrupts();
    lastTachPulses=0;
    fanRpm=0;
    fanFault=false;
    fanFaultSince=0;
    return;
  }
  unsigned long now=millis();
  if(now-lastTachSample<FAN_TACH_SAMPLE_MS)return;
  uint32_t pulses;
  noInterrupts(); pulses=fanTachPulses; interrupts();
  uint32_t newPulses=pulses-lastTachPulses;
  unsigned long elapsed=now-lastTachSample;
  fanRpm=(int)((newPulses*60000UL)/(FAN_TACH_PULSES_PER_REV*elapsed));
  fanFault=(fanSpeed>=30 && fanRpm<100);
  lastTachPulses=pulses;
  lastTachSample=now;
}
float readWater(){
  digitalWrite(WATER_PWR_PIN,HIGH);delay(10);
  int raw=analogRead(WATER_SIG_PIN);
  digitalWrite(WATER_PWR_PIN,LOW);
  if(rawFull<=rawEmpty)return 0;
  return constrain((raw-rawEmpty)*100.0f/(rawFull-rawEmpty),0.0f,100.0f);
}
void saveHistory(){
  updateClock();
  if(!dayKey[0]||isnan(temperature)||isnan(humidity))return;
  File f=LittleFS.open(String("/data/")+dayKey+".csv","a");
  if(f){f.printf("%s,%.1f,%.1f\n",timeText,temperature,humidity);f.close();}
}
String daysJson(){
  JsonDocument doc;JsonArray a=doc.to<JsonArray>();
  File dir=LittleFS.open("/data");
  if(dir&&dir.isDirectory())for(File f=dir.openNextFile();f;f=dir.openNextFile()){
    String n=f.name();
    if(n.endsWith(".csv")){
      int slash=n.lastIndexOf('/');
      a.add(n.substring(slash+1,n.length()-4)); // only YYYY-MM-DD, never the LittleFS /data/ path
    }
  }
  String out;serializeJson(doc,out);return out;
}
String historyJson(const String& day){
  JsonDocument doc;JsonArray labels=doc["labels"].to<JsonArray>();
  JsonArray temps=doc["temps"].to<JsonArray>();JsonArray hums=doc["hums"].to<JsonArray>();
  File f=LittleFS.open(String("/data/")+day+".csv","r");
  if(!f){doc["error"]="Sem dados";String out;serializeJson(doc,out);return out;}
  while(f.available()){
    String s=f.readStringUntil('\n');int a=s.indexOf(','),b=s.indexOf(',',a+1);
    if(a>0&&b>a){labels.add(s.substring(0,a));temps.add(s.substring(a+1,b).toFloat());hums.add(s.substring(b+1).toFloat());}
  }
  f.close();String out;serializeJson(doc,out);return out;
}
void broadcast(){
  updateClock();JsonDocument doc;
  doc["temp"]=isnan(temperature)?0:temperature;doc["hum"]=isnan(humidity)?0:humidity;
  doc["water"]=(int)waterPct;doc["mist"]=mist;doc["manual"]=manual;doc["manualMistOn"]=manualMistOn;doc["waterAlert"]=lowWater;
  doc["fanSpeed"]=fanSpeed;doc["fanManual"]=fanManual;doc["fanManualSpeed"]=fanManualSpeed;
  doc["fanRpm"]=fanRpm;doc["fanFault"]=fanFault;doc["fanTachConnected"]=FAN_TACH_CONNECTED;
  doc["tempMin"]=tempMin;doc["tempMax"]=tempMax;doc["humMin"]=humMin;doc["humMax"]=humMax;
  doc["trend"]=humTrend;doc["future"]=isnan(humidity)?0:humidity+humTrend*2.0f;
  doc["tempTrend"]=tempTrend;doc["tempFuture"]=isnan(temperature)?0:temperature+tempTrend*2.0f;
  doc["hours"]=(mistSeconds+(mist?(millis()-mistStart)/1000UL:0))/3600.0f;
  doc["cleaningDue"]=(doc["hours"].as<float>()>=100.0f);
  doc["rawEmpty"]=rawEmpty;doc["rawFull"]=rawFull;doc["ssid"]=WiFi.SSID();doc["ip"]=WiFi.localIP().toString();
  doc["telegramConfigured"]=(telegramToken.length()>=20 && telegramChatId.length()>0);doc["telegramStatus"]=telegramStatus;
  doc["date"]=dateText;doc["time"]=timeText;
  String out;serializeJson(doc,out);ws.textAll(out);
}
void readControl(){
  // The water sensor must remain independent of the DHT: a failed DHT read
  // must never freeze water indication or the low-water safety cut-off.
  waterPct=readWater();
  lowWater=waterPct<LOW_WATER;

  float h=dht.readHumidity();
  float t=dht.readTemperature();
  bool dhtValid=!isnan(h)&&!isnan(t);
  if(dhtValid){
    temperature=t;
    humidity=h;
    // Média exponencial: cada leitura nova contribui apenas 25 %. Isto reduz
    // o ruído normal do DHT22 sem ignorar uma alteração ambiental sustentada.
    if(isnan(controlHumidity)) controlHumidity=h;
    else controlHumidity+=0.25f*(h-controlHumidity);
    if(isnan(controlTemperature)) controlTemperature=t;
    else controlTemperature+=0.25f*(t-controlTemperature);

    // A tendência usa os valores filtrados e também é suavizada. Uma leitura
    // isolada de 0,1 % deixa de ser interpretada como uma mudança brusca.
    if(!isnan(previousHum)){
      float instantHumTrend=(controlHumidity-previousHum)*12.0f;
      humTrend=0.75f*humTrend+0.25f*instantHumTrend;
      humTrend=constrain(humTrend,-3.0f,3.0f);
    }
    if(!isnan(previousTemp)){
      float instantTempTrend=(controlTemperature-previousTemp)*12.0f;
      tempTrend=0.75f*tempTrend+0.25f*instantTempTrend;
      tempTrend=constrain(tempTrend,-3.0f,3.0f);
    }
    previousHum=controlHumidity;
    previousTemp=controlTemperature;
  }else{
    Serial.println("Falha na leitura do DHT22; nivel de agua continua ativo.");
  }

  // Never run the mist maker with critically low water. Humidity control only
  // runs after a valid DHT measurement, so NaN cannot cause a false decision.
  if(waterPct<CRITICAL_WATER){
    // A proteção de água tem sempre prioridade, inclusive no modo manual.
    setMist(false);
  }else if(manual){
    setMist(manualMistOn);
  }else if(dhtValid){
    // A previsão serve apenas para antecipar uma tendência estável. O valor
    // filtrado tem de estar realmente fora da zona normal antes de comutar.
    float predicted=controlHumidity+humTrend*2.0f;
    bool wantsMist=!mist && controlHumidity<humMin && predicted<humMin+0.2f;
    bool wantsStop=mist && (controlHumidity>=humMax || predicted>=humMax+0.6f);
    unsigned long now=millis();
    // Depois de uma mudança automática, mantém o relé nesse estado pelo
    // menos dois minutos. A proteção de água acima continua imediata.
    if((wantsMist || wantsStop) &&
       (lastMistAutoChange==0 || now-lastMistAutoChange>=MIST_MIN_SWITCH_MS)){
      setMist(wantsMist);
      lastMistAutoChange=now;
    }
  }
  if(dhtValid){
    int automaticFan=0;
    if(h>=humMax || t>=tempMax){
      automaticFan=30;
      if(h>=humMax+2 || t>=tempMax+2) automaticFan=60;
      if(h>=humMax+5 || t>=tempMax+5) automaticFan=100;
    }
    setFanSpeed(fanManual ? fanManualSpeed : automaticFan);
  }
  evaluateTelegramAlerts();
  broadcast();
}
void drawMain(){
  updateClock();oled.clearDisplay();oled.setTextSize(1);oled.setTextColor(SSD1306_WHITE);
  oled.setCursor(1,0);oled.print("Orquidea IA v2.2");oled.drawLine(0,9,127,9,1);
  oled.setCursor(0,12);oled.printf("Temp: %.1f C",temperature);oled.setCursor(84,12);oled.printf("%d-%d",(int)tempMin,(int)tempMax);
  oled.setCursor(0,23);oled.printf("Hum:  %.1f %%",humidity);oled.setCursor(84,23);oled.printf("%d-%d",(int)humMin,(int)humMax);
  oled.drawLine(0,33,127,33,1);oled.setCursor(0,36);oled.print(mist?"NEBULIZ: ON":"NEBULIZ: OFF");
  oled.setCursor(78,36);oled.print(fanSpeed>0?"FAN: ON":"FAN: OFF");
  oled.setCursor(0,45);oled.printf("H2O:%d%%",(int)waterPct);oled.drawRect(48,44,48,8,1);oled.fillRect(49,45,(int)(46*waterPct/100),6,1);
  if(lowWater){oled.fillTriangle(112,43,104,52,120,52,1);oled.setTextColor(SSD1306_BLACK);oled.setCursor(109,45);oled.print("!");oled.setTextColor(SSD1306_WHITE);}
  oled.drawLine(0,54,127,54,1);oled.setCursor(0,56);oled.print(dateText);oled.setCursor(75,56);oled.print(timeText);oled.display();
}
void drawPrediction(){
  updateClock();oled.clearDisplay();oled.setTextSize(1);oled.setTextColor(SSD1306_WHITE);
  oled.setCursor(1,0);oled.print("Orquidea IA Previsao");oled.drawLine(0,9,127,9,1);
  // As duas previsões usam a velocidade de variação entre leituras DHT
  // válidas, projetada para aproximadamente os próximos dois minutos.
  float predictedTemp=isnan(temperature)?NAN:temperature+tempTrend*2.0f;
  float predictedHum=isnan(humidity)?NAN:humidity+humTrend*2.0f;
  oled.setCursor(0,16);oled.printf("Previsto T: %.1f C",predictedTemp);
  oled.setCursor(0,27);oled.printf("Previsto H: %.1f %%",predictedHum);
  // Estado explícito: identifica se o valor está abaixo, dentro ou acima
  // dos limites configurados, sem ocupar mais do que uma linha no OLED.
  const char* tempState=isnan(temperature)?"--":(temperature<tempMin?"Baixa":(temperature>tempMax?"Alta":"OK"));
  const char* humState=isnan(humidity)?"--":(humidity<humMin?"Baixa":(humidity>humMax?"Alta":"OK"));
  oled.setCursor(0,39);oled.printf("T:%s H:%s",tempState,humState);
  oled.drawLine(0,52,127,52,1);oled.setCursor(0,55);oled.print(dateText);oled.setCursor(75,55);oled.print(timeText);oled.display();
}
void drawStartup(const String& status){
  oled.clearDisplay();
  // O nome é a peça principal: faixa alta, invertida e centrada numa só linha.
  oled.fillRoundRect(2,3,124,23,4,SSD1306_WHITE);
  oled.setTextColor(SSD1306_BLACK);oled.setTextSize(1);
  oled.setCursor(13,11);oled.print("Orquidea IA v2.2");
  oled.setTextColor(SSD1306_WHITE);
  oled.drawLine(4,33,123,33,SSD1306_WHITE);
  // Apenas o estado de rede fica abaixo do título.
  oled.setCursor(4,43);oled.print(status);
  oled.display();
}
const char PAGE[] PROGMEM=R"HTML(<!doctype html><html lang='pt'><head><meta charset='UTF-8'><meta name='viewport' content='width=device-width,initial-scale=1'><title>Orquídea IA v2.2</title></head><style>body{max-width:560px;margin:auto;background:#121212;color:#eee;font:16px Arial;padding:12px}.card{background:#202020;border-radius:12px;padding:12px;margin:10px 0}.grid{display:grid;grid-template-columns:1fr 1fr;gap:10px}.big{font-size:2em;color:#70c6ff}input{width:100%}button{background:#1976d2;color:white;border:0;border-radius:6px;padding:9px;margin:3px}.alert{display:none;background:#b71c1c;border-radius:8px;padding:10px}canvas{display:block;width:100%;height:auto;aspect-ratio:13/4;background:#181818;border-radius:4px;touch-action:none;cursor:crosshair}</style><body><h2>🌸 Orquidea IA <small>v2.2</small></h2><div id='alert' class='alert'></div><div class='grid'><div class='card'>Temperatura<div id='temp' class='big'>--</div><span id='tr'></span></div><div class='card'>Humidade<div id='hum' class='big'>--</div><span id='hr'></span></div></div><div class='card' id='overviewStats'><div class='sectionHead'><div><span class='eyebrow'>REGISTOS LOCAIS</span><b>Extremos de hoje</b></div><span class='liveDot'>Atualiza automaticamente</span></div><div id='overviewStatsBody' class='statsBody'>A carregar registos…</div><div class='chartBlock'><div class='chartTitle'><span class='chartSwatch tempSwatch'></span><b>Temperatura</b><small>Últimas 12 horas</small></div><div class='chartFrame'><canvas id='overviewTempChart' width='520' height='160'></canvas></div></div><div class='chartBlock'><div class='chartTitle'><span class='chartSwatch humSwatch'></span><b>Humidade</b><small>Últimas 12 horas</small></div><div class='chartFrame'><canvas id='overviewHumChart' width='520' height='160'></canvas></div></div></div><div class='card'>Água: <b id='water'></b>%<progress id='bar' max='100' style='width:100%'></progress>Nebulizador: <b id='mist'></b> · Modo: <b id='mistMode'></b><br><button onclick='send("mistAuto")'>Automático</button><button onclick='send("mistOn")'>Ligar manualmente</button><button onclick='send("mistStop")'>Parar</button><br>Horas: <span id='hours'></span>/100 h <button id='cleanReset' style='display:none' onclick='if(confirm("Já limpou o nebulizador? Isto vai reiniciar o contador de manutenção."))send("cleanReset")'>Limpeza concluída — repor contador</button></div><div class='card'><b>Limites e valores atuais</b><div class='grid' style='margin:8px 0'><div>Temperatura agora: <b id='tempLimit'>--</b></div><div>Humidade agora: <b id='humLimit'>--</b></div></div>Temp mín: <b><span id='tminValue'>--</span> °C</b><input type='range' id='tmin' min='0' max='50' oninput='sliderValue("tmin",this.value);set("tmin",this.value)'>Temp máx: <b><span id='tmaxValue'>--</span> °C</b><input type='range' id='tmax' min='0' max='50' oninput='sliderValue("tmax",this.value);set("tmax",this.value)'>Hum mín: <b><span id='hminValue'>--</span> %</b><input type='range' id='hmin' min='30' max='95' oninput='sliderValue("hmin",this.value);set("hmin",this.value)'>Hum máx: <b><span id='hmaxValue'>--</span> %</b><input type='range' id='hmax' min='30' max='95' oninput='sliderValue("hmax",this.value);set("hmax",this.value)'></div><div class='card'>🔮 Tendência T: <span id='tempTrend'></span>°C/min · Prevista em 2 min: <span id='tempFuture'></span>°C<br>Tendência H: <span id='trend'></span>%/min · Prevista em 2 min: <span id='future'></span>%</div><div class='card'><b>Ventilação no topo</b><br>Estado: <b id='fan'></b> · Modo: <b id='fanMode'></b><br>Rotação real: <b id='fanRpm'>--</b> RPM <span id='fanWarn'></span><br><button onclick='send("fanAuto")'>Automático</button><button onclick='send("fanOff")'>Parar</button><button onclick='send("fanMax")'>100%</button><br>Velocidade manual <input type='range' id='fanSlider' min='0' max='100' oninput='set("fanSpeed",this.value)'></div><div class='card'>Calibrar sensor: <button onclick='send("empty")'>Vazio</button><button onclick='send("full")'>Cheio</button><br>RAW: <span id='empty'></span> / <span id='full'></span></div><div class='card'><div class='sectionHead'><div><span class='eyebrow'>HISTÓRICO</span><b>Leituras guardadas</b></div></div><div class='historyTools'><select id='day'></select><button onclick='history()'>Ver</button><button onclick='download()'>CSV</button></div><div class='chartFrame historyChart'><canvas id='chart' width='520' height='160'></canvas></div><div id='chartStats' class='statsBody'></div></div><script>let ws,latestTelegramState=null;function renderTelegramState(d){latestTelegramState=d;let ti=document.getElementById('telegramInfo');if(ti){let configured=!!d.telegramConfigured;let status=(typeof d.telegramStatus==='string'&&d.telegramStatus.length)?d.telegramStatus:(configured?'Estado Telegram recebido do ESP32.':'Telegram ainda não configurado.');ti.textContent=(configured?'Telegram configurado. ':'Telegram ainda não configurado. ')+status}}async function refreshTelegramState(){try{let d=await fetch('/telegram-status',{cache:'no-store'}).then(r=>{if(!r.ok)throw new Error('estado indisponível');return r.json()});renderTelegramState(d)}catch(e){let ti=document.getElementById('telegramInfo');if(ti&&!latestTelegramState)ti.textContent='Ainda não foi possível obter o estado do ESP32.'}}function enableChartCursor(c,x,d,px,pyT,pyH,base){let active=false;function restore(){x.putImageData(base,0,0)}function show(e){let r=c.getBoundingClientRect(),mx=(e.clientX-r.left)*c.width/r.width,i=Math.round((mx-24)*Math.max(1,d.temps.length-1)/(c.width-24-36));i=Math.max(0,Math.min(d.temps.length-1,i));restore();let X=px(i),t=d.temps[i],h=d.hums[i];x.strokeStyle='#e8e8e8';x.lineWidth=1;x.setLineDash([3,3]);x.beginPath();x.moveTo(X,6);x.lineTo(X,c.height-24);x.stroke();x.setLineDash([]);x.fillStyle='#e7a36b';x.beginPath();x.arc(X,pyT(t),3,0,Math.PI*2);x.fill();x.fillStyle='#58c6b0';x.beginPath();x.arc(X,pyH(h),3,0,Math.PI*2);x.fill();let lines=[d.labels[i],t.toFixed(1)+' °C',h.toFixed(1)+' %'],bw=106,bh=48,bx=X+8>c.width-bw?X-bw-8:X+8,by=8;x.save();x.shadowColor='rgba(0,0,0,.38)';x.shadowBlur=10;x.fillStyle='rgba(10,28,20,.96)';x.strokeStyle='rgba(157,229,185,.38)';x.lineWidth=1;x.beginPath();x.roundRect(bx,by,bw,bh,7);x.fill();x.stroke();x.restore();x.fillStyle='#dff5e7';x.font='600 10px system-ui';lines.forEach((v,n)=>{if(n===1)x.fillStyle='#f1bd8f';else if(n===2)x.fillStyle='#75d8c5';else x.fillStyle='#dff5e7';x.fillText(v,bx+8,by+13+n*12)});active=true}c.onpointermove=show;c.onpointerdown=e=>{c.setPointerCapture&&c.setPointerCapture(e.pointerId);show(e)};c.onpointerleave=()=>{if(active)restore();active=false};c.onpointerup=()=>{if(active)restore();active=false}}function cmd(o){if(ws&&ws.readyState===1){ws.send(JSON.stringify(o));return true}return false}function send(c){cmd({cmd:c})}function set(c,v){cmd({cmd:c,v:+v})}function sliderValue(id,value){let label=document.getElementById(id+'Value');if(label)label.textContent=value}function connect(){ws=new WebSocket('ws://'+location.host+'/ws');ws.onclose=()=>setTimeout(connect,2000);ws.onmessage=e=>{let d=JSON.parse(e.data);temp.textContent=d.temp.toFixed(1)+' C';hum.textContent=d.hum.toFixed(1)+' %';tempLimit.textContent=d.temp.toFixed(1)+' C';humLimit.textContent=d.hum.toFixed(1)+' %';water.textContent=d.water;bar.value=d.water;mist.textContent=d.mist?'ON':'OFF';mistMode.textContent=d.manual?(d.manualMistOn?'Ligado manualmente':'Parado manualmente'):'Automático';hours.textContent=d.hours.toFixed(1);let cleanReset=document.getElementById('cleanReset');if(cleanReset)cleanReset.style.display=d.cleaningDue?'inline-block':'none';trend.textContent=d.trend.toFixed(1);future.textContent=d.future.toFixed(1);tempTrend.textContent=d.tempTrend.toFixed(2);tempFuture.textContent=d.tempFuture.toFixed(1);tr.textContent=d.tempMin+'-'+d.tempMax+' C';hr.textContent=d.humMin+'-'+d.humMax+' %';tmin.value=d.tempMin;tmax.value=d.tempMax;hmin.value=d.humMin;hmax.value=d.humMax;sliderValue('tmin',d.tempMin);sliderValue('tmax',d.tempMax);sliderValue('hmin',d.humMin);sliderValue('hmax',d.humMax);empty.textContent=d.rawEmpty;full.textContent=d.rawFull;let ssidEl=document.getElementById('ssid'),ipEl=document.getElementById('ip');if(ssidEl)ssidEl.textContent=d.ssid;if(ipEl)ipEl.textContent=d.ip;fan.textContent=d.fanSpeed+'%';fanMode.textContent=d.fanManual?'Manual':'Automático';fanSlider.value=d.fanManualSpeed;fanRpm.textContent=d.fanTachConnected?d.fanRpm:'--';fanWarn.textContent=!d.fanTachConnected?'(ventoinha ainda não ligada)':(d.fanFault?'⚠ Ventoinha sem rotação':'');alert.style.display=(d.waterAlert||d.fanFault)?'block':'none';alert.textContent=d.waterAlert?'⚠ Nível de água baixo — reabastece o depósito.':(d.fanFault?'⚠ A ventoinha recebeu comando mas não foram detetados RPM. Verifica TACH, alimentação de 12 V e obstruções.':'');renderTelegramState(d);}}connect();fetch('/days').then(r=>r.json()).then(a=>a.sort().reverse().forEach(x=>day.add(new Option(x,x))));function history(){fetch('/history?day='+encodeURIComponent(day.value)).then(r=>r.json()).then(d=>{let c=chart,x=c.getContext('2d'),w=c.width,h=c.height,p=24;if(!d.temps||!d.temps.length){x.clearRect(0,0,w,h);x.fillStyle='#ddd';x.fillText('Sem leituras para este dia.',12,28);chartStats.textContent='Sem valores mínimos ou máximos para apresentar.';return}let tMinVal=Math.min(...d.temps),tMaxVal=Math.max(...d.temps),hMinVal=Math.min(...d.hums),hMaxVal=Math.max(...d.hums);chartStats.innerHTML='<b>Resumo do período</b><br>Temperatura: mín. '+tMinVal.toFixed(1)+' °C · máx. '+tMaxVal.toFixed(1)+' °C<br>Humidade: mín. '+hMinVal.toFixed(1)+' % · máx. '+hMaxVal.toFixed(1)+' %';let tLo=Math.floor(tMinVal-1),tHi=Math.ceil(tMaxVal+1),hLo=Math.floor(hMinVal-2),hHi=Math.ceil(hMaxVal+2),tRange=Math.max(1,tHi-tLo),hRange=Math.max(1,hHi-hLo),right=36,px=i=>p+i*(w-p-right)/Math.max(1,d.temps.length-1),pyT=v=>h-p-(v-tLo)*(h-p-12)/tRange,pyH=v=>h-p-(v-hLo)*(h-p-12)/hRange;x.clearRect(0,0,w,h);x.strokeStyle='#555';x.lineWidth=1;x.beginPath();x.moveTo(p,6);x.lineTo(p,h-p);x.lineTo(w-right,h-p);x.lineTo(w-right,6);x.stroke();x.fillStyle='#72d59a';x.font='600 10px system-ui';x.fillText(tHi+' °C',1,12);x.fillText(tLo+' °C',1,h-p);x.fillStyle='#72d59a';x.fillText(hHi+' %',w-right+3,12);x.fillText(hLo+' %',w-right+3,h-p);x.fillStyle='#9fb9aa';x.fillText(d.labels[0],p,h-4);x.fillText(d.labels[d.labels.length-1],w-right-36,h-4);x.fillText('Tempo',w/2-14,h-4);function line(a,color,convert){x.strokeStyle=color;x.lineWidth=2;x.beginPath();a.forEach((v,i)=>{let X=px(i),Y=convert(v);i?x.lineTo(X,Y):x.moveTo(X,Y)});x.stroke()}line(d.temps,'#e7a36b',pyT);line(d.hums,'#58c6b0',pyH);x.fillStyle='#72d59a';x.font='700 10px system-ui';x.fillText('Temperatura',p+16,14);x.fillText('Humidade',p+112,14);enableChartCursor(c,x,d,px,pyT,pyH,x.getImageData(0,0,w,h))})}function download(){location='/download?day='+encodeURIComponent(day.value)}</script><script>(function(){const q=id=>document.getElementById(id);const css=`:root{color-scheme:dark;--bg:#091411;--surface:rgba(19,36,30,.88);--surface-2:#152b23;--line:rgba(161,218,184,.14);--ink:#edf7f0;--muted:#9fb9aa;--accent:#72d59a;--accent-strong:#42b977;--blue:#69bdf5;--danger:#ff7777}*{box-sizing:border-box}body{max-width:760px;padding:18px 14px 36px;margin:auto;background:radial-gradient(800px 450px at 85% -10%,#1a5140 0%,transparent 60%),var(--bg)!important;color:var(--ink)!important;font:15px/1.45 system-ui,-apple-system,BlinkMacSystemFont,'Segoe UI',sans-serif!important}h2{margin:4px 0 18px;letter-spacing:-.6px;font-size:1.65rem;display:flex;align-items:center;gap:8px}h2 small{font-size:.75rem;font-weight:600;color:var(--accent);background:rgba(114,213,154,.13);padding:3px 8px;border-radius:999px}.card{background:linear-gradient(145deg,rgba(29,52,43,.96),var(--surface))!important;border:1px solid var(--line);border-radius:18px!important;padding:16px!important;margin:12px 0!important;box-shadow:0 10px 28px rgba(0,0,0,.18)}.grid{gap:12px!important}.big{color:var(--accent)!important;font-size:2.35rem!important;font-weight:750;letter-spacing:-1.5px;margin:5px 0}.grid>.card{position:relative;overflow:hidden}.grid>.card:before{content:'';position:absolute;width:88px;height:88px;right:-32px;top:-36px;border-radius:50%;background:rgba(114,213,154,.08)}input,select{accent-color:var(--accent-strong)}input[type=range]{width:100%;margin:5px 0 12px}input:not([type=range]),select{width:100%;border:1px solid var(--line);border-radius:10px;background:#0d2019;color:var(--ink);padding:9px;margin:4px 0 10px}button{background:#214237!important;color:var(--ink)!important;border:1px solid rgba(149,230,182,.16)!important;border-radius:10px!important;padding:9px 12px!important;margin:3px 2px!important;font:inherit!important;font-weight:650;transition:transform .15s,background .15s,box-shadow .15s}button:hover{background:#2b5948!important;box-shadow:0 5px 16px rgba(0,0,0,.2)}button:active{transform:scale(.97)}.alert{border:1px solid rgba(255,119,119,.45);background:rgba(125,28,31,.82)!important;border-radius:14px!important;padding:12px!important}.tabNav{position:sticky;top:0;z-index:5;display:flex;gap:7px;overflow-x:auto;padding:9px 2px 12px!important;margin:0 -2px 4px!important;background:linear-gradient(var(--bg) 74%,transparent);scrollbar-width:none}.tabNav::-webkit-scrollbar{display:none}.tabNav button{white-space:nowrap;margin:0!important;padding:8px 13px!important;background:rgba(35,64,53,.75)!important;color:var(--muted)!important;box-shadow:none}.tabNav button.active{background:var(--accent-strong)!important;color:#062314!important;border-color:transparent!important;box-shadow:0 5px 17px rgba(66,185,119,.25)!important}.tabPage{display:none}.tabPage.active{display:block;animation:fadeIn .22s ease}.tabPage>.grid{margin:0}.tabPage .card:first-child{margin-top:0!important}#tab-overview>.grid{align-items:stretch}#tab-overview>.grid>.card{margin:0!important;min-height:150px;box-sizing:border-box}.sectionHead{display:flex;align-items:center;justify-content:space-between;gap:10px;margin-bottom:10px}.sectionHead b{display:block;font-size:1.03rem}.eyebrow{display:block;color:var(--muted);font-size:.67rem;font-weight:750;letter-spacing:.08em;margin-bottom:2px}.liveDot{font-size:.7rem;color:var(--accent);background:rgba(114,213,154,.10);border:1px solid rgba(114,213,154,.16);padding:4px 7px;border-radius:999px;white-space:nowrap}.liveDot:before{content:'•';font-size:1.1em;margin-right:4px}.statsBody{margin-top:8px;font-size:.9em;line-height:1.7;color:var(--muted)}.statsBody b{color:var(--ink)}.chartBlock{margin-top:18px}.chartTitle{display:flex;align-items:center;gap:8px;padding:2px 3px 9px;font-size:.9rem;letter-spacing:-.15px}.chartTitle b{color:var(--accent);font-size:1rem;font-weight:750;letter-spacing:-.35px}.chartTitle small{color:var(--muted);margin-left:auto;font-size:.76rem;font-weight:600}.chartSwatch{width:8px;height:8px;border-radius:99px;background:var(--accent);box-shadow:0 0 0 4px rgba(114,213,154,.12)}.tempSwatch,.humSwatch{background:var(--accent);box-shadow:0 0 0 4px rgba(114,213,154,.12)}.chartFrame{position:relative;overflow:hidden;border:1px solid rgba(161,218,184,.19);border-radius:15px;background:linear-gradient(180deg,rgba(12,35,26,.86),rgba(4,15,11,.58));box-shadow:inset 0 1px 0 rgba(255,255,255,.035),0 8px 18px rgba(0,0,0,.14)}.chartFrame:after{content:'';position:absolute;inset:0;pointer-events:none;background:linear-gradient(90deg,rgba(255,255,255,.025),transparent 22%,transparent 78%,rgba(0,0,0,.08))}.chartFrame:focus-within,.chartFrame:hover{border-color:rgba(114,213,154,.4)}canvas{display:block;width:100%;height:auto;aspect-ratio:13/4;background:transparent!important;border:0!important;border-radius:0!important;margin:0!important;touch-action:none;cursor:crosshair}.historyTools{display:flex;gap:7px;align-items:center;margin:10px 0 12px}.historyTools select{flex:1;margin:0!important}.historyTools button{margin:0!important}.historyChart{margin-top:0}.dashOpts label{display:flex;justify-content:space-between;align-items:center;padding:9px 0;border-bottom:1px solid var(--line)}progress{height:8px;border-radius:8px;overflow:hidden}progress::-webkit-progress-bar{background:#0a1b14;border-radius:8px}progress::-webkit-progress-value{background:var(--accent);border-radius:8px}.lightDash{color-scheme:light;--bg:#eff7f1;--surface:#fff;--surface-2:#e6f0e8;--line:#c8ddcf;--ink:#112219;--muted:#587063;background:radial-gradient(800px 450px at 85% -10%,#c9efd7 0%,transparent 60%),var(--bg)!important}.lightDash .card{background:rgba(255,255,255,.93)!important;box-shadow:0 8px 22px rgba(32,75,47,.08)}.lightDash .tabNav{background:linear-gradient(var(--bg) 74%,transparent)}.lightDash input:not([type=range]),.lightDash select,.lightDash canvas{background:#f7fbf8!important;color:var(--ink)}.lightDash button{background:#e0eee4!important;color:var(--ink)!important}.lightDash .tabNav button.active{background:var(--accent-strong)!important;color:#062314!important}@keyframes fadeIn{from{opacity:.3;transform:translateY(4px)}to{opacity:1;transform:none}}@media(max-width:430px){body{padding:13px 10px 28px}.card{padding:14px!important;border-radius:15px!important}.big{font-size:2rem!important}h2{font-size:1.4rem}.grid{gap:9px!important}}`;
function buildTabs(){
  const directCards=Array.from(document.body.children).filter(e=>e.classList&&e.classList.contains('card'));
  const overviewGrid=document.body.querySelector(':scope > .grid');
  const overviewStats=directCards[0],water=directCards[1],limits=directCards[2],prediction=directCards[3],fan=directCards[4],calibration=directCards[5],historyCard=directCards[6];
  if(!overviewGrid||!overviewStats||!water||!limits||!prediction||!fan||!calibration||!historyCard)return;
  const wifiCard=document.createElement('div');
  wifiCard.className='card';
  wifiCard.innerHTML='<b>Rede e acesso</b><br>Wi-Fi: <span id="ssid"></span><br>IP local: <span id="ip"></span><br><small>Acesso remoto apenas através de VPN.</small>';
  const telegramCard=document.createElement('div');
  telegramCard.className='card';
  telegramCard.innerHTML='<b>Notificações Telegram</b><br><small>O ESP32 usa apenas uma ligação HTTPS de saída; não abras portas no router.</small><br><label>Token do bot<input id="telegramToken" type="password" autocomplete="off" placeholder="Cole o token do BotFather"></label><label>Chat ID<input id="telegramChatId" inputmode="numeric" autocomplete="off" placeholder="Ex.: 123456789"></label><button id="saveTelegram">Guardar Telegram</button><button id="testTelegram">Testar Telegram</button><br><small id="telegramInfo">A aguardar estado do ESP32…</small>';
  const nav=document.createElement('nav');nav.className='tabNav';nav.setAttribute('aria-label','Menu do painel');
  const pages={};
  const definitions=[['overview','Visão geral',[overviewGrid,overviewStats]],['settings','Ajustes',[limits,water,fan,wifiCard,telegramCard]],['history','Histórico',[prediction,historyCard]],['calibration','Calibração',[calibration]]];
  definitions.forEach(([id,label,nodes])=>{let b=document.createElement('button'),page=document.createElement('section');b.type='button';b.textContent=label;b.dataset.tab=id;page.className='tabPage';page.id='tab-'+id;nodes.forEach(n=>page.appendChild(n));b.onclick=()=>openTab(id);nav.appendChild(b);document.body.appendChild(page);pages[id]={b,page};});
  document.querySelector('h2').insertAdjacentElement('afterend',nav);
  function openTab(id){Object.entries(pages).forEach(([key,item])=>{let active=key===id;item.b.classList.toggle('active',active);item.page.classList.toggle('active',active)});localStorage.setItem('orquidea-tab',id);window.scrollTo({top:0,behavior:'smooth'});}
  openTab(localStorage.getItem('orquidea-tab') in pages?localStorage.getItem('orquidea-tab'):'overview');
  document.getElementById('saveTelegram').onclick=()=>{let token=document.getElementById('telegramToken').value.trim(),chatId=document.getElementById('telegramChatId').value.trim();if(!token||!chatId){document.getElementById('telegramInfo').textContent='Introduz o token e o Chat ID antes de guardar.';return}cmd({cmd:'telegramSave',token:token,chatId:chatId});document.getElementById('telegramToken').value='';document.getElementById('telegramChatId').value='';};
  document.getElementById('testTelegram').onclick=()=>{let info=document.getElementById('telegramInfo');if(!cmd({cmd:'telegramTest'})){info.textContent='O painel perdeu a ligação ao ESP32. Aguarda alguns segundos e atualiza a página.';return}info.textContent='Pedido de teste enviado ao ESP32; a enviar mensagem Telegram…';};
  // O cartão é criado depois da ligação WebSocket. Mostra já o último estado
  // recebido, em vez de ficar preso no texto de espera até à próxima leitura.
  if(latestTelegramState)renderTelegramState(latestTelegramState);
  refreshTelegramState();
}
async function refreshOverviewStats(){const out=q('overviewStatsBody');try{let days=await fetch('/days').then(r=>r.json());days.sort().reverse();if(!days.length){out.textContent='Ainda não há registos válidos para apresentar.';return}let today=days[0],yesterday=days[1];let current=await fetch('/history?day='+encodeURIComponent(today)).then(r=>r.json());if(!current.temps||!current.temps.length){out.textContent='Ainda não há registos válidos para apresentar.';return}let stat=a=>({min:Math.min(...a),max:Math.max(...a)}),ct=stat(current.temps),ch=stat(current.hums);let previous=null;if(yesterday){let prior=await fetch('/history?day='+encodeURIComponent(yesterday)).then(r=>r.json());if(prior.temps&&prior.temps.length)previous={t:stat(prior.temps),h:stat(prior.hums)}}let delta=(v,old,unit)=>{if(!old)return '<span style="color:#aaa">sem comparação</span>';let d=v-old;if(Math.abs(d)<0.05)return '<span style="color:#aaa">= igual a ontem</span>';return d>0?'<span style="color:#edb07e">▲ +'+d.toFixed(1)+unit+' vs. ontem</span>':'<span style="color:#72cfbf">▼ '+d.toFixed(1)+unit+' vs. ontem</span>'};out.innerHTML='<small>'+today+'</small><br><b>Temperatura</b>: mín. '+ct.min.toFixed(1)+' °C '+delta(ct.min,previous&&previous.t.min,' °C')+'<br>Temperatura: máx. '+ct.max.toFixed(1)+' °C '+delta(ct.max,previous&&previous.t.max,' °C')+'<br><b>Humidade</b>: mín. '+ch.min.toFixed(1)+' % '+delta(ch.min,previous&&previous.h.min,' %')+'<br>Humidade: máx. '+ch.max.toFixed(1)+' % '+delta(ch.max,previous&&previous.h.max,' %')}catch(e){out.textContent='Não foi possível carregar o resumo dos registos.'}}function drawOverviewLine(canvasId,points,color,unit){let c=q(canvasId),x=c.getContext('2d'),w=c.width,h=c.height,p=30,right=10,bottom=22;x.clearRect(0,0,w,h);if(!points.length){x.fillStyle='#bbb';x.font='12px Arial';x.fillText('Ainda não há leituras válidas nas últimas 12 horas.',12,28);return}let values=points.map(v=>v.value),lo=Math.floor(Math.min(...values)-1),hi=Math.ceil(Math.max(...values)+1),range=Math.max(1,hi-lo),px=i=>p+i*(w-p-right)/Math.max(1,points.length-1),py=v=>h-bottom-(v-lo)*(h-bottom-12)/range;x.strokeStyle='#555';x.beginPath();x.moveTo(p,6);x.lineTo(p,h-bottom);x.lineTo(w-right,h-bottom);x.stroke();x.fillStyle='#72d59a';x.font='600 10px system-ui';x.fillText(hi+unit,1,12);x.fillText(lo+unit,1,h-bottom);x.fillStyle='#9fb9aa';x.fillText(points[0].label,p,h-5);x.fillText(points[points.length-1].label,w-42,h-5);x.strokeStyle=color;x.lineWidth=2;x.beginPath();points.forEach((v,i)=>i?x.lineTo(px(i),py(v.value)):x.moveTo(px(i),py(v.value)));x.stroke();let base=x.getImageData(0,0,w,h),active=false;function show(e){let r=c.getBoundingClientRect(),mx=(e.clientX-r.left)*w/r.width,i=Math.round((mx-p)*Math.max(1,points.length-1)/(w-p-right));i=Math.max(0,Math.min(points.length-1,i));x.putImageData(base,0,0);let X=px(i),v=points[i];x.strokeStyle='#eee';x.setLineDash([3,3]);x.beginPath();x.moveTo(X,6);x.lineTo(X,h-bottom);x.stroke();x.setLineDash([]);x.fillStyle=color;x.beginPath();x.arc(X,py(v.value),3,0,Math.PI*2);x.fill();let bw=118,bx=X+bw+8>w?X-bw-8:X+8;x.save();x.shadowColor='rgba(0,0,0,.38)';x.shadowBlur=10;x.fillStyle='rgba(10,28,20,.96)';x.strokeStyle='rgba(157,229,185,.38)';x.lineWidth=1;x.beginPath();x.roundRect(bx,8,bw,32,7);x.fill();x.stroke();x.restore();x.fillStyle='#dff5e7';x.font='600 10px system-ui';x.fillText(v.full,bx+8,20);x.fillStyle='#72d59a';x.font='750 11px system-ui';x.fillText(v.value.toFixed(1)+' '+unit,bx+8,32);active=true}c.onpointermove=show;c.onpointerdown=e=>{c.setPointerCapture&&c.setPointerCapture(e.pointerId);show(e)};c.onpointerleave=()=>{if(active)x.putImageData(base,0,0);active=false};c.onpointerup=()=>{if(active)x.putImageData(base,0,0);active=false}}
async function refreshOverviewCharts(){try{let days=await fetch('/days').then(r=>r.json());days.sort().reverse();let sets=await Promise.all(days.slice(0,2).map(day=>fetch('/history?day='+encodeURIComponent(day)).then(r=>r.json()).then(data=>({day,data}))));let cutoff=Date.now()-12*60*60*1000,temp=[],hum=[];sets.reverse().forEach(s=>{if(!s.data.labels)return;s.data.labels.forEach((label,i)=>{let stamp=new Date(s.day+'T'+label).getTime();if(stamp>=cutoff){let full=s.day.slice(8,10)+'/'+s.day.slice(5,7)+' '+label;temp.push({label,value:s.data.temps[i],full});hum.push({label,value:s.data.hums[i],full})}})});drawOverviewLine('overviewTempChart',temp,'#e7a36b',' °C');drawOverviewLine('overviewHumChart',hum,'#58c6b0',' %')}catch(e){}}
buildTabs();setTimeout(()=>{refreshOverviewStats();refreshOverviewCharts();refreshTelegramState()},400);setInterval(()=>{refreshOverviewStats();refreshOverviewCharts()},15000);setInterval(refreshTelegramState,4000);let st=document.createElement('style');st.textContent=css;document.head.appendChild(st);let panel=document.createElement('div');panel.className='card';panel.innerHTML=`<b>Personalizar painel</b><p style='font-size:.85em'>A escolha fica guardada neste browser.</p><div class='dashOpts'><label>Modo claro <input type='checkbox' id='lightMode'></label></div><p><b>Perfis de humidade</b><br><button id='orchidProfile'>Orquídea 60–70%</button><button id='nightProfile'>Noite 55–65%</button><button id='awayProfile'>Ausente 50–60%</button></p><p><b>Gráficos</b><br><button id='todayGraph'>Hoje / 24 h</button><button id='weekGraph'>Média dos últimos 7 dias</button></p>`;q('tab-history').appendChild(panel);function pref(k,v){localStorage.setItem('orquidea-'+k,v)}let lm=q('lightMode');lm.checked=localStorage.getItem('orquidea-light')==='true';document.body.classList.toggle('lightDash',lm.checked);lm.onchange=()=>{pref('light',lm.checked);document.body.classList.toggle('lightDash',lm.checked)};function profile(a,b){set('hmin',a);set('hmax',b)}q('orchidProfile').onclick=()=>profile(60,70);q('nightProfile').onclick=()=>profile(55,65);q('awayProfile').onclick=()=>profile(50,60);q('todayGraph').onclick=()=>history();q('weekGraph').onclick=async()=>{let days=await fetch('/days').then(r=>r.json());days.sort().reverse();let sets=await Promise.all(days.slice(0,7).map(day=>fetch('/history?day='+encodeURIComponent(day)).then(r=>r.json()).then(x=>({day,x}))));let d={labels:[],temps:[],hums:[]};sets.reverse().forEach(s=>{if(!s.x.temps||!s.x.temps.length)return;s.x.temps.forEach((v,i)=>{d.labels.push(s.day.slice(5)+' '+s.x.labels[i]);d.temps.push(v);d.hums.push(s.x.hums[i])})});let c=q('chart'),x=c.getContext('2d'),w=c.width,h=c.height,p=24,right=36;x.clearRect(0,0,w,h);if(!d.temps.length){x.fillStyle='#ddd';x.fillText('Ainda não há dados para os últimos 7 dias.',12,28);q('chartStats').textContent='Sem valores mínimos ou máximos para apresentar.';return}let tMinVal=Math.min(...d.temps),tMaxVal=Math.max(...d.temps),hMinVal=Math.min(...d.hums),hMaxVal=Math.max(...d.hums);q('chartStats').innerHTML='<b>Resumo dos últimos 7 dias</b><br>Temperatura: mín. '+tMinVal.toFixed(1)+' °C · máx. '+tMaxVal.toFixed(1)+' °C<br>Humidade: mín. '+hMinVal.toFixed(1)+' % · máx. '+hMaxVal.toFixed(1)+' %';let tLo=Math.floor(tMinVal-1),tHi=Math.ceil(tMaxVal+1),hLo=Math.floor(hMinVal-2),hHi=Math.ceil(hMaxVal+2),tRange=Math.max(1,tHi-tLo),hRange=Math.max(1,hHi-hLo),px=i=>p+i*(w-p-right)/Math.max(1,d.temps.length-1),pyT=v=>h-p-(v-tLo)*(h-p-12)/tRange,pyH=v=>h-p-(v-hLo)*(h-p-12)/hRange;x.strokeStyle='#555';x.lineWidth=1;x.beginPath();x.moveTo(p,6);x.lineTo(p,h-p);x.lineTo(w-right,h-p);x.lineTo(w-right,6);x.stroke();x.fillStyle='#72d59a';x.font='600 10px system-ui';x.fillText(tHi+' °C',1,12);x.fillText(tLo+' °C',1,h-p);x.fillStyle='#72d59a';x.fillText(hHi+' %',w-right+3,12);x.fillText(hLo+' %',w-right+3,h-p);x.fillStyle='#9fb9aa';x.fillText(d.labels[0],p,h-4);x.fillText(d.labels[d.labels.length-1],w-right-42,h-4);x.fillText('Últimos 7 dias',w/2-30,h-4);function line(a,color,convert){x.strokeStyle=color;x.lineWidth=2;x.beginPath();a.forEach((v,i)=>{let X=px(i),Y=convert(v);i?x.lineTo(X,Y):x.moveTo(X,Y)});x.stroke()}line(d.temps,'#e7a36b',pyT);line(d.hums,'#58c6b0',pyH);x.fillStyle='#72d59a';x.font='700 10px system-ui';x.fillText('Temperatura',p+16,14);x.fillText('Humidade',p+112,14);enableChartCursor(c,x,d,px,pyT,pyH,x.getImageData(0,0,w,h))}})();</script></body></html>)HTML";
void onWs(AsyncWebSocket*,AsyncWebSocketClient*,AwsEventType type,void*,uint8_t* data,size_t len){
  // Ao abrir o painel, entrega já o estado gravado (incluindo Telegram), sem
  // obrigar o utilizador a esperar pelo próximo ciclo de leitura do sensor.
  if(type==WS_EVT_CONNECT){broadcast();return;}
  if(type!=WS_EVT_DATA)return;JsonDocument doc;if(deserializeJson(doc,data,len)!=DeserializationError::Ok)return;
  String c=doc["cmd"]|"";
  if(c=="mistAuto"){manual=false;manualMistOn=false;} else if(c=="mistOn"){manual=true;manualMistOn=true; if(waterPct>=CRITICAL_WATER)setMist(true);} else if(c=="mistStop"){manual=true;manualMistOn=false;setMist(false);} else if(c=="fanAuto"){fanManual=false;} else if(c=="fanOff"){fanManual=true;fanManualSpeed=0;setFanSpeed(0);} else if(c=="fanMax"){fanManual=true;fanManualSpeed=100;setFanSpeed(100);} else if(c=="fanSpeed"){fanManual=true;fanManualSpeed=constrain((int)doc["v"],0,100);setFanSpeed(fanManualSpeed);} else if(c=="tmin")tempMin=constrain((float)doc["v"],0,49); else if(c=="tmax")tempMax=constrain((float)doc["v"],1,50); else if(c=="hmin")humMin=constrain((float)doc["v"],30,94); else if(c=="hmax")humMax=constrain((float)doc["v"],31,95); else if(c=="empty"){digitalWrite(WATER_PWR_PIN,HIGH);delay(10);rawEmpty=analogRead(WATER_SIG_PIN);digitalWrite(WATER_PWR_PIN,LOW);} else if(c=="full"){digitalWrite(WATER_PWR_PIN,HIGH);delay(10);rawFull=analogRead(WATER_SIG_PIN);digitalWrite(WATER_PWR_PIN,LOW);} else if(c=="telegramSave"){String token=doc["token"]|"";String chatId=doc["chatId"]|"";if(token.length()>=20 && chatId.length()>0){telegramToken=token;telegramChatId=chatId;telegramStatus="Configuração Telegram guardada";}else telegramStatus="Token ou Chat ID inválido";} else if(c=="cleanReset"){
    // Só repõe o registo de manutenção; não liga nem desliga o nebulizador.
    // Se estiver ligado, a nova contagem continua a partir deste instante.
    mistSeconds=0;
    if(mist)mistStart=millis();
    cleaningAlertSent=false;
  } else if(c=="telegramTest"){
    if(telegramToken.length()<20 || telegramChatId.length()==0) telegramStatus="Configure o token e o Chat ID antes do teste";
    else {telegramStatus="A enviar teste Telegram…";queueTelegram("Orquidea IA: teste Telegram recebido. As notificacoes estao ativas.");}
  }
  if(tempMin>=tempMax)tempMin=tempMax-1;if(humMin>=humMax)humMin=humMax-1;saveSettings();broadcast();
}
void setup(){
  Serial.begin(115200);
  // Segurança no arranque: mantém a névoa desligada antes de iniciar Wi-Fi,
  // servidor, OLED ou qualquer leitura de sensor.
  pinMode(MIST_EN_PIN,OUTPUT);digitalWrite(MIST_EN_PIN,LOW);
  pinMode(WATER_PWR_PIN,OUTPUT);digitalWrite(WATER_PWR_PIN,LOW);pinMode(LED_RED_PIN,OUTPUT);
  Wire.begin(OLED_SDA,OLED_SCL);oled.begin(SSD1306_SWITCHCAPVCC,0x3C);dht.begin();LittleFS.begin(true);if(!LittleFS.exists("/data"))LittleFS.mkdir("/data");loadSettings();
  // Tal como o nebulizador, a ventoinha nunca retoma um comando manual após
  // reinício: volta logo ao modo automático e a primeira leitura decide a velocidade.
  fanManual=false;
  fanManualSpeed=0;
  ledcAttach(FAN_PWM_PIN,FAN_PWM_HZ,FAN_PWM_BITS);fanSpeed=-1;setFanSpeed(0);
  // O fio TACH da NF-A4x10 está ligado através do pull-up de 10 kΩ a 3,3 V.
  if(FAN_TACH_CONNECTED){
    pinMode(FAN_TACH_PIN,INPUT_PULLUP);
    attachInterrupt(digitalPinToInterrupt(FAN_TACH_PIN),onFanTach,FALLING);
  }else{
    pinMode(FAN_TACH_PIN,INPUT_PULLUP);
  }
  lastTachSample=millis();
  // O ecrã de identidade mantém-se 10 s. Se a rede não estiver disponível,
  // o controlador arranca na mesma e a reconexão automática continua no loop.
  WiFi.mode(WIFI_STA);
  WiFi.setAutoReconnect(true);
  WiFi.persistent(false);
  WiFi.begin(WIFI_SSID,WIFI_PASS);
  lastWiFiAttempt=millis();
  unsigned long startupAt=millis();
  while(millis()-startupAt<10000UL){
    String status=WiFi.status()==WL_CONNECTED ? "IP: "+WiFi.localIP().toString() : "A ligar ao Wi-Fi...";
    drawStartup(status);
    delay(100);
  }
  if(WiFi.status()==WL_CONNECTED){
    drawStartup("IP: "+WiFi.localIP().toString());
    startMdns();
  }
  configTzTime("WET0WEST,M3.5.0/1,M10.5.0","pool.ntp.org");ArduinoOTA.setHostname("orquidea-ia");ArduinoOTA.begin();
  ws.onEvent(onWs);server.addHandler(&ws);server.on("/",HTTP_GET,[](AsyncWebServerRequest*r){AsyncWebServerResponse* response=r->beginResponse_P(200,"text/html; charset=utf-8",PAGE);response->addHeader("Cache-Control","no-store, no-cache, must-revalidate, max-age=0");r->send(response);});server.on("/telegram-status",HTTP_GET,[](AsyncWebServerRequest*r){JsonDocument doc;doc["telegramConfigured"]=(telegramToken.length()>=20 && telegramChatId.length()>0);doc["telegramStatus"]=telegramStatus;String out;serializeJson(doc,out);AsyncWebServerResponse* response=r->beginResponse(200,"application/json",out);response->addHeader("Cache-Control","no-store, no-cache, must-revalidate, max-age=0");r->send(response);});server.on("/days",HTTP_GET,[](AsyncWebServerRequest*r){r->send(200,"application/json",daysJson());});server.on("/history",HTTP_GET,[](AsyncWebServerRequest*r){r->send(200,"application/json",historyJson(r->hasParam("day")?r->getParam("day")->value():""));});server.on("/download",HTTP_GET,[](AsyncWebServerRequest*r){String d=r->hasParam("day")?r->getParam("day")->value():"";String p="/data/"+d+".csv";if(!LittleFS.exists(p)){r->send(404,"text/plain","Sem dados");return;}AsyncWebServerResponse*q=r->beginResponse(LittleFS,p,"text/csv");q->addHeader("Content-Disposition","attachment; filename=orquidea-"+d+".csv");r->send(q);});server.begin();
}
void loop(){
  maintainWiFi();
  serviceTelegram();
  ArduinoOTA.handle();ws.cleanupClients();updateFanRpm();unsigned long now=millis();if(now-lastRead>=READ_MS){lastRead=now;readControl();}if(now-lastHistory>=HISTORY_MS){lastHistory=now;saveHistory();}if(now-lastPage>=5000UL){lastPage=now;predictionPage=!predictionPage;}if(predictionPage)drawPrediction();else drawMain();digitalWrite(LED_RED_PIN,lowWater&&((now/500)%2));
}
Remix this project
Make it yours in one click
Open a full copy of this project in your own Schematik workspace — diagram, code, parts, and assembly steps included. Swap the sensor, add features, or redesign the whole thing with AI. The author's original stays untouched.