Schematik build
WiFi LED Matrix Billboard
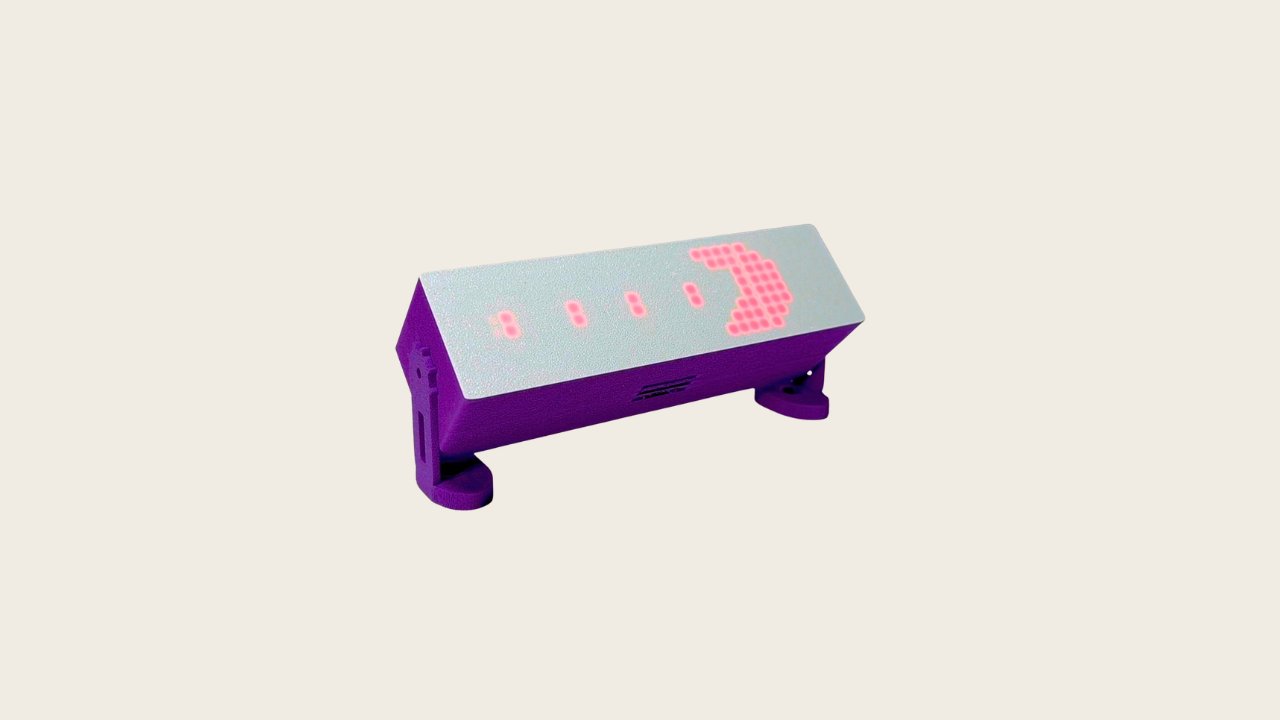
Build a WiFi-controlled LED matrix billboard that displays scrolling text and animations. The ESP32 microcontroller connects to a four-module MAX7219 LED matrix display via a 74AHCT125 logic buffer, which safely translates the ESP32's 3.3V signals to the 5V logic levels the matrix requires. The guide includes a complete wiring diagram, parts list, and step-by-step assembly instructions for connecting power, ground, and the three SPI signal lines.
The included firmware turns the billboard into a web server that broadcasts its own WiFi network. Connect any device to the network, open a browser, and send custom messages with adjustable text effects (scroll, wipe, slice, open, close), brightness levels, and animation speeds. Perfect for signs, notifications, or creative displays that respond to network commands.
Wiring diagram

Gather all the parts
Assemble it in 5 steps
1. Arrange the compact billboard
Place the four FC-16 modules edge-to-edge in their factory daisy-chain order, with the input connector (marked DIN, CLK, CS/LOAD, VCC, GND) facing the ESP32-S2 Mini. Treat the whole chain as one 32×8 display; do not connect to a DOUT connector.
- Keep the display’s IN end accessible: DIN must enter the first module, not the far end.
- A small stand or enclosure may hold the 32×8 strip; no breadboard is required.
2. Make the shared 5 V power and ground connections
Plug USB-C into the LOLIN/WEMOS S2 Mini. Run its 5V/VIN pin to FC-16 VCC and to the 74AHCT125 VCC. Run the S2 Mini GND pin to FC-16 GND and to 74AHCT125 GND.
- Use short, reasonably thick power leads for the matrix.
- This is a common-ground circuit: the ESP32-S2 Mini, the 74AHCT125, and the FC-16 must all share GND.
- Do not connect the FC-16 VCC to the ESP32 3V3 pin. The FC-16/MAX7219 display is a 5 V load.
- Use a USB supply capable of at least 1 A for reliable bright operation.
3. Enable the logic buffer
Tie 1OE, 2OE, and 3OE of the 74AHCT125 to GND. Leave the unused fourth buffer disconnected (or follow the breakout board’s unused-channel guidance).
- OE means output enable; on this chip it is active-low, so ground keeps each used channel enabled.
- Do not leave the three used OE inputs floating.
4. Wire the three billboard signals
Connect ESP32-S2 GPIO11 (MOSI) to 74AHCT125 1A, then 1Y to FC-16 DIN. Connect GPIO7 (SCK) to 2A, then 2Y to FC-16 CLK. Connect GPIO12 (SS) to 3A, then 3Y to FC-16 CS/LOAD.
- Keep each signal label consistent along its two wire segments: GPIO11/MOSI → DIN, GPIO7/SCK → CLK, and GPIO12/SS → CS/LOAD.
- The 74AHCT125 is non-inverting, so it preserves all signal meanings while changing 3.3 V logic to 5 V logic.
- Connect DIN only at the matrix chain’s IN end. Reversing the chain will prevent correct text display.
5. Power and use the WiFi billboard
With the wiring checked, power the S2 Mini through USB-C. The firmware creates the S2-Billboard WiFi access point and hosts its text, brightness, scroll-speed, and effect controls at 192.168.4.1.
- Use Schematik’s Deploy button to compile and flash the firmware.
- The default WiFi password is billboard.
- Disconnect USB-C power before changing wiring.
Review all connections
1. Connections between "matrix_32x8" and "ESP32"
2. Connections between "logic_buffer" and "ESP32"
Deploy the firmware
#include <Arduino.h>
#include <WiFi.h>
#include <WebServer.h>
#include <SPI.h>
#include <MD_Parola.h>
#include <MD_MAX72xx.h>
// FC-16 4-module matrix: ESP32-S2 -> 74AHCT125 -> matrix input.
#define MOSI_PIN 11
#define SCK_PIN 7
#define CS_PIN 12
#define MAX_DEVICES 4
#define HARDWARE_TYPE MD_MAX72XX::FC16_HW
// Hoisted type definitions
typedef textEffect_t TextEffect;
// Forward declarations
TextEffect selectedEffect();
String htmlEscape(const String &input);
void startAnimation();
void handleRoot();
void handleSet();
const char *AP_SSID = "S2-Billboard";
const char *AP_PASSWORD = "billboard";
MD_Parola matrix = MD_Parola(HARDWARE_TYPE, CS_PIN, MAX_DEVICES);
WebServer server(80);
String message = "HELLO!";
uint8_t brightness = 4;
uint16_t scrollSpeed = 45;
String effectName = "scroll";
TextEffect selectedEffect()
{
if (effectName == "wipe") return PA_WIPE;
if (effectName == "slice") return PA_SLICE;
if (effectName == "open") return PA_OPENING;
if (effectName == "close") return PA_CLOSING;
return PA_SCROLL_LEFT;
}
String htmlEscape(const String &input)
{
String result;
for (size_t i = 0; i < input.length(); ++i)
{
char c = input[i];
if (c == '&') result += "&";
else if (c == '<') result += "<";
else if (c == '>') result += ">";
else if (c == '"') result += """;
else result += c;
}
return result;
}
void startAnimation()
{
matrix.displayClear();
matrix.setIntensity(brightness);
matrix.displayText(message.c_str(), PA_CENTER, scrollSpeed, 0, selectedEffect(), selectedEffect());
matrix.displayReset();
}
void handleRoot()
{
String page = F("<!doctype html><html><head><meta name='viewport' content='width=device-width,initial-scale=1'>"
"<style>body{font-family:Arial,sans-serif;max-width:520px;margin:28px auto;padding:0 16px;background:#101318;color:#f4f7fb}"
"h1{font-size:1.45rem}label{display:block;margin-top:16px}input,select,button{box-sizing:border-box;width:100%;padding:11px;margin-top:6px;border-radius:7px;border:1px solid #52606f;font-size:1rem}button{background:#35b778;color:#07150e;border:0;font-weight:bold}.hint{color:#b6c3d1;font-size:.9rem}</style></head><body>"
"<h1>32x8 WiFi Billboard</h1><p class='hint'>Connected to the S2-Billboard access point. Changes apply immediately.</p>"
"<form action='/set' method='get'><label>Text<input name='text' maxlength='80' value='");
page += htmlEscape(message);
page += F("'></label><label>Brightness (0 = dim, 15 = brightest)<input name='brightness' type='number' min='0' max='15' value='");
page += String(brightness);
page += F("'></label><label>Scroll speed (milliseconds; lower is faster)<input name='speed' type='number' min='10' max='250' value='");
page += String(scrollSpeed);
page += F("'></label><label>Effect<select name='effect'>");
const char *effects[] = {"scroll", "wipe", "slice", "open", "close"};
for (const char *effect : effects)
{
page += "<option value='" + String(effect) + "'";
if (effectName == effect) page += " selected";
page += ">" + String(effect) + "</option>";
}
page += F("</select></label><button type='submit'>Update billboard</button></form>"
"<p class='hint'>WiFi network: <b>S2-Billboard</b> Password: <b>billboard</b><br>Open <b>192.168.4.1</b> after connecting.</p>"
"</body></html>");
server.send(200, "text/html", page);
}
void handleSet()
{
if (server.hasArg("text"))
{
message = server.arg("text");
message.trim();
if (message.length() == 0) message = " ";
}
if (server.hasArg("brightness")) brightness = constrain(server.arg("brightness").toInt(), 0, 15);
if (server.hasArg("speed")) scrollSpeed = constrain(server.arg("speed").toInt(), 10, 250);
if (server.hasArg("effect")) effectName = server.arg("effect");
startAnimation();
server.sendHeader("Location", "/");
server.send(303, "text/plain", "Updated");
}
void setup()
{
// Route ESP32-S2 SPI onto the requested FC-16 signal pins before MD_Parola starts.
SPI.begin(SCK_PIN, -1, MOSI_PIN, CS_PIN);
matrix.begin();
startAnimation();
WiFi.mode(WIFI_AP);
WiFi.softAP(AP_SSID, AP_PASSWORD);
server.on("/", HTTP_GET, handleRoot);
server.on("/set", HTTP_GET, handleSet);
server.begin();
}
void loop()
{
server.handleClient();
if (matrix.displayAnimate()) matrix.displayReset();
}Download project files
Remix this project
Make it yours in one click
Open a full copy of this project in your own Schematik workspace — diagram, code, parts, and assembly steps included. Swap the sensor, add features, or redesign the whole thing with AI. The author's original stays untouched.
Related projects
How to Build a Scrolling LED Matrix Message Board with ESP32
ESP32 · Beginner · 30 minutes · June 12, 2026Schematik
How to Build an ESP32 Desk Presence Busy Light
ESP32 · Beginner · 35 minutes · July 22, 2026Schematik
How to Build a Tiny OLED Desk Command Centre
ESP32 · Beginner · 30 minutes · June 12, 2026Schematik