Schematik build
How to Build a Sports GPS Hotspot
A compact ESP32-C3 tracker with its own Wi-Fi network for live field stats
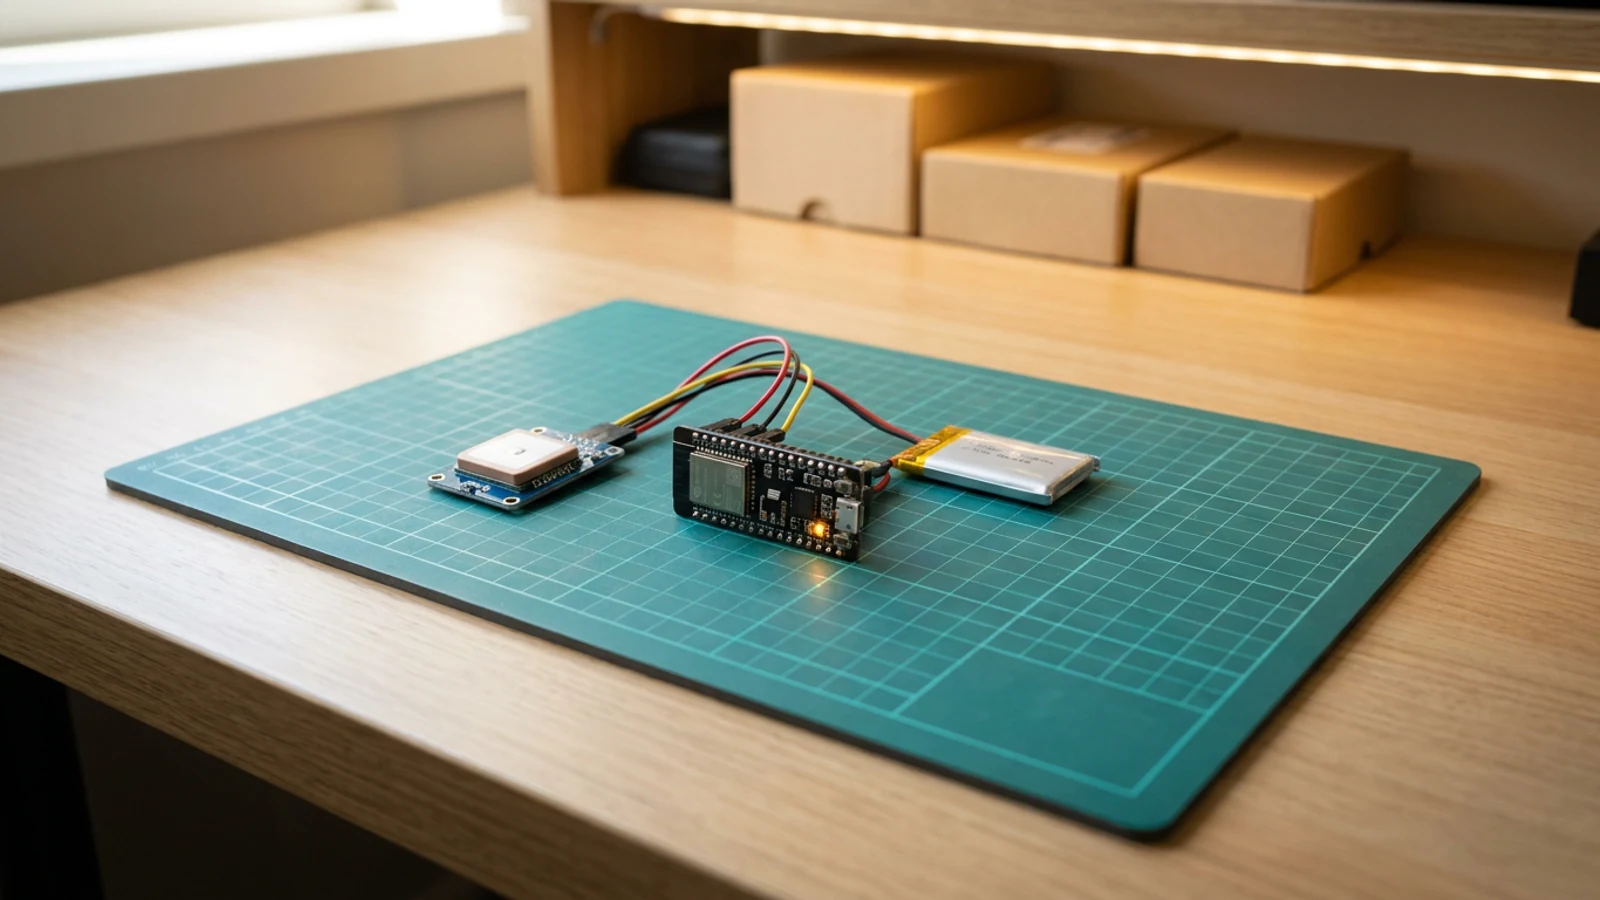
What you'll build
This guide builds a compact GPS tracker on an ESP32-C3 Super Mini that creates its own open Wi-Fi network called SportsGPS and serves a live dashboard at 192.168.4.1. Power the tracker, connect your phone to the network, open the address in a browser, and you have real-time speed, fix status, satellite count, coordinates, and session distance — all updating every second without a page reload.
The build is smaller and lighter than the ESP32 Dev Kit version in the Pocket GPS Dashboard guide. The ESP32-C3 Super Mini runs on 3.3 V logic throughout, which matches the PA1616D directly. There is no router involved: the board is both the access point and the web server.
The useful workflow is: power on, join SportsGPS, open 192.168.4.1, step outside until the LED stops blinking, then read stats. The guide keeps the wiring and firmware behaviour matched to that experience.
What you are building
The firmware has four main jobs:
- Read NMEA sentences from the PA1616D over UART1 (GPIO20 RX, GPIO21 TX) at 9600 baud using TinyGPSPlus,
- Host a soft-access-point named
SportsGPSand serve the dashboard HTML plus a/dataJSON endpoint, - Blink the status LED on GPIO5 at 500 ms while no fix is held and keep it solid once the PA1616D locks on,
- Accumulate session distance using the Haversine formula and apply a 3-metre jitter filter (
JITTER_FILTER_M) to suppress noise at a standstill.
Internet connectivity, cloud storage, and route replay are deliberately outside the scope of this build.
Upload and calibrate
Open the project in Schematik and click Deploy using Chrome or Edge. If flashing does not start automatically, hold the BOOT button on the ESP32-C3 while clicking Deploy, then release it once upload begins.
Open Serial Monitor at 115200 baud. You should see SportsGPS starting… followed by the soft-AP IP address within a second or two of boot.
On your phone, join the open Wi-Fi network SportsGPS. Open a browser and navigate to 192.168.4.1. The dashboard loads immediately. Take the tracker near a window or outdoors — the status LED stops blinking and the dashboard switches from "No fix" to "Fixed" once the PA1616D locks on. First lock outdoors typically takes one to three minutes; a cold start can take longer.
Use the Reset Distance button at the start of each session to zero the session distance counter.
Troubleshooting
- Dashboard does not load at 192.168.4.1: confirm your phone is still connected to
SportsGPS. Some phones drop access points with no internet routing. Disable mobile data and retry. - Status LED never goes solid: move fully outdoors with a clear sky view. Buildings and windows block satellite signals. The PA1616D needs a direct view of the sky.
- Serial Monitor shows no output after flashing: hold the BOOT button during the first connection — the ESP32-C3 Super Mini occasionally needs this on some host machines.
- Session distance jumps at a standstill: the
JITTER_FILTER_Mconstant (3 metres) suppresses small GPS noise. If your module is particularly noisy, increase this value in the firmware. - Speed reads non-zero while stationary: TinyGPSPlus reports the PA1616D's built-in speed field directly. Very small values below 0.5 km/h are normal GPS noise; the module reports them as valid.
- Status LED stays low after boot: check that the resistor is correctly placed between GPIO5 and the anode, and that the cathode goes to GND.
Going further
Because the ESP32-C3 already has Bluetooth Low Energy, you can add a BLE characteristic alongside the Wi-Fi dashboard so a paired phone receives GPS updates without the hotspot. For battery longevity on long rides, the ESP32-C3's light-sleep mode between GPS reads can cut idle current substantially. Adding an I2C OLED to display speed without a phone is straightforward on the same board.
Wiring diagram
Gather all the parts
Assemble it in 7 steps
1. Wire the PA1616D GPS module
Connect the PA1616D TX pin to ESP32-C3 GPIO20 and the PA1616D RX pin to GPIO21. These are the hardware UART1 pins used by the firmware.
- Keep the GPS wires short — under 15 cm — to reduce noise on the serial lines.
- The PA1616D module operates at 3.3 V logic, which matches the ESP32-C3 directly.
2. Power the GPS module
Connect PA1616D VCC to the 3V3 rail on the ESP32-C3 Super Mini and PA1616D GND to any GND pin.
- Some PA1616D breakouts are marked '3.3–5 V' — the 3V3 rail is fine for all of them.
- Do not connect PA1616D VCC directly to the 5 V pin if your module lacks an on-board regulator.
3. Add the status LED
Connect the LED anode through the 220 Ω resistor to GPIO5, and connect the cathode to GND. The LED blinks while searching for a GPS fix and stays solid after lock.
- GPIO5 matches STATUS_LED_PIN in the firmware.
- The 220 Ω resistor limits LED current.
4. Assemble and adjust the protected LiPo power chain
Connect the LiPo to TP4056 BAT+ and BAT− with verified polarity. Connect TP4056 OUT+ and OUT− to the MT3608 input. Before connecting the ESP32, power the chain and adjust the MT3608 output to exactly 5.0 V with a multimeter. Then connect boost OUT+ to board VIN/5V and OUT− to GND.
- Use the protected TP4056 variant with separate BAT and OUT pads.
- Insulate the boost converter after adjustment so its trimmer cannot be knocked.
- Never connect the raw 3.0–4.2 V charger output directly to board VIN/5V.
- Verify battery polarity and the 5.0 V boost output before connecting the board.
- Do not charge a hot, damaged, swollen, or enclosed LiPo.
5. Upload the firmware
Connect the ESP32-C3 Super Mini to your computer via USB, open the Schematik Deploy panel, and click Deploy. Use Chrome or Edge for Web Serial support. If flashing does not start, hold the BOOT button while clicking Deploy, then release it once the upload begins.
- Open the Serial Monitor at 115200 baud after upload to confirm 'SportsGPS starting…' and the AP IP address.
6. Connect and test
Power the tracker, then on your phone join the open Wi-Fi network called SportsGPS. Open a browser and go to 192.168.4.1. Take the tracker near a window or outdoors — the status LED will stop blinking and the dashboard will show a fix once the PA1616D locks on.
- First fix can take 1–3 minutes outdoors with a clear sky view.
- The dashboard polls /data every second with no page reload needed.
- Use the Reset Distance button at the start of each activity.
7. Charge with the tracker load disconnected
Switch the tracker off and disconnect the MT3608 input from TP4056 OUT before connecting the TP4056 charger. Reconnect the boost converter only after the charge-complete LED indicates termination and USB charging power is removed.
- Use a keyed two-pin connector between TP4056 OUT and MT3608 IN so this disconnection is unambiguous.
- The protected TP4056 module is not a load-sharing charger. Running the ESP32 while charging can prevent correct charge termination.
Review all connections
1. Connections between "lipo-battery" and "ESP32"
2. Connections between "mt3608-boost" and "ESP32"
3. Connections between "neo6m-gps" and "ESP32"
4. Connections between "sports-gps-hotspot-charge-disconnect-1" and "ESP32"
5. Connections between "status-led" and "ESP32"
6. Connections between "status-led-resistor" and "ESP32"
7. Connections between "tp4056-charger" and "ESP32"
Deploy the firmware
// Sports GPS Hotspot — ESP32-C3 Super Mini + NEO-6M
// Creates a "SportsGPS" Wi-Fi AP and serves a phone-friendly
// live dashboard at 192.168.4.1 showing speed, fix status,
// satellites, lat/lon, and accumulated session distance.

#include <Arduino.h>
#include <WiFi.h>
#include <WebServer.h>
#include <TinyGPSPlus.h>

// ── Pin assignments (match pin_definitions.json) ──────────────────────────
#define GPS_RX_PIN     20   // ESP32-C3 RX ← NEO-6M TX
#define GPS_TX_PIN     21   // ESP32-C3 TX → NEO-6M RX
#define STATUS_LED_PIN  5   // Single LED: slow-blink = no fix, solid = fix

// ── Configuration ─────────────────────────────────────────────────────────
static const char* AP_SSID        = "SportsGPS";
static const uint32_t GPS_BAUD    = 9600;
// Ignore position updates smaller than this to suppress GPS jitter
static const double JITTER_FILTER_M = 3.0;

// ── Globals ───────────────────────────────────────────────────────────────
TinyGPSPlus      gps;
HardwareSerial   gpsSerial(1);
WebServer        server(80);

double  sessionDistanceM = 0.0;   // accumulated metres this session
double  prevLat = 0.0, prevLon = 0.0;
bool    prevValid = false;

unsigned long lastLedMs = 0;
bool          ledState  = false;

// ── Helpers ───────────────────────────────────────────────────────────────

bool hasFreshFix() {
  return gps.location.isValid() && gps.location.age() < 5000;
}

// Haversine great-circle distance in metres
double haversineM(double lat1, double lon1, double lat2, double lon2) {
  const double R = 6371000.0; // Earth radius, metres
  double dLat = radians(lat2 - lat1);
  double dLon = radians(lon2 - lon1);
  double a = sin(dLat / 2) * sin(dLat / 2) +
             cos(radians(lat1)) * cos(radians(lat2)) *
             sin(dLon / 2) * sin(dLon / 2);
  return R * 2.0 * atan2(sqrt(a), sqrt(1.0 - a));
}

// Update session distance from a new valid GPS fix
void accumulateDistance() {
  if (!hasFreshFix()) return;
  double lat = gps.location.lat();
  double lon = gps.location.lng();

  if (prevValid) {
    double d = haversineM(prevLat, prevLon, lat, lon);
    if (d >= JITTER_FILTER_M) {
      sessionDistanceM += d;
      prevLat = lat;
      prevLon = lon;
    }
  } else {
    prevLat   = lat;
    prevLon   = lon;
    prevValid = true;
  }
}

// ── HTTP handlers ─────────────────────────────────────────────────────────

// /data — polled by dashboard JS every second
void handleData() {
  bool    fix       = hasFreshFix();
  double  lat       = fix ? gps.location.lat()   : 0.0;
  double  lon       = fix ? gps.location.lng()   : 0.0;
  double  speedKmh  = (fix && gps.speed.isValid()) ? gps.speed.kmph() : 0.0;
  int     sats      = gps.satellites.isValid() ? (int)gps.satellites.value() : 0;
  double  distKm    = sessionDistanceM / 1000.0;

  String json = "{";
  json += "\"fix\":"      + String(fix ? "true" : "false") + ",";
  json += "\"lat\":"      + String(lat, 6) + ",";
  json += "\"lon\":"      + String(lon, 6) + ",";
  json += "\"speedKmh\":" + String(speedKmh, 1) + ",";
  json += "\"sats\":"     + String(sats) + ",";
  json += "\"distKm\":"   + String(distKm, 3);
  json += "}";

  server.send(200, "application/json", json);
}

// /reset — clears session distance
void handleReset() {
  sessionDistanceM = 0.0;
  prevValid        = false;
  server.send(200, "application/json", "{\"ok\":true}");
}

// / — phone-friendly dashboard
void handleRoot() {
  // Inline HTML/CSS/JS — no external resources needed on an isolated AP
  const char* html = R"rawhtml(<!DOCTYPE html>
<html lang="en">
<head>
<meta charset="utf-8">
<meta name="viewport" content="width=device-width,initial-scale=1">
<title>SportsGPS</title>
<style>
  *{box-sizing:border-box;margin:0;padding:0}
  body{background:#0d1117;color:#e6edf3;font-family:system-ui,sans-serif;
       display:flex;flex-direction:column;align-items:center;padding:1rem}
  h1{font-size:1.4rem;margin-bottom:1rem;letter-spacing:.05em;color:#58a6ff}
  .card{background:#161b22;border:1px solid #30363d;border-radius:12px;
        padding:1rem 1.4rem;margin-bottom:.8rem;width:100%;max-width:360px;
        display:flex;flex-direction:column;gap:.2rem}
  .label{font-size:.75rem;color:#8b949e;text-transform:uppercase;
         letter-spacing:.06em}
  .value{font-size:2.4rem;font-weight:700;line-height:1}
  .unit {font-size:1rem;color:#8b949e;margin-left:.2rem}
  .fix-ok {color:#3fb950}
  .fix-no {color:#f85149}
  .small {font-size:1.3rem}
  #btn{margin-top:.4rem;padding:.6rem 1.4rem;border:none;border-radius:8px;
       background:#21262d;color:#e6edf3;font-size:.9rem;cursor:pointer;
       border:1px solid #30363d;width:100%;max-width:360px}
  #btn:active{background:#30363d}
</style>
</head>
<body>
<h1>SportsGPS</h1>

<div class="card">
  <span class="label">Speed</span>
  <span><span class="value" id="speed">--</span><span class="unit">km/h</span></span>
</div>

<div class="card">
  <span class="label">GPS Fix</span>
  <span class="value small" id="fix">Waiting...</span>
</div>

<div class="card">
  <span class="label">Satellites</span>
  <span class="value" id="sats">--</span>
</div>

<div class="card">
  <span class="label">Latitude</span>
  <span class="value small" id="lat">--</span>
</div>

<div class="card">
  <span class="label">Longitude</span>
  <span class="value small" id="lon">--</span>
</div>

<div class="card">
  <span class="label">Session Distance</span>
  <span><span class="value" id="dist">0.000</span><span class="unit">km</span></span>
</div>

<button id="btn" onclick="resetDist()">Reset Distance</button>

<script>
function update(){
  fetch('/data').then(r=>r.json()).then(d=>{
    document.getElementById('speed').textContent = d.speedKmh.toFixed(1);
    var fixEl = document.getElementById('fix');
    if(d.fix){
      fixEl.textContent='Fixed';
      fixEl.className='value small fix-ok';
    } else {
      fixEl.textContent='No fix';
      fixEl.className='value small fix-no';
    }
    document.getElementById('sats').textContent = d.sats;
    document.getElementById('lat').textContent  = d.fix ? d.lat.toFixed(6) : '--';
    document.getElementById('lon').textContent  = d.fix ? d.lon.toFixed(6) : '--';
    document.getElementById('dist').textContent = d.distKm.toFixed(3);
  }).catch(()=>{});
}
function resetDist(){
  fetch('/reset').then(()=>update());
}
setInterval(update,1000);
update();
</script>
</body>
</html>)rawhtml";

  server.send(200, "text/html", html);
}

// ── setup / loop ───────────────────────────────────────────────────────────

void setup() {
  pinMode(STATUS_LED_PIN, OUTPUT);
  digitalWrite(STATUS_LED_PIN, LOW);

  Serial.begin(115200);
  Serial.println("SportsGPS starting…");

  // GPS serial on UART1 — RX=GPIO20, TX=GPIO21
  gpsSerial.begin(GPS_BAUD, SERIAL_8N1, GPS_RX_PIN, GPS_TX_PIN);
  Serial.println("GPS serial started on GPIO20/21 at 9600 baud");

  // Soft-AP — open network, no password
  WiFi.mode(WIFI_AP);
  WiFi.softAP(AP_SSID);
  Serial.print("AP \"");
  Serial.print(AP_SSID);
  Serial.print("\" up — dashboard at ");
  Serial.println(WiFi.softAPIP());

  server.on("/",      handleRoot);
  server.on("/data",  handleData);
  server.on("/reset", handleReset);
  server.begin();
  Serial.println("HTTP server started");
}

void loop() {
  // Feed GPS parser — non-blocking
  while (gpsSerial.available()) {
    gps.encode(gpsSerial.read());
  }

  // Accumulate distance whenever we get a new valid position
  if (gps.location.isUpdated() && hasFreshFix()) {
    accumulateDistance();
  }

  // Status LED: solid = fix acquired, 1 Hz blink = searching
  bool hasFix = hasFreshFix();
  if (hasFix) {
    digitalWrite(STATUS_LED_PIN, HIGH);
  } else {
    unsigned long now = millis();
    if (now - lastLedMs >= 500) {
      lastLedMs = now;
      ledState  = !ledState;
      digitalWrite(STATUS_LED_PIN, ledState ? HIGH : LOW);
    }
  }

  server.handleClient();
}
Remix this project
Make it yours in one click
Open a full copy of this project in your own Schematik workspace — diagram, code, parts, and assembly steps included. Swap the sensor, add features, or redesign the whole thing with AI. The author's original stays untouched.
Related projects
How to Build a Pocket GPS Dashboard
ESP32 · Intermediate · 45 minutes · July 22, 2026Schematik
How to Build an ESP32 Ultrasonic Parking Sensor
ESP32 · Beginner · 40 minutes · June 12, 2026Schematik
How to Build a Self-Balancing Rover with ESP32
ESP32 · Intermediate · 60 minutes · July 22, 2026Schematik