Community project
Build An Esp32 Weather Station Using Wi-fi To
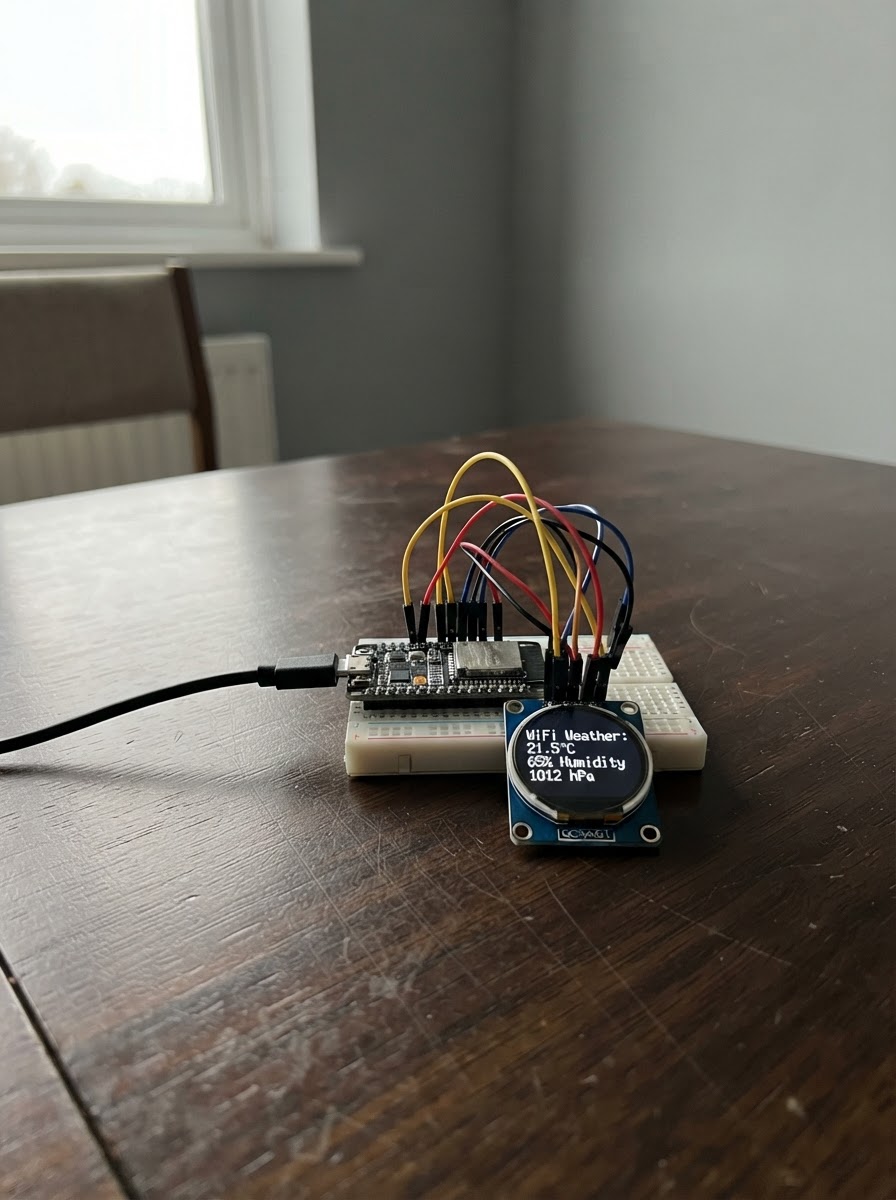
This project builds a Wi-Fi-connected weather station on an ESP32 that displays real-time conditions on a round 1.28-inch TFT display. The station fetches weather data from Open-Meteo API and shows temperature, wind speed, precipitation probability, and weather conditions with color-coded status indicators.
The guide provides a complete wiring diagram connecting the GC9A01A display to the ESP32 via SPI, a full parts list, ready-to-use firmware with Wi-Fi and API integration, and step-by-step assembly instructions. Builders will have a functional weather display that updates every 10 minutes and can be customized for any location by changing the latitude and longitude in the code.
Wiring diagram

Gather all the parts
Assemble it in 5 steps
1. Keep the board unpowered
Unplug the ESP32-C3 SuperMini from USB before making connections. Place the GC9A01A display and board on a non-conductive surface.
- The display is a 3.3 V logic device.
- Do not connect the display to 5 V or VBUS.
2. Connect display power
Connect GC9A01A VCC to the SuperMini 3V3 pin. Connect GC9A01A GND to any GND pin on the SuperMini.
- Power and ground should be connected before the signal wires.
- Both devices must share GND.
3. Connect the SPI signals
Wire GC9A01A SCK (sometimes labelled CLK or SCL) to GPIO6. Wire MOSI (sometimes labelled DIN or SDA) to GPIO7. Wire CS to GPIO10.
- Keep these three wires short to reduce display glitches.
- This display is write-only; do not add a MISO connection.
4. Connect display control and backlight
Wire DC to GPIO3, RST to GPIO2, and BL or BLK to GPIO1. The firmware drives BL high to turn on the backlight.
- Some GC9A01A boards label MOSI as DIN and SCK as CLK.
- Check each module label rather than wire position; inexpensive modules may order header pins differently.
5. Review the complete wiring
Confirm: VCC→3V3, GND→GND, SCK/CLK→GPIO6, MOSI/DIN→GPIO7, CS→GPIO10, DC→GPIO3, RST→GPIO2, BL/BLK→GPIO1. Then connect the USB data cable to power and program the board.
- The project is USB-powered; no external supply is required.
- Recheck that VCC is on 3V3, not 5V, before connecting USB.
Review all connections
1. Connections between "gc9a01a_0" and "ESP32"
Deploy the firmware
// Amsterdam Wi-Fi Weather Station — ESP32-C3 SuperMini + GC9A01A 240x240 TFT
#include <Arduino.h>
#include <WiFi.h>
#include <HTTPClient.h>
#include <ArduinoJson.h>
#include <Adafruit_GFX.h>
#include <Adafruit_GC9A01A.h>
#define TFT_SCK 6
#define TFT_MOSI 7
#define TFT_CS 10
#define TFT_DC 3
#define TFT_RST 2
#define TFT_BL 1
// Hoisted type definitions
struct Weather { float temp, wind; int code, rain; bool valid; } weather;
// Forward declarations
String condition(int c);
String advice();
void centered(String s, int y, uint8_t size, uint16_t color);
void statusScreen(const char* title, const char* detail, uint16_t color);
void drawWeather();
bool fetchWeather();
void connectWiFi();
const char* ssid = "Sharvil";
const char* password = "";
const char* weatherURL =
"https://api.open-meteo.com/v1/forecast?latitude=52.3676&longitude=4.9041"
"¤t_weather=true&hourly=precipitation_probability"
"&timezone=Europe%2FAmsterdam&forecast_days=1";
Adafruit_GC9A01A tft(TFT_CS, TFT_DC, TFT_MOSI, TFT_SCK, TFT_RST);
const uint16_t BLACK=0x0000, WHITE=0xFFFF, GRAY=0x8410, DARK=0x2104;
const uint16_t AMBER=0xFBA0, CYAN=0x07FF, GREEN=0x07E0, RED=0xF800;
unsigned long lastUpdate = 0;
const unsigned long UPDATE_MS = 600000UL;
String condition(int c) {
if (c == 0) return "CLEAR";
if (c <= 3) return "PARTLY CLOUDY";
if (c <= 49) return "FOG";
if (c <= 59) return "DRIZZLE";
if (c <= 69) return "RAIN";
if (c <= 79) return "SNOW";
if (c <= 82) return "SHOWERS";
return "STORM";
}
String advice() {
if (weather.code >= 51 || weather.rain > 40) return "TAKE AN UMBRELLA";
if (weather.temp < 5) return "COAT AND SCARF";
if (weather.temp < 14 || weather.wind > 35) return "WEAR A JACKET";
if (weather.temp > 22 && weather.code <= 3) return "T-SHIRT + SUNGLASSES";
if (weather.temp > 18) return "LIGHT LAYERS";
return "WEAR LAYERS";
}
void centered(String s, int y, uint8_t size, uint16_t color) {
tft.setTextSize(size); tft.setTextColor(color);
int16_t x1,y1; uint16_t w,h;
tft.getTextBounds(s, 0, y, &x1, &y1, &w, &h);
tft.setCursor((240 - w) / 2, y); tft.print(s);
}
void statusScreen(const char* title, const char* detail, uint16_t color) {
tft.fillScreen(BLACK);
tft.drawCircle(120, 120, 105, DARK);
centered(title, 95, 2, color);
centered(detail, 130, 1, GRAY);
}
void drawWeather() {
tft.fillScreen(BLACK);
tft.drawCircle(120, 120, 118, DARK);
centered("AMSTERDAM", 20, 1, AMBER);
centered(condition(weather.code), 38, 1, GRAY);
tft.drawFastHLine(30, 55, 180, DARK);
String degrees = String((int)round(weather.temp)) + " C";
centered(degrees, 70, 5, WHITE);
centered("NOW", 122, 1, GRAY);
tft.drawFastHLine(30, 140, 180, DARK);
centered("WIND " + String((int)weather.wind) + " km/h RAIN " + String(weather.rain) + "%", 152, 1, CYAN);
tft.drawRoundRect(19, 176, 202, 43, 8, AMBER);
centered("WHAT TO WEAR", 181, 1, AMBER);
centered(advice(), 198, 1, weather.rain > 40 ? CYAN : GREEN);
}
bool fetchWeather() {
HTTPClient http;
http.setTimeout(12000);
if (!http.begin(weatherURL)) return false;
int result = http.GET();
if (result != HTTP_CODE_OK) { Serial.printf("HTTP: %d\n", result); http.end(); return false; }
DynamicJsonDocument doc(6144);
DeserializationError err = deserializeJson(doc, http.getString());
http.end();
if (err) { Serial.println("JSON parse failed"); return false; }
JsonObject current = doc["current_weather"];
weather.temp = current["temperature"] | 0.0;
weather.wind = current["windspeed"] | 0.0;
weather.code = current["weathercode"] | 0;
JsonArray precipitation = doc["hourly"]["precipitation_probability"];
weather.rain = precipitation.size() > 0 ? (precipitation[0] | 0) : 0;
weather.valid = true;
Serial.printf("%.1f C, wind %.0f, rain %d%%\n", weather.temp, weather.wind, weather.rain);
return true;
}
void connectWiFi() {
statusScreen("CONNECTING", ssid, AMBER);
WiFi.mode(WIFI_STA); WiFi.begin(ssid, password);
for (int tries=0; WiFi.status()!=WL_CONNECTED && tries<30; tries++) { delay(500); Serial.print('.'); }
}
void setup() {
Serial.begin(115200);
pinMode(TFT_BL, OUTPUT); digitalWrite(TFT_BL, HIGH);
tft.begin(); tft.setRotation(0); tft.fillScreen(BLACK);
connectWiFi();
if (WiFi.status() == WL_CONNECTED && fetchWeather()) { lastUpdate=millis(); drawWeather(); }
else statusScreen("NO WEATHER", "Check Wi-Fi and credentials", RED);
}
void loop() {
if (WiFi.status() != WL_CONNECTED) { connectWiFi(); return; }
if (lastUpdate == 0 || millis() - lastUpdate >= UPDATE_MS) {
if (fetchWeather()) { lastUpdate=millis(); drawWeather(); }
else if (!weather.valid) statusScreen("NO WEATHER", "Open-Meteo unavailable", RED);
}
delay(1000);
}Remix this project
Make it yours in one click
Open a full copy of this project in your own Schematik workspace — diagram, code, parts, and assembly steps included. Swap the sensor, add features, or redesign the whole thing with AI. The author's original stays untouched.