Community project
Spotify E-Paper Display
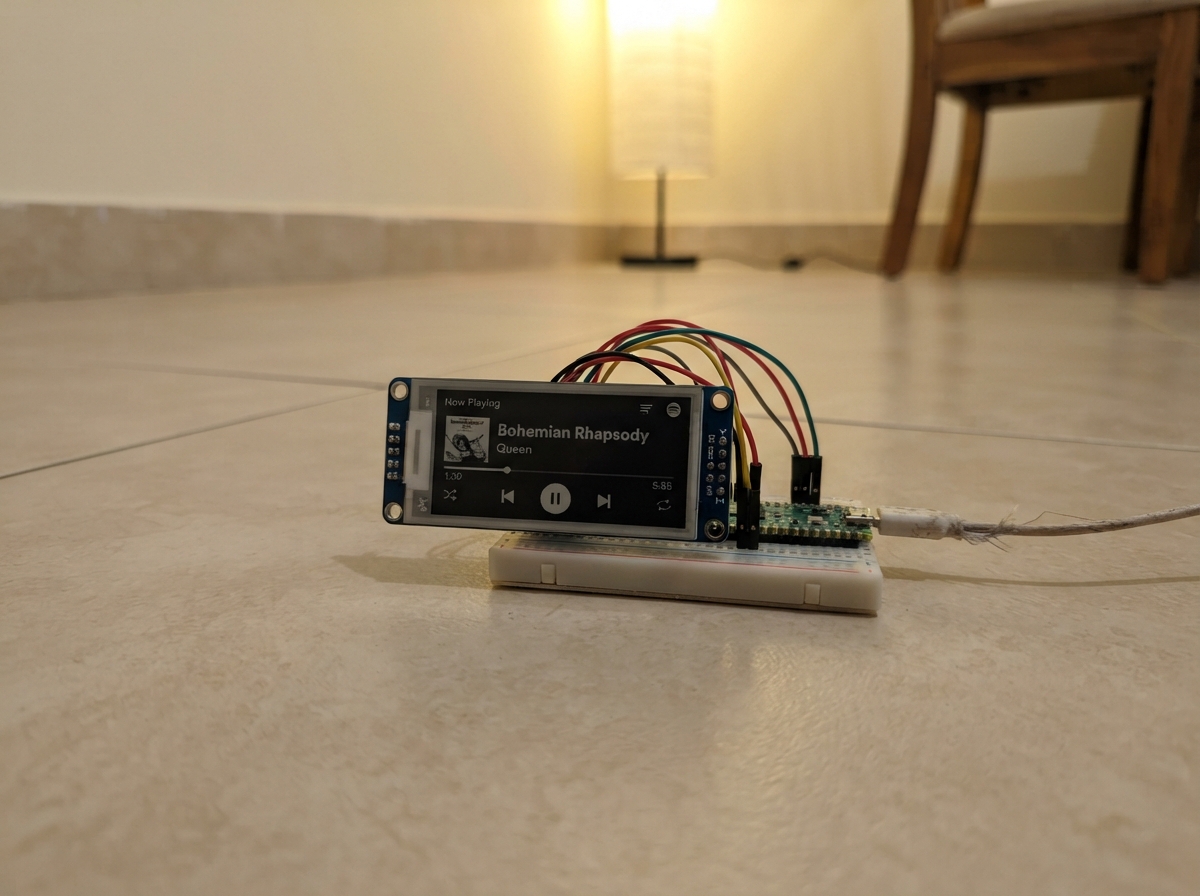
This project displays now-playing information from Spotify on a low-power e-paper display connected to an ESP32. The 2.9-inch monochrome e-ink panel draws minimal current and retains its image even when powered down, making it ideal for a always-visible music status indicator on a desk or shelf.
The guide includes a complete parts list, wiring diagram showing all SPI and control connections, and Arduino firmware that renders track name, artist, and playback time on the display. Assembly takes just a few minutes—connect the power and six data/control wires, load the code, and the display updates with a single refresh before entering low-power sleep mode.
Wiring diagram

Gather all the parts
Assemble it in 5 steps
1. Keep the board unplugged
Place the ESP32 DevKit V1 and the 2.9-inch e-paper module on a non-metal table. Leave the ESP32 unplugged while you add wires so an accidental loose wire cannot power the display incorrectly.
- Use short jumper wires if possible; they are less likely to lose contact.
- Do not connect the display VCC pin to the ESP32 5V pin — this panel expects 3.3V and 5V can damage it.
2. Connect display power
Connect the e-paper VCC pin to the ESP32 3V3 pin (power). Connect the e-paper GND pin to an ESP32 GND pin (ground).
- The labels are printed beside the small header pins on most Waveshare modules.
- Make sure VCC and GND are not swapped — swapped power can damage the display.
3. Connect the three shared data wires
Connect DIN on the display to ESP32 GPIO23 (data), CLK to GPIO18 (clock), and CS to GPIO4 (select). These three wires carry the picture data and let the board choose this display.
- Follow the printed pin labels rather than the physical left-to-right order; module revisions can arrange the header differently.
4. Connect the three control wires
Connect DC on the display to ESP32 GPIO27 (signal), RST to GPIO26 (reset signal), and BUSY to GPIO25 (ready signal). The BUSY wire tells the ESP32 when the slow-refreshing e-paper panel has finished.
- Check each jumper by tracing it from one printed label to the other before plugging in USB.
- A loose BUSY, RST, or DC wire can leave the screen blank even when the power wires are correct.
5. Power it from USB
After checking all eight connections, plug the ESP32 into your computer with USB. The USB cable powers the ESP32, and its 3V3 pin powers the display.
- The screen may flash black and white once during its first update; that is normal for e-paper.
Review all connections
1. Connections between "epaper_1" and "ESP32"
Deploy the firmware
#include <Arduino.h>
#include <SPI.h>
#include <GxEPD2_BW.h>
#include <Fonts/FreeMonoBold9pt7b.h>
#include <Fonts/FreeMonoBold18pt7b.h>

constexpr int EPD_CS = 4;
constexpr int EPD_DC = 27;
constexpr int EPD_RST = 26;
constexpr int EPD_BUSY = 25;
constexpr int EPD_SCK = 18;
constexpr int EPD_MOSI = 23;

// Waveshare 2.9-inch V2 monochrome panel, 296 x 128 pixels.
GxEPD2_BW<GxEPD2_290_T94, GxEPD2_290_T94::HEIGHT> display(
  GxEPD2_290_T94(EPD_CS, EPD_DC, EPD_RST, EPD_BUSY));

void drawNowPlaying()
{
  display.setFullWindow();
  display.firstPage();
  do
  {
    display.fillScreen(GxEPD_WHITE);
    display.drawRect(0, 0, 296, 128, GxEPD_BLACK);
    display.drawFastHLine(0, 31, 296, GxEPD_BLACK);

    display.setTextColor(GxEPD_BLACK);
    display.setFont(&FreeMonoBold9pt7b);
    display.setCursor(12, 21);
    display.print("SPOTIFY  /  DEMO");

    // Simple record icon; no image file or online account is needed.
    display.fillCircle(42, 76, 27, GxEPD_BLACK);
    display.fillCircle(42, 76, 18, GxEPD_WHITE);
    display.fillCircle(42, 76, 6, GxEPD_BLACK);

    display.setFont(&FreeMonoBold18pt7b);
    display.setCursor(82, 68);
    display.print("Midnight");
    display.setCursor(82, 94);
    display.print("Signal");

    display.setFont(&FreeMonoBold9pt7b);
    display.setCursor(82, 114);
    display.print("Demo Artist   2:34");
  }
  while (display.nextPage());

  // Put the panel to sleep after the one-time refresh to save power.
  display.hibernate();
}

void setup()
{
  SPI.begin(EPD_SCK, -1, EPD_MOSI, EPD_CS);
  display.init(115200, true, 2, false);
  drawNowPlaying();
}

void loop()
{
  // Spotify access will be added later. The e-paper image stays visible without redrawing.
  delay(1000);
}
Remix this project
Make it yours in one click
Open a full copy of this project in your own Schematik workspace — diagram, code, parts, and assembly steps included. Swap the sensor, add features, or redesign the whole thing with AI. The author's original stays untouched.