Community project
ESP32 Motion-Controlled Stepper
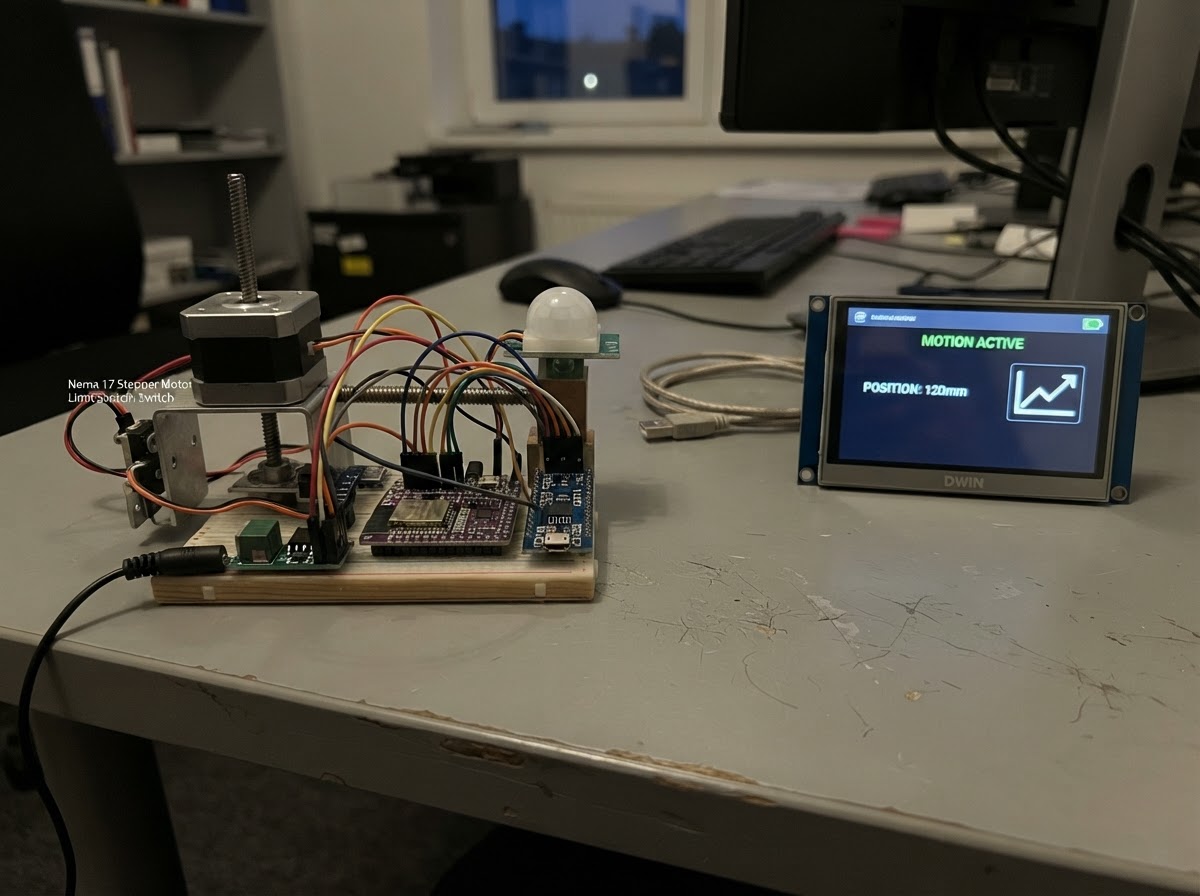
This project builds a motion-activated motorized curtain controller using an ESP32 microcontroller, a TMC2209 stepper driver, and a NEMA 17 motor. The system detects motion via a PIR sensor, displays status on a 7-inch HMI touchscreen, and can operate in manual or automatic modes through a selector switch. A limit switch provides homing feedback, while an opto-isolated relay controls auxiliary lighting.
The guide provides a complete wiring diagram, detailed parts list, and step-by-step assembly instructions for the carrier PCB. Firmware is included to handle motion detection, stepper control, display communication, and state management. Builders will learn how to integrate motion sensing, stepper motor control, and HMI display communication on a single coordinated system.
Wiring diagram

Gather all the parts
Assemble it in 7 steps
1. Mount and label the carrier PCB
Fit the carrier PCB inside a non-metal enclosure. Place the 12 V input and motor terminals at one edge, the TMC2209 socket immediately behind them, and the ESP32-C3, MAX3232, and sensor headers on the opposite side. Label every connector on the board before fitting it in the enclosure.
- Use 2-layer FR-4, 1.6 mm thick, with 1 oz copper or heavier.
- Keep the ESP32 antenna end at least 15 mm from copper pours, the metal enclosure, motor wires, and the DWIN cable.
- Do not mount this controller where condensation can reach the terminals or PCB.
- Keep any mains-light wiring physically separate from this low-voltage PCB; a relay contact is not an enclosure.
2. Build the protected 12 V entrance
Route the positive wire from the 12 V input terminal to the fuse holder IN pin, then route the fuse holder OUT pin as the protected 12 V rail. Connect the 12 V supply negative wire to the ground plane. Put labels `+12V IN`, `GND`, and `FUSED +12V` beside these terminals.
- Use a 3 A slow-blow fuse only as a starting point; choose the final fuse from the measured running and startup current of the actual stepper motor and display.
- Use wide traces or copper pours for the fused 12 V and motor-return paths.
- Do not replace a blowing fuse with a larger fuse until the wiring fault or excessive motor current has been found.
- Disconnect the wall adapter before changing a fuse or moving any motor wire.
3. Place the motor driver and its capacitors
Place the TMC2209 socket close to the motor terminal. Connect VM to fused 12 V (motor power) and GND to the nearby ground return. Fit the 100 µF capacitor with its long positive lead to VM and its striped negative lead to GND, then fit the 100 nF ceramic capacitor across the same two points. Keep both capacitors within a few centimetres of the driver socket.
- Make the four motor traces short and wide, and keep them away from the ESP32 antenna and the UART wires.
- Provide a clearly marked 4-pin motor terminal: A+, A−, B+, B−.
- A reversed electrolytic capacitor can burst when power is applied.
- Never connect or disconnect the motor while the 12 V supply is connected; that can destroy the TMC2209.
4. Fit the plug-in low-voltage modules
Fit headers for the ESP32-C3 SuperMini, MP1584 buck module, MAX3232 module, and the relay module rather than soldering those modules permanently to the board. Connect the MP1584 input to fused 12 V and ground, then use its adjusted 5 V output for the ESP32, PIR, and relay. Use the ESP32 3.3 V pin for MAX3232 VCC and TMC2209 VIO.
- Before plugging in the ESP32, power only the buck module and adjust its output to exactly 5.0 V with a multimeter.
- Mark the MAX3232 header `3V3 ONLY` directly on the PCB.
- A 5 V-powered MAX3232 can send 5 V signals into the ESP32 and damage it.
- GPIO2 must connect only to an active-high, high-impedance relay input so the relay cannot hold it low during ESP32 startup.
5. Fit the low-voltage control connectors
Install keyed or screw-terminal connectors for the open limit switch, three-position mode switch, PIR, and relay input. Wire the open switch COM to GND (ground) and NC to GPIO7 (end-stop signal). Wire the mode switch common to GND (ground), then its OPEN, CLOSE, and AUTO contacts to GPIO0, GPIO1, and GPIO6 (signals). Wire PIR OUT to GPIO3 through a 3.3 V-safe interface.
- Print the connector labels on the PCB: `ENDSTOP GND/NC`, `MODE GND/OPEN/CLOSE/AUTO`, `PIR 5V/GND/OUT`, and `RELAY 5V/GND/IN`.
- Keep the endstop and PIR cables away from the motor terminal and motor cable.
- The common HC-SR501 version can output nearly 5 V. Do not connect that directly to GPIO3; use a 3.3 V-safe PIR output version or a level-shifter/divider.
- GPIO0 and GPIO1 affect startup. The selector must be break-before-make and must not short two contacts together.
6. Fit the DWIN display connection
Install a 4-pin or keyed display connector carrying fused 12 V, GND, RS232_TX, and RS232_RX. Connect ESP32 GPIO21 to MAX3232 TTL_RX (data) and GPIO20 to MAX3232 TTL_TX (data). Connect MAX3232 RS232_TX to DWIN UART2_RX (data), and MAX3232 RS232_RX to DWIN UART2_TX (data).
- Write `DWIN RS-232 — NOT TTL` beside the connector.
- Keep the RS-232 pair away from the motor terminal and route them together over the ground plane.
- Never connect GPIO20 or GPIO21 directly to the DWIN RS-232 connector; RS-232 voltage levels can damage the ESP32.
- Confirm the DWIN display connector’s actual pin order from the display documentation before plugging it in.
7. Inspect, power, and test the PCB
Before installing the ESP32 or TMC2209, inspect for solder bridges and verify that fused 12 V is not shorted to ground. Set the buck module to 5.0 V, then install the modules. With the curtain disconnected from the mechanism, connect power and confirm the controller homes toward the open switch.
- Test the 12 V, 5 V, and 3.3 V rails with a multimeter before connecting the screen or motor.
- If homing travels away from the endstop, reverse the direction in firmware or reverse one complete motor coil pair.
- Keep fingers, hair, and curtain fabric away from the drive while testing.
- Stop immediately if the motor stalls, chatters, or the TMC2209 becomes too hot to touch; continued stalling can damage the motor or driver.
Review all connections
1. Connections between "power_12v_1" and "ESP32"
2. Connections between "buck_5v_1" and "ESP32"
3. Connections between "tmc2209_1" and "ESP32"
4. Connections between "pir_1" and "ESP32"
5. Connections between "open_endstop_1" and "ESP32"
6. Connections between "mode_switch_1" and "ESP32"
7. Connections between "max3232_1" and "ESP32"
8. Connections between "dwin_hmi_1" and "ESP32"
9. Connections between "light_relay_1" and "ESP32"
10. Connections between "fuse_12v_1" and "ESP32"
11. Connections between "motor_bulk_cap_1" and "ESP32"
12. Connections between "motor_ceramic_cap_1" and "ESP32"
13. Connections between "pir_divider_top_1" and "ESP32"
14. Connections between "pir_divider_bottom_1" and "ESP32"
Deploy the firmware
#include <Arduino.h>
#include <AccelStepper.h>

// Hardware matches the final low-voltage carrier PCB. GPIO2 replaces GPIO8 for
// the relay because GPIO8 is boot-sensitive and has the SuperMini's built-in LED attached.

enum class State : uint8_t { HOMING, OPENING, CLOSING, OPEN, CLOSED, STOPPED, ERROR };


// Forward declarations
bool endstopActive();
bool modeOpen();
bool modeClose();
bool modeAuto();
void motorEnable(bool enabled);
void sendDwinPage(uint16_t page);
void homeCurtain();
void openCurtain();
void closeCurtain();
void stopCurtain();
void updateMotion();
void updatePhysicalSelector();

constexpr uint8_t STEP_PIN = 4;
constexpr uint8_t DIR_PIN = 5;
constexpr uint8_t ENABLE_PIN = 10;  // TMC2209 EN: active LOW
constexpr uint8_t PIR_PIN = 3;
constexpr uint8_t OPEN_ENDSTOP_PIN = 7; // NC switch to GND, INPUT_PULLUP
constexpr uint8_t MODE_OPEN_PIN = 0;
constexpr uint8_t MODE_CLOSE_PIN = 1;
constexpr uint8_t MODE_AUTO_PIN = 6;
constexpr uint8_t LIGHT_PIN = 2; // active-HIGH, reset-safe relay interface
constexpr uint8_t DWIN_RX_PIN = 20;
constexpr uint8_t DWIN_TX_PIN = 21;

constexpr long TRAVEL_STEPS = 32400;
constexpr long HOMING_EXTRA_STEPS = 1200;
constexpr float MAX_SPEED = 19500.0F;
constexpr float ACCELERATION = 3000.0F;
constexpr uint32_t MOVE_TIMEOUT_MS = 60000UL;

HardwareSerial DwinSerial(1);
AccelStepper curtain(AccelStepper::DRIVER, STEP_PIN, DIR_PIN);


State state = State::HOMING;
bool positionKnown = false;
uint32_t movementStartedMs = 0;

bool endstopActive() { return digitalRead(OPEN_ENDSTOP_PIN) == LOW; }
bool modeOpen() { return digitalRead(MODE_OPEN_PIN) == LOW; }
bool modeClose() { return digitalRead(MODE_CLOSE_PIN) == LOW; }
bool modeAuto() { return digitalRead(MODE_AUTO_PIN) == LOW; }

void motorEnable(bool enabled) {
  digitalWrite(ENABLE_PIN, enabled ? LOW : HIGH);
}

void sendDwinPage(uint16_t page) {
  const uint8_t frame[] = {0x5A, 0xA5, 0x07, 0x82, 0x00, 0x84, 0x5A, 0x01,
                           static_cast<uint8_t>(page >> 8), static_cast<uint8_t>(page)};
  DwinSerial.write(frame, sizeof(frame));
}

void homeCurtain() {
  motorEnable(true);
  digitalWrite(LIGHT_PIN, LOW);
  movementStartedMs = millis();
  curtain.setMaxSpeed(3500.0F);
  curtain.setAcceleration(1200.0F);
  curtain.moveTo(curtain.currentPosition() - TRAVEL_STEPS - HOMING_EXTRA_STEPS);
  state = State::HOMING;
}

void openCurtain() {
  if (endstopActive()) {
    curtain.setCurrentPosition(0);
    positionKnown = true;
    motorEnable(false);
    digitalWrite(LIGHT_PIN, HIGH);
    state = State::OPEN;
    return;
  }
  if (!positionKnown) { homeCurtain(); return; }
  motorEnable(true);
  digitalWrite(LIGHT_PIN, HIGH);
  movementStartedMs = millis();
  curtain.setMaxSpeed(MAX_SPEED);
  curtain.setAcceleration(ACCELERATION);
  curtain.moveTo(-HOMING_EXTRA_STEPS);
  state = State::OPENING;
}

void closeCurtain() {
  if (!positionKnown) { homeCurtain(); return; }
  motorEnable(true);
  movementStartedMs = millis();
  curtain.setMaxSpeed(MAX_SPEED);
  curtain.setAcceleration(ACCELERATION);
  curtain.moveTo(TRAVEL_STEPS);
  state = State::CLOSING;
}

void stopCurtain() {
  curtain.stop();
  state = State::STOPPED;
}

void updateMotion() {
  curtain.run();
  if ((state == State::HOMING || state == State::OPENING) && endstopActive()) {
    curtain.setCurrentPosition(0);
    positionKnown = true;
    motorEnable(false);
    digitalWrite(LIGHT_PIN, HIGH);
    state = State::OPEN;
  } else if (state == State::CLOSING && curtain.distanceToGo() == 0) {
    curtain.setCurrentPosition(TRAVEL_STEPS);
    motorEnable(false);
    digitalWrite(LIGHT_PIN, LOW);
    state = State::CLOSED;
  } else if (state == State::STOPPED && curtain.distanceToGo() == 0) {
    motorEnable(false);
  }

  if ((state == State::HOMING || state == State::OPENING || state == State::CLOSING) &&
      millis() - movementStartedMs > MOVE_TIMEOUT_MS) {
    motorEnable(false);
    positionKnown = false;
    state = State::ERROR;
  }
}

void updatePhysicalSelector() {
  static uint8_t previous = 255;
  const uint8_t active = static_cast<uint8_t>(modeOpen()) + static_cast<uint8_t>(modeClose()) + static_cast<uint8_t>(modeAuto());
  const uint8_t selection = active == 1 ? (modeOpen() ? 1 : modeClose() ? 2 : 3) : 0;
  if (selection == previous) return;
  previous = selection;
  if (selection == 1) openCurtain();
  else if (selection == 2) closeCurtain();
  else if (selection == 3) {
    if (digitalRead(PIR_PIN) == HIGH) closeCurtain();
    else openCurtain();
  } else if (active > 1) stopCurtain();
}

void setup() {
  pinMode(ENABLE_PIN, OUTPUT);
  pinMode(LIGHT_PIN, OUTPUT);
  pinMode(PIR_PIN, INPUT);
  pinMode(OPEN_ENDSTOP_PIN, INPUT_PULLUP);
  pinMode(MODE_OPEN_PIN, INPUT_PULLUP);
  pinMode(MODE_CLOSE_PIN, INPUT_PULLUP);
  pinMode(MODE_AUTO_PIN, INPUT_PULLUP);
  motorEnable(false);
  digitalWrite(LIGHT_PIN, LOW);
  curtain.setMinPulseWidth(3);
  curtain.setMaxSpeed(MAX_SPEED);
  curtain.setAcceleration(ACCELERATION);
  Serial.begin(115200);
  DwinSerial.begin(115200, SERIAL_8N1, DWIN_RX_PIN, DWIN_TX_PIN);
  sendDwinPage(0);
  homeCurtain();
}

void loop() {
  updateMotion();
  updatePhysicalSelector();
  if (modeAuto() && !((state == State::HOMING) || (state == State::OPENING) || (state == State::CLOSING))) {
    if (digitalRead(PIR_PIN) == HIGH && state != State::CLOSED) closeCurtain();
    if (digitalRead(PIR_PIN) == LOW && state != State::OPEN) openCurtain();
  }
  yield();
}
Remix this project
Make it yours in one click
Open a full copy of this project in your own Schematik workspace — diagram, code, parts, and assembly steps included. Swap the sensor, add features, or redesign the whole thing with AI. The author's original stays untouched.