Simulator
ESP32 and Arduino simulator in your browser
Your firmware, the program on your board, runs on a 3D workbench with your parts and wires. Press a button or drag a sensor, and the screens, LEDs and serial monitor react.
Runs 260 boards: ESP32, ESP32-S3, ESP32-C3, ESP32-C6, Arduino Uno, Nano, Mega and Raspberry Pi Pico. To try it, open a project, pick Preview and press Run.
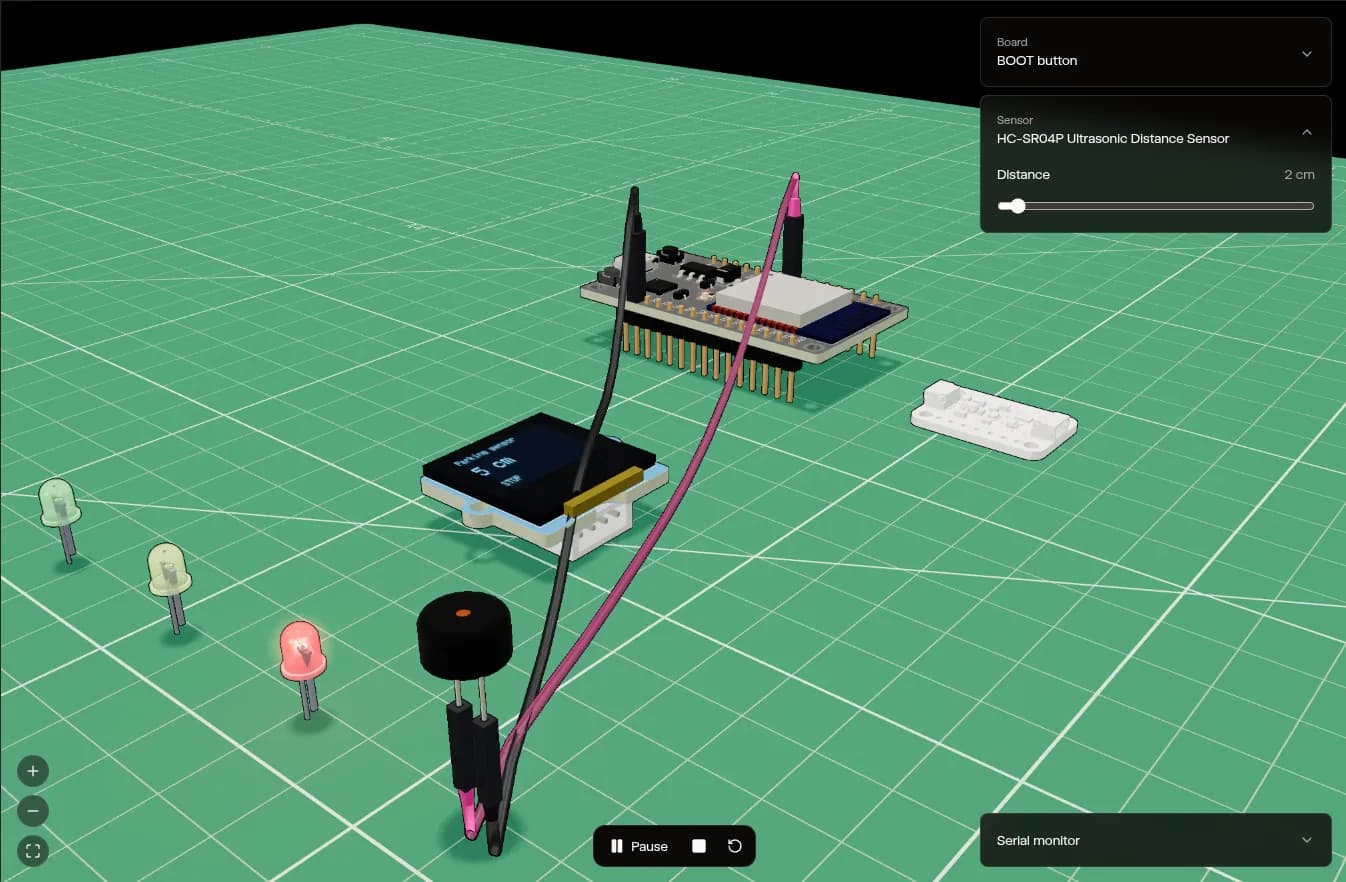
What it can show you
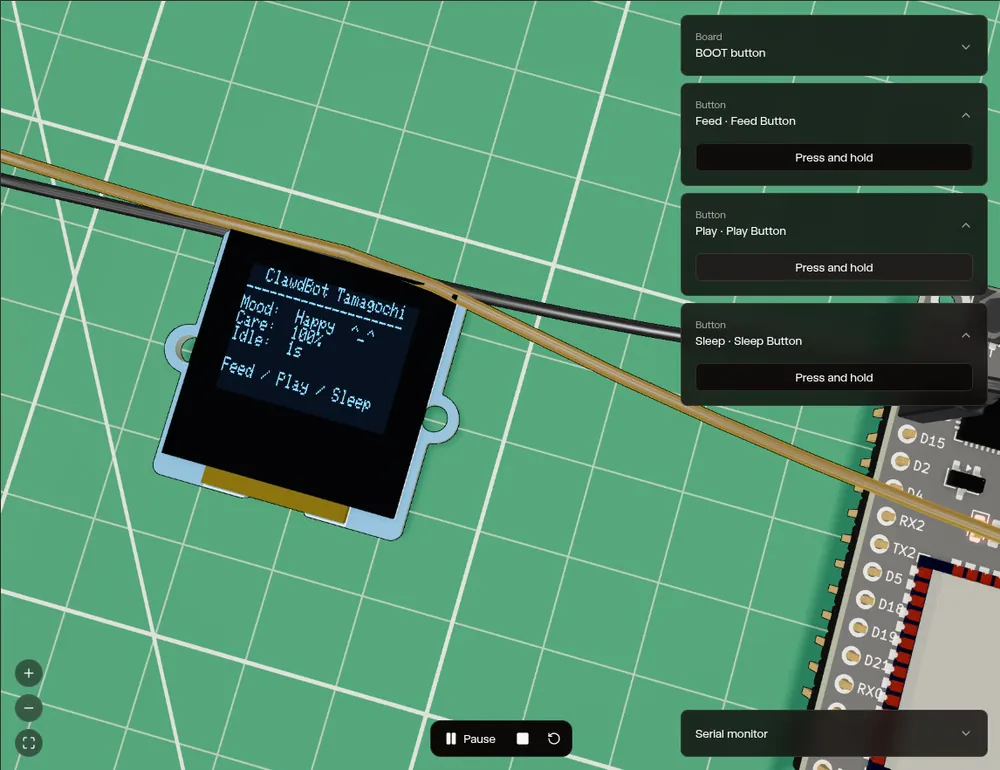
OLED screens
Press Feed, Play or Sleep and the pet's mood changes on a 128x64 OLED. ClawdBot tamagotchi
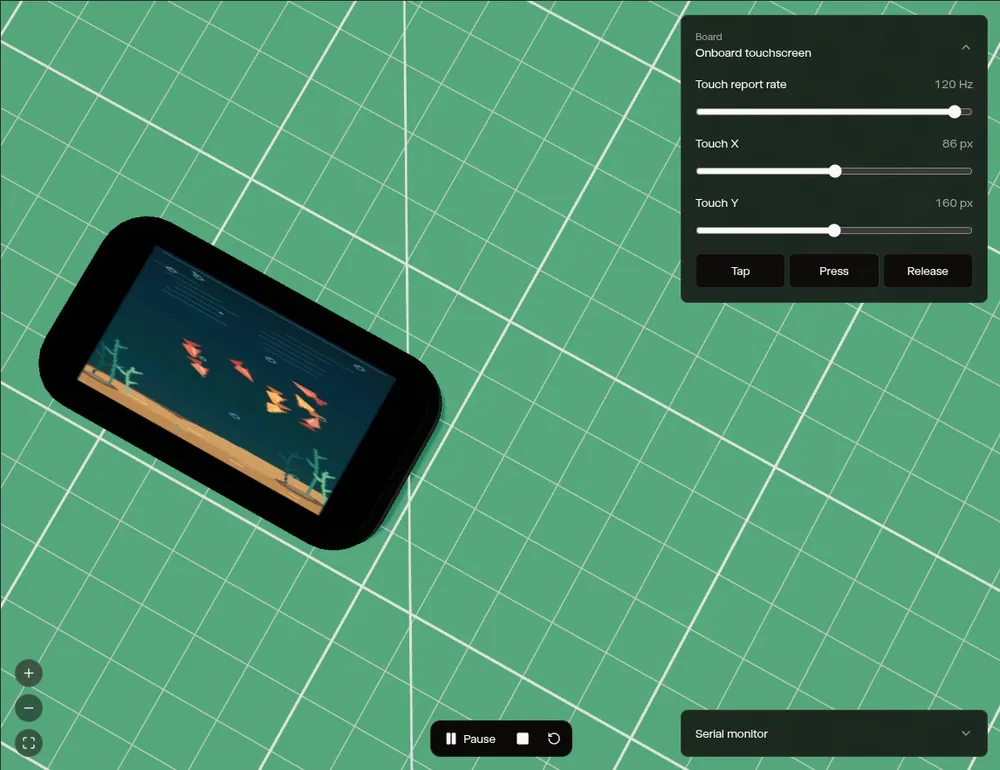
Color screens
Orange fish swim over tan sand on the color LCD built into this ESP32-C6 board. Aquarium from our ESP32 coding test
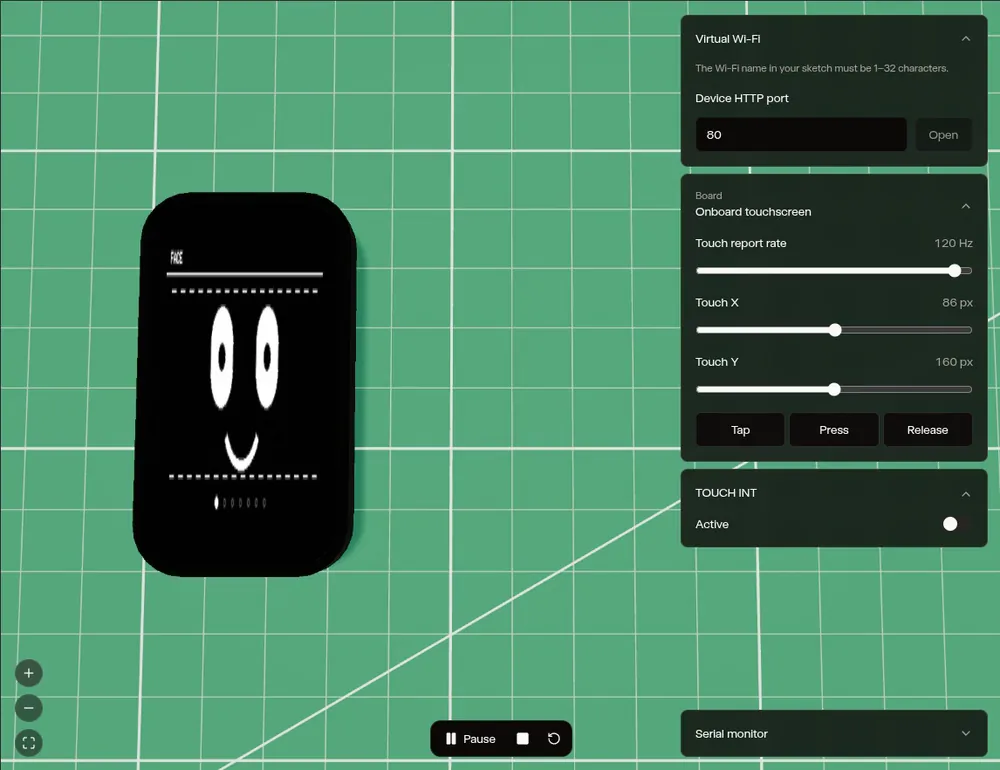
Touchscreens
Tap the screen with the touch controls and the face reacts. Tiny ESP DeskBuddy
LED strips
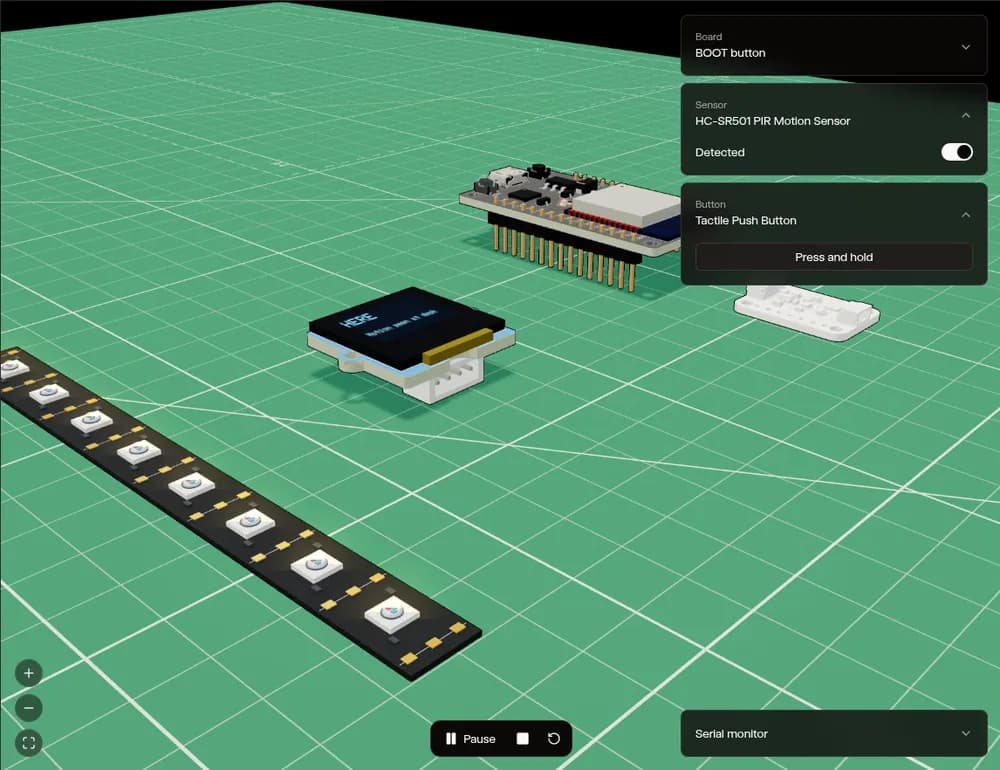
Flip the motion sensor or press the button. The screen goes from FREE to HERE to BUSY and the LEDs change color. Desk presence busy light
Servos
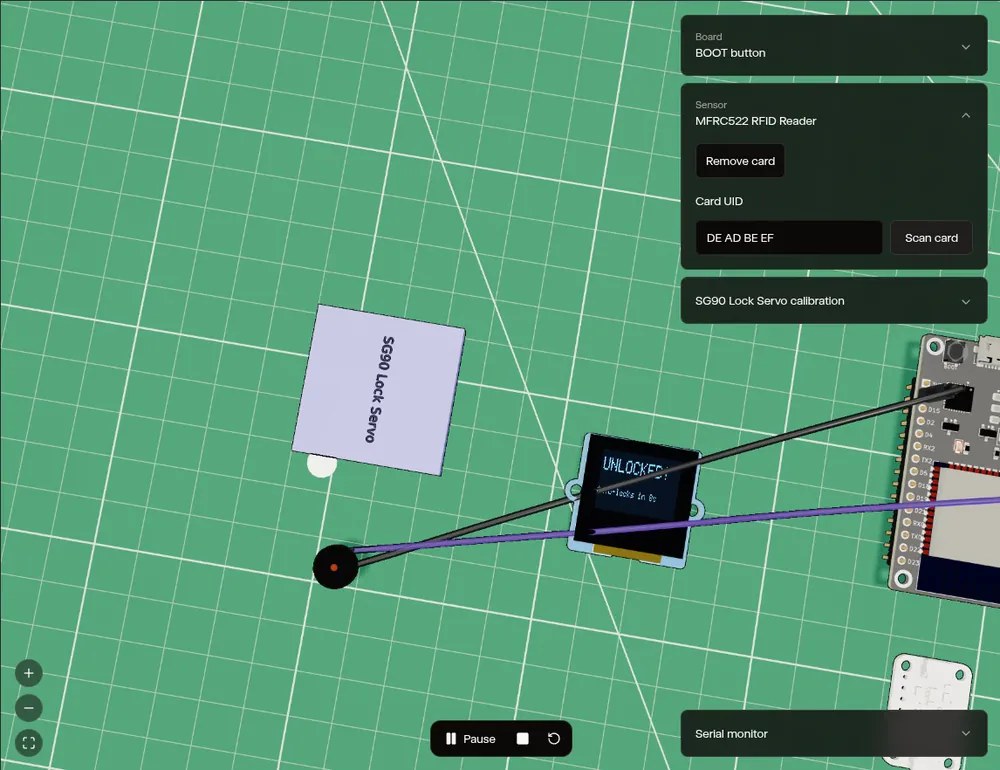
Scan a card and the servo arm swings while the OLED says UNLOCKED. This servo has no 3D model yet, so it gets a labeled stand-in body. RFID treasure chest
Arduino and the serial monitor
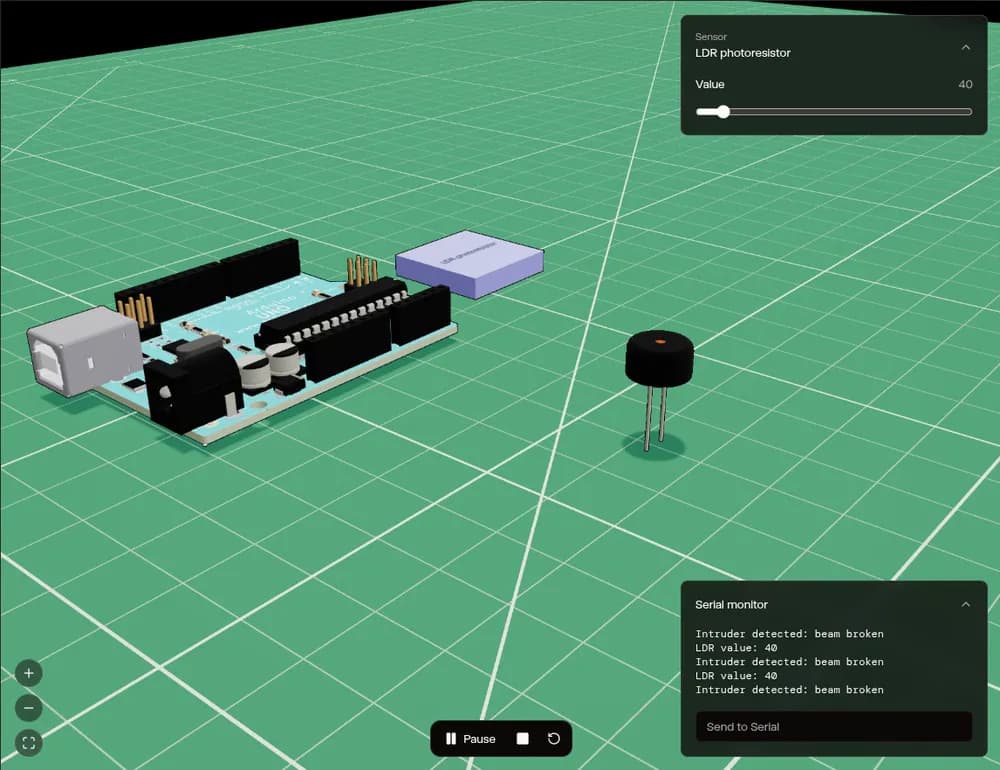
Drag the light sensor down on an Arduino Uno and the serial monitor prints Intruder detected. Laser tripwire alarm
Raspberry Pi Pico
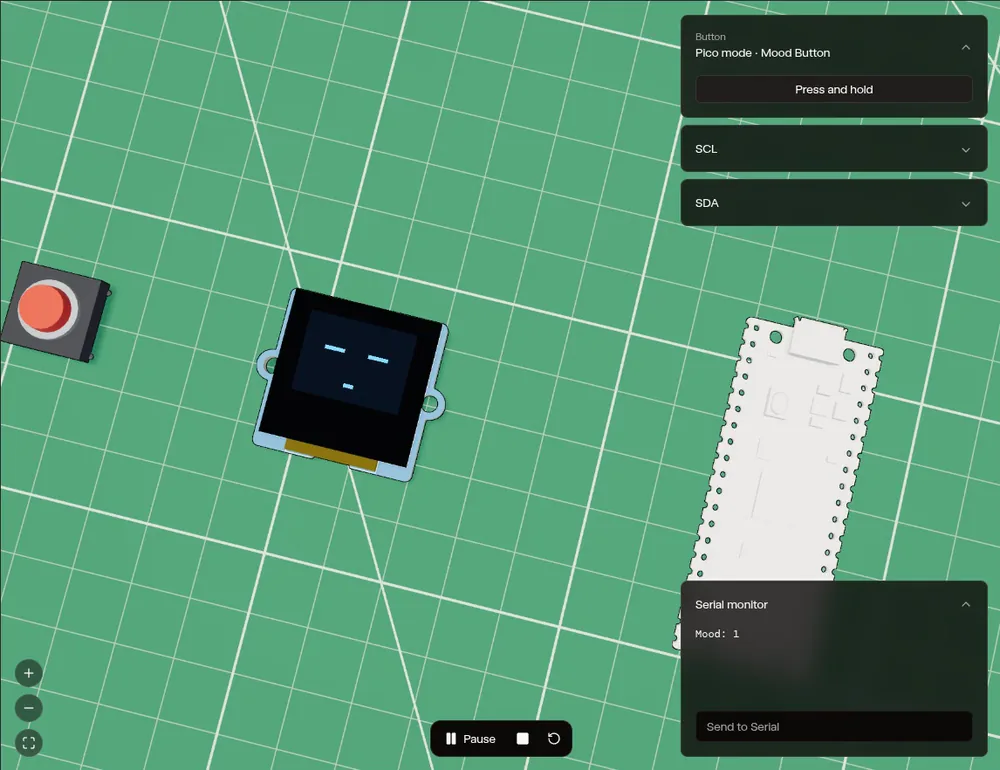
A short sketch we wrote for this page: press the button and the face changes mood. Pico projects
The same firmware on a real board
We flashed real boards, then ran the exact same firmware in the simulator. All 12 OLED builds closely matched the real board, down to the scenes, text and timing. On the C6's color LCD the layout and motion matched, and the colors looked different on camera.
Read the ESP32 coding test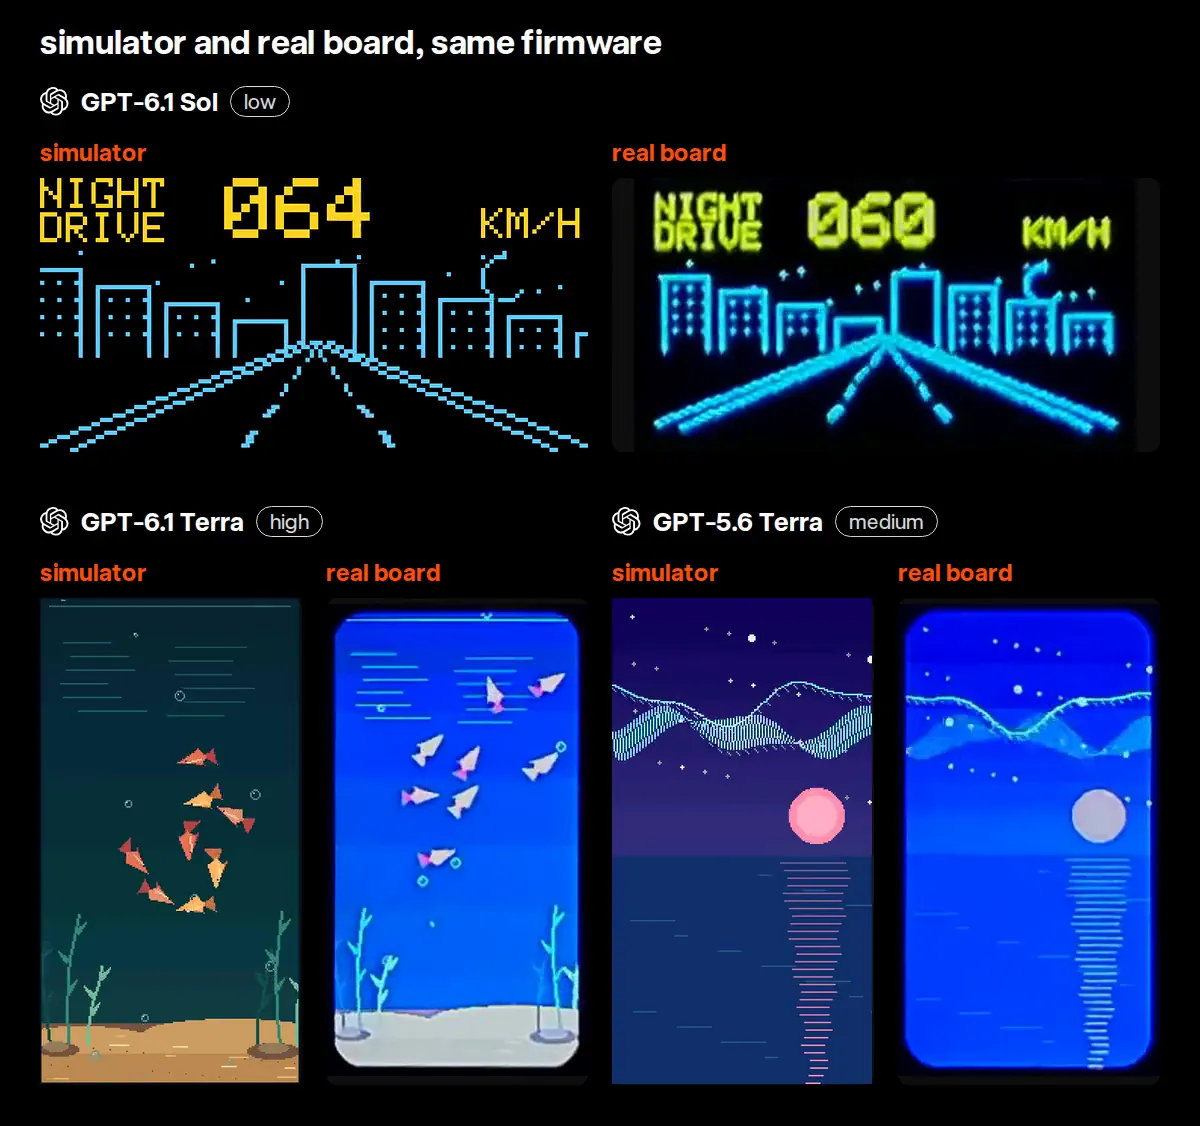
Boards it runs
The simulator runs 260 boards today. Arduino sketches run on all of them. ESPHome projects run on every ESP32, ESP32-S3, ESP32-C3 and ESP32-C6 board. ESP-IDF projects run on the 23 ESP32 and ESP32-S3 boards we've verified, like the DevKit v1 and ESP32-S3-DevKitC-1. Boards without a simulator profile aren't offered, and you can still Deploy to them.
ESP32151 boards
DevKit v1, Cheap Yellow Display, Adafruit Feather V2
ESP32-S373 boards
DevKitC-1, XIAO ESP32S3, M5Stack CoreS3
ESP32-C319 boards
DevKitM-1, C3 Super Mini, XIAO ESP32C3
ESP32-C66 boards
DevKitC-1, Waveshare C6 Touch LCD, XIAO ESP32C6
Arduino5 boards
Uno, Nano, Mega
RP20406 boards
Raspberry Pi Pico, Pico W, Nano RP2040 Connect
What runs in it
What you see
- OLEDs, character LCDs and color screens
- LED strips and plain LEDs that dim and brighten
- Servos that swing
- Jumper wires between parts
What you control
- Buttons, rotary encoders, joysticks and keypads
- Touchscreens, RFID cards and gestures
- Distance, light and weight sliders
- 58 I2C sensor models
- Your webcam on ESP32-S3 boards, your microphone on all ESP32 chips
What you get around the run
- Serial monitor, both ways
- Buzzers you can hear
- Virtual Wi-Fi on ESP32 chips
- Pause, stop, reset, orbit, zoom and drag parts
Try it on your project
- Describe a project to Schematik, or open one from the community.
- Open the Preview tab to see your board and parts on the mat.
- Press Run. The first run takes a minute or two while your firmware compiles.
What it leaves out
- It runs firmware and doesn't model voltage or current, so a wrong resistor or a swapped wire won't show up here. Wires come from your pin assignments.
- Parts without a 3D model get a generated or stand-in body, and an icon in the simulator tells you.
- Steppers, DC motors and relays stay still.
- Arduino and RP2040 runs have no Wi-Fi, and Bluetooth isn't simulated on any board.
- Running a project needs a Schematik account.