Community project
ESP32 OLED Music Player
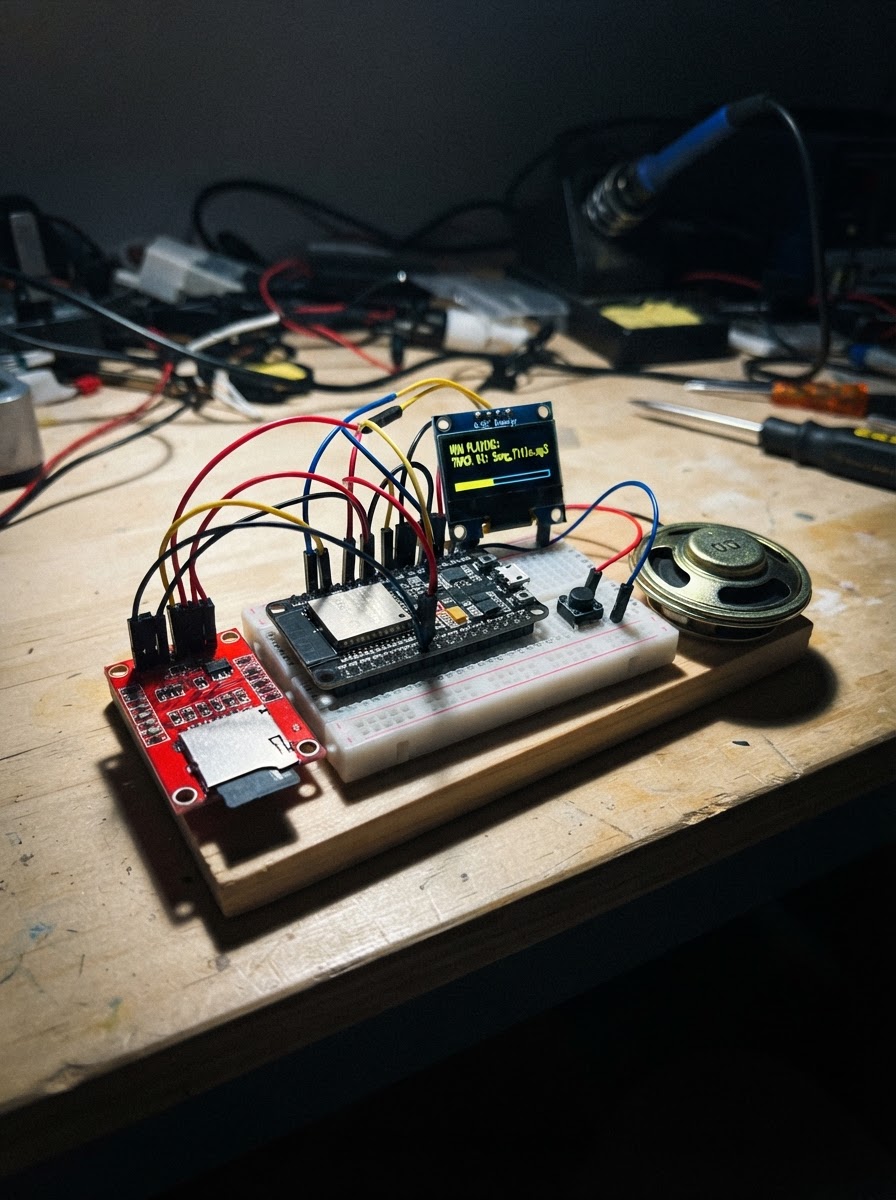
This ESP32-based music player combines an MP3 audio module with an OLED display and five push buttons to create a compact, portable music device. The guide provides a complete wiring diagram, parts list, and step-by-step assembly instructions for connecting the MP3-TF-16P module, SSD1306 OLED screen, speaker, and control buttons to the ESP32 microcontroller.
The included firmware implements debounced button handling, track navigation, volume control, and real-time display updates on the OLED screen. Builders will learn how to interface serial communication with the MP3 module, manage button state logic, and coordinate multiple peripherals on a single microcontroller platform.
Wiring diagram

Gather all the parts
Assemble it in 8 steps
1. Prepare the music card
With the ESP32 unplugged, put a FAT32-formatted microSD card into the MP3-TF-16P. Copy music files named 0001.mp3, 0002.mp3, 0003.mp3 and so on into the card's top-level folder; these become tracks 1, 2, 3 and so on.
- Use four-digit filenames so the music player finds tracks in the expected order.
- Do not remove or insert the card while the circuit has power; the music files can be damaged.
2. Connect the speaker
Connect one speaker wire to MP3-TF-16P SPK1 and the other speaker wire to MP3-TF-16P SPK2 (audio).
- If the speaker has red and black wires, use red for SPK1 and black for SPK2 so the wiring is easy to follow.
- Do not connect either speaker wire to GND — both SPK1 and SPK2 are active audio wires, and grounding one can damage the MP3-TF-16P.
3. Power the MP3 module
Connect MP3-TF-16P VCC to ESP32 VIN or 5V (power), and MP3-TF-16P GND to ESP32 GND (ground).
- Use a red wire for 5V and a black wire for GND.
- Make sure VCC and GND are not swapped — swapped power can damage the music player.
4. Connect the music commands
Connect ESP32 GPIO17 to MP3-TF-16P RX (commands), and MP3-TF-16P TX to ESP32 GPIO16 (status data).
- Use two different colors for these two thin signal wires so they do not get crossed.
- Do not connect the MP3 module TX wire to 5V; TX goes only to GPIO16.
5. Wire the OLED screen
Connect OLED VCC to ESP32 3V3 (power), OLED GND to ESP32 GND (ground), OLED SDA to GPIO21 (data), and OLED SCL to GPIO22 (clock).
- Most OLED boards print SDA and SCL next to their pins. Keep this screen on 3V3, not VIN/5V.
- Make sure VCC and GND are not swapped — swapped power can damage the screen.
6. Place the five buttons
Put each four-legged push button across the centre gap of the breadboard. For every button, connect one side to ESP32 GND (ground). Connect its opposite side to its own ESP32 pin: Previous to GPIO25 (signal), Play/Pause to GPIO26 (signal), Next to GPIO27 (signal), Volume up to GPIO32 (signal), and Volume down to GPIO33 (signal).
- A four-legged button has two legs joined together on each side; use one leg from each opposite side, not two legs on the same side.
- Do not join the signal sides of different buttons together — each button needs its own GPIO pin or every press will perform the same action.
7. Use the controls
Press Previous to go back one track, Next to go forward one track, Play/Pause to start or pause music, Volume up to make it louder, and Volume down to make it quieter.
- The player starts quietly at volume 12 out of 30. Press a button once at a time and release it before the next command.
- Keep the speaker away from your ears while raising the volume because an 8 Ω speaker can become loud suddenly.
8. Power and test the player
Check that the ESP32, OLED, buttons, and MP3-TF-16P all have their GND wires joined together. Plug the ESP32 into USB, then use Schematik's Deploy button to load the firmware.
- No capacitor is used in this simpler build. The player waits quietly at startup until you press Play/Pause.
- Use only the ESP32 USB connection for power in this build; do not connect another supply to VIN while USB is connected.
Review all connections
1. Connections between "oled_1" and "ESP32"
2. Connections between "dfplayer_1" and "ESP32"
3. Connections between "speaker_1" and "ESP32"
4. Connections between "button_previous" and "ESP32"
5. Connections between "button_play" and "ESP32"
6. Connections between "button_next" and "ESP32"
7. Connections between "button_volume_up" and "ESP32"
8. Connections between "button_volume_down" and "ESP32"
Deploy the firmware
#include <Arduino.h>
#include <Wire.h>
#include <Adafruit_GFX.h>
#include <Adafruit_SSD1306.h>
#include <DFRobotDFPlayerMini.h>

struct Button {
  uint8_t pin;
  bool lastReading;
  bool stableState;
  uint32_t changedAt;
};


// Forward declarations
bool wasPressed(Button &button);
void drawPlayerScreen();
void playCurrentTrack();

constexpr int DFPLAYER_RX_PIN = 16;
constexpr int DFPLAYER_TX_PIN = 17;
constexpr int OLED_SDA_PIN = 21;
constexpr int OLED_SCL_PIN = 22;
constexpr int PREVIOUS_BUTTON_PIN = 25;
constexpr int PLAY_BUTTON_PIN = 26;
constexpr int NEXT_BUTTON_PIN = 27;
constexpr int VOLUME_UP_BUTTON_PIN = 32;
constexpr int VOLUME_DOWN_BUTTON_PIN = 33;
constexpr uint8_t OLED_WIDTH = 128;
constexpr uint8_t OLED_HEIGHT = 64;
constexpr uint8_t START_VOLUME = 12;
constexpr uint32_t DEBOUNCE_MS = 35;

Adafruit_SSD1306 display(OLED_WIDTH, OLED_HEIGHT, &Wire, -1);
HardwareSerial mp3Serial(2);
DFRobotDFPlayerMini player;

Button previousButton{PREVIOUS_BUTTON_PIN, HIGH, HIGH, 0};
Button playButton{PLAY_BUTTON_PIN, HIGH, HIGH, 0};
Button nextButton{NEXT_BUTTON_PIN, HIGH, HIGH, 0};
Button volumeUpButton{VOLUME_UP_BUTTON_PIN, HIGH, HIGH, 0};
Button volumeDownButton{VOLUME_DOWN_BUTTON_PIN, HIGH, HIGH, 0};

bool playerReady = false;
bool playing = false;
bool trackHasStarted = false;
uint16_t trackNumber = 1;
uint8_t volumeLevel = START_VOLUME;

bool wasPressed(Button &button) {
  bool reading = digitalRead(button.pin);
  uint32_t now = millis();

  if (reading != button.lastReading) {
    button.changedAt = now;
    button.lastReading = reading;
  }
  if (now - button.changedAt >= DEBOUNCE_MS && reading != button.stableState) {
    button.stableState = reading;
    return button.stableState == LOW;
  }
  return false;
}

void drawPlayerScreen() {
  display.clearDisplay();
  display.setTextColor(SSD1306_WHITE);
  display.setTextSize(1);
  display.setCursor(0, 0);
  display.println(F("ESP32 MUSIC PLAYER"));
  display.drawFastHLine(0, 11, OLED_WIDTH, SSD1306_WHITE);
  display.setTextSize(2);
  display.setCursor(0, 19);
  if (playerReady) {
    // This module selects music by numbered filenames: 0001.mp3, 0002.mp3, and so on.
    display.print(F("Track:"));
    display.setCursor(0, 37);
    if (trackNumber < 1000) display.print('0');
    if (trackNumber < 100) display.print('0');
    if (trackNumber < 10) display.print('0');
    display.print(trackNumber);
    // The number is the selected track; the matching file on the card is 0001.mp3, 0002.mp3, and so on.
    display.println();
  } else {
    display.println(F("No MP3"));
  }
  display.setTextSize(1);
  display.setCursor(0, 47);
  display.print(playing ? F("Playing") : F("Paused"));
  display.setCursor(74, 47);
  display.print(F("Vol "));
  display.print(volumeLevel);
  display.print(F("/30"));
  display.display();
}

void playCurrentTrack() {
  if (!playerReady) return;
  player.play(trackNumber);
  trackHasStarted = true;
  playing = true;
  drawPlayerScreen();
}

void setup() {
  Serial.begin(115200);
  pinMode(PREVIOUS_BUTTON_PIN, INPUT_PULLUP);
  pinMode(PLAY_BUTTON_PIN, INPUT_PULLUP);
  pinMode(NEXT_BUTTON_PIN, INPUT_PULLUP);
  pinMode(VOLUME_UP_BUTTON_PIN, INPUT_PULLUP);
  pinMode(VOLUME_DOWN_BUTTON_PIN, INPUT_PULLUP);

  Wire.begin(OLED_SDA_PIN, OLED_SCL_PIN);
  if (!display.begin(SSD1306_SWITCHCAPVCC, 0x3C)) {
    while (true) delay(1000);
  }

  mp3Serial.begin(9600, SERIAL_8N1, DFPLAYER_RX_PIN, DFPLAYER_TX_PIN);
  delay(800);
  playerReady = player.begin(mp3Serial, true, true);
  if (playerReady) player.volume(volumeLevel);
  drawPlayerScreen();
}

void loop() {
  if (!playerReady) return;

  if (wasPressed(previousButton)) {
    if (trackNumber > 1) --trackNumber;
    playCurrentTrack();
  }
  if (wasPressed(nextButton)) {
    ++trackNumber;
    playCurrentTrack();
  }
  if (wasPressed(playButton)) {
    if (!trackHasStarted) {
      playCurrentTrack();
    } else if (playing) {
      player.pause();
      playing = false;
      drawPlayerScreen();
    } else {
      player.start();
      playing = true;
      drawPlayerScreen();
    }
  }
  if (wasPressed(volumeUpButton)) {
    if (volumeLevel < 30) ++volumeLevel;
    player.volume(volumeLevel);
    drawPlayerScreen();
  }
  if (wasPressed(volumeDownButton)) {
    if (volumeLevel > 0) --volumeLevel;
    player.volume(volumeLevel);
    drawPlayerScreen();
  }
}
Remix this project
Make it yours in one click
Open a full copy of this project in your own Schematik workspace — diagram, code, parts, and assembly steps included. Swap the sensor, add features, or redesign the whole thing with AI. The author's original stays untouched.