Community project
ESP32 Temperature Monitor
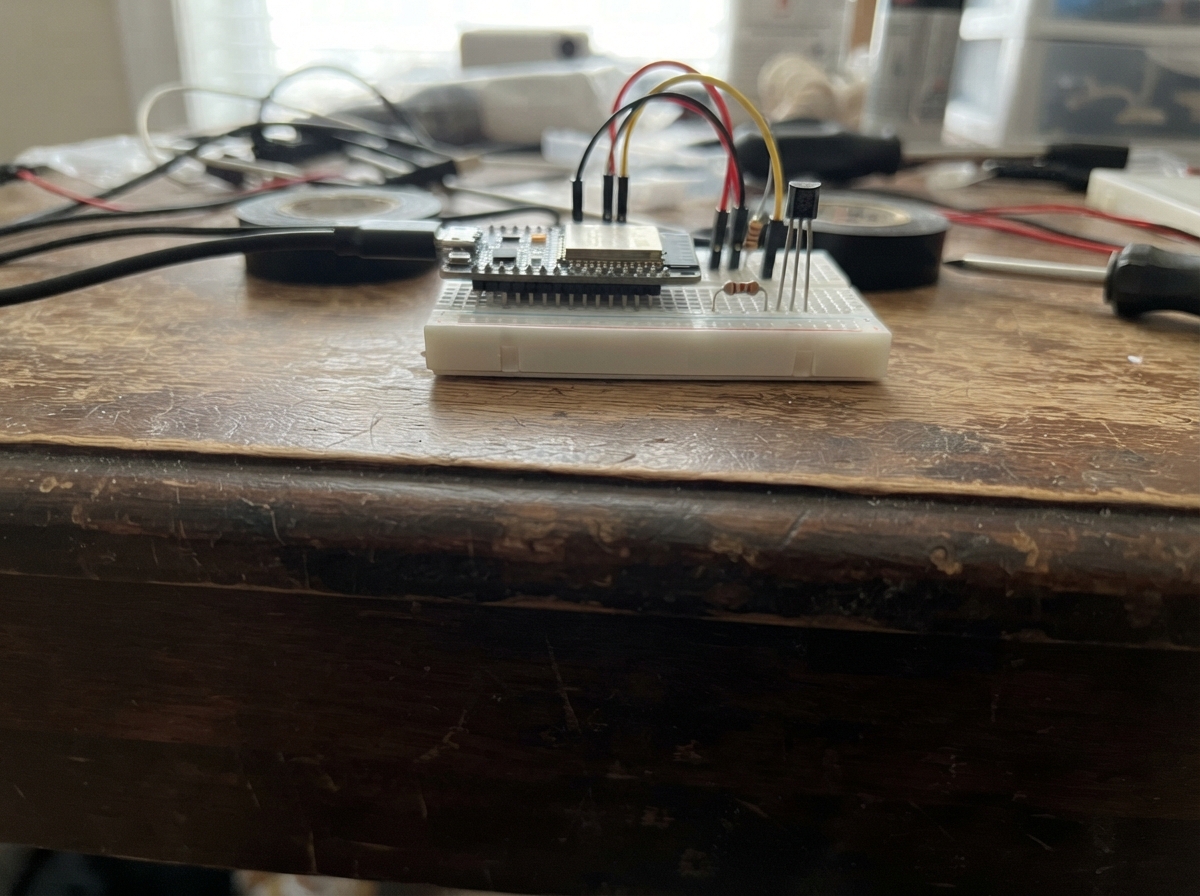
This project turns an ESP32 microcontroller into a temperature monitoring device using a DS18B20 digital temperature sensor. The sensor communicates over a single data wire, making it simple to wire up while maintaining high accuracy. Builders will receive a complete wiring diagram, parts list, and ready-to-deploy firmware that reads temperature values every two seconds and outputs them in both Celsius and Fahrenheit via serial communication.
The guide walks through each assembly step, from connecting power and ground to wiring the temperature signal with the required pull-up resistor. Once deployed, the firmware handles sensor initialization, error detection, and continuous temperature monitoring. This foundation can be extended to log data, trigger alerts, or integrate with home automation systems.
Wiring diagram

Gather all the parts
Assemble it in 4 steps
1. Place the ESP32 and sensor
Put the ESP32 DevKit v1 and the DS18B20 on a breadboard or work surface with their printed pin labels visible. If your DS18B20 is a waterproof probe, its three leads are commonly red for power, black for ground, and yellow or white for data; check its label if the colors differ.
- Keep the probe away from the ESP32 itself while measuring air temperature, because the board warms slightly when powered.
- Do not guess the probe wire colors if they are not marked — connecting power to the wrong lead can damage the sensor.
2. Connect power and ground
Connect DS18B20 VCC to the ESP32 3V3 pin (power). Connect DS18B20 GND to an ESP32 GND pin (ground). Connect one end of the 4.7 kΩ resistor to 3V3 (power) and its other end to the sensor DATA connection (keeps the data wire at a reliable resting level).
- The resistor has no direction, so either leg can go to 3V3.
- Make sure the sensor's VCC and GND are not swapped — swapped power can damage the sensor.
3. Connect the temperature signal
Connect DS18B20 DATA to ESP32 GPIO4 (signal). The free end of the 4.7 kΩ resistor must join this same DATA-to-GPIO4 connection (keeps the sensor's single data wire readable).
- On a breadboard, put the DS18B20 data wire, the resistor leg, and the jumper to GPIO4 in the same connected row or rail.
- Do not connect the sensor's DATA wire directly to 5V; the ESP32 input uses 3.3V and 5V can damage it.
4. Power and deploy
Look over the three sensor connections once more, then connect the ESP32 to your computer with USB. Schematik will print a new temperature reading every two seconds after you press Deploy.
- If the output says the sensor is not found, first check that the resistor bridges 3V3 and the DATA/GPIO4 junction.
Review all connections
1. Connections between "temperature_sensor" and "ESP32"
2. Connections between "onewire_pullup" and "ESP32"
Deploy the firmware
#include <Arduino.h>
#include <OneWire.h>
#include <DallasTemperature.h>

constexpr uint8_t ONE_WIRE_BUS = 4;
constexpr unsigned long READ_INTERVAL_MS = 2000;

OneWire oneWire(ONE_WIRE_BUS);
DallasTemperature temperatureSensors(&oneWire);
unsigned long lastReadMs = 0;

void printTemperature() {
  temperatureSensors.requestTemperatures();
  const float temperatureC = temperatureSensors.getTempCByIndex(0);

  if (temperatureC == DEVICE_DISCONNECTED_C) {
    Serial.println("Temperature sensor not found. Check the DATA wire and 4.7 kOhm resistor.");
    return;
  }

  Serial.print("Temperature: ");
  Serial.print(temperatureC, 2);
  Serial.print(" C  /  ");
  Serial.print(DallasTemperature::toFahrenheit(temperatureC), 2);
  Serial.println(" F");
}

void setup() {
  Serial.begin(115200);
  delay(300);
  Serial.println("ESP32 temperature monitor starting");
  temperatureSensors.begin();
  printTemperature();
  lastReadMs = millis();
}

void loop() {
  const unsigned long now = millis();
  if (now - lastReadMs >= READ_INTERVAL_MS) {
    lastReadMs = now;
    printTemperature();
  }
}
Remix this project
Make it yours in one click
Open a full copy of this project in your own Schematik workspace — diagram, code, parts, and assembly steps included. Swap the sensor, add features, or redesign the whole thing with AI. The author's original stays untouched.