Community project
Gacha Pet Legendaris
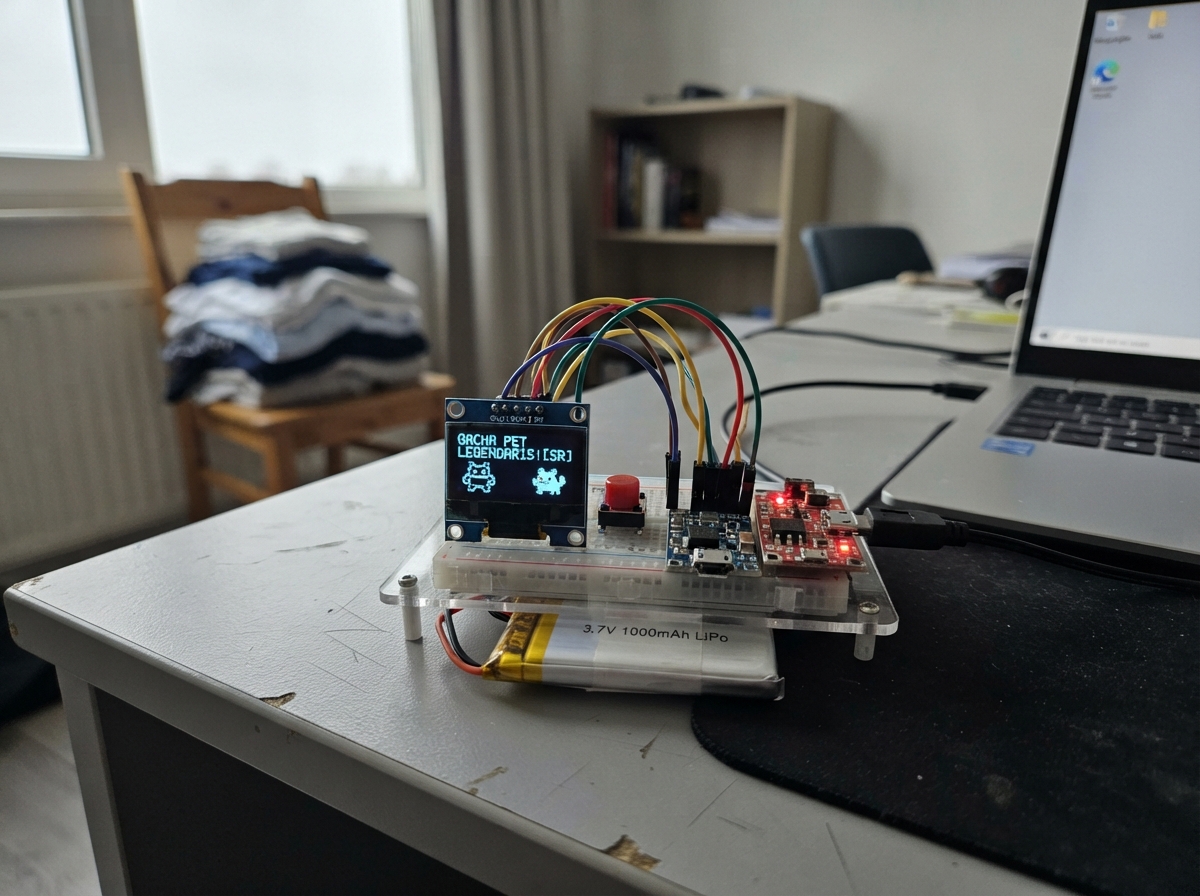
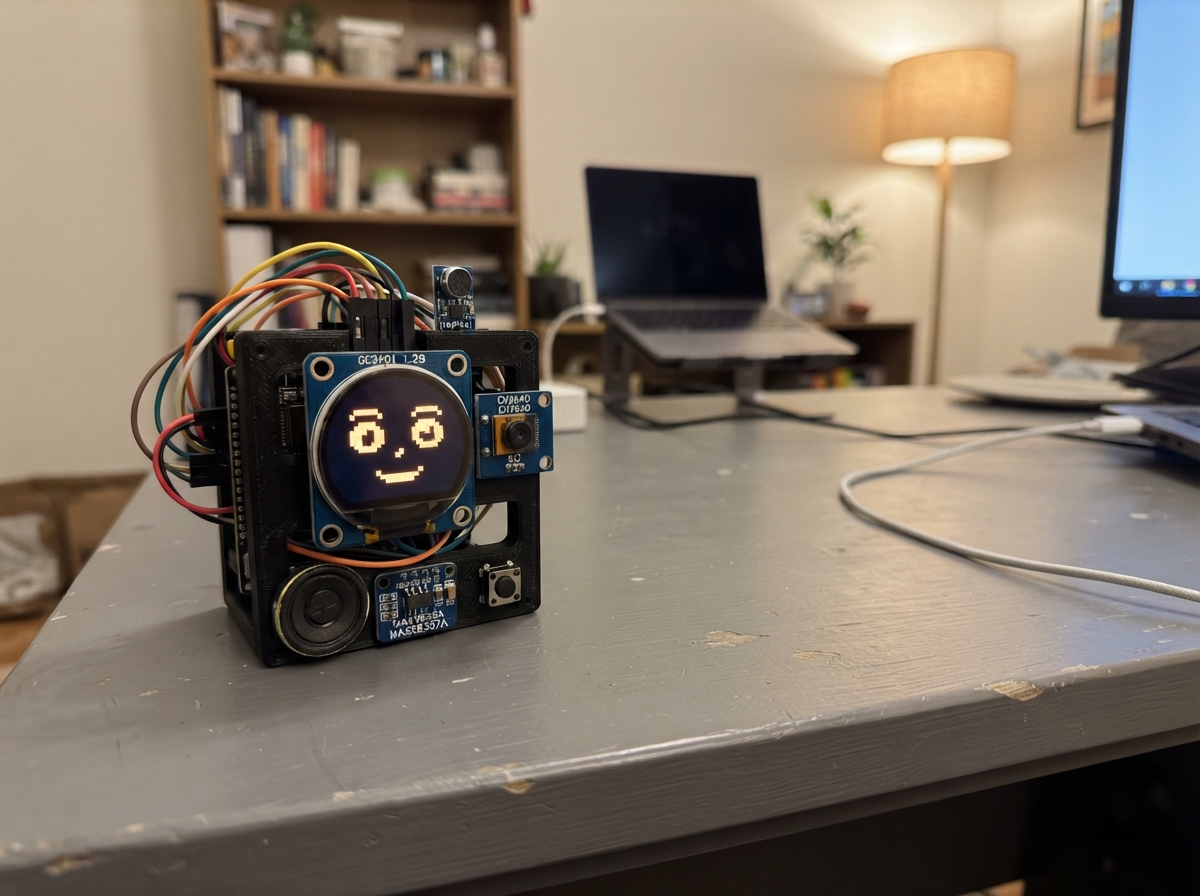
Gacha Pet Legendaris is a virtual pet game built around an ESP32 microcontroller and a small OLED display. Players collect legendary creatures like dragons, phoenixes, and unicorns through a gacha system, then care for their pets by managing hunger, happiness, and energy levels. The game features multiple modes including pet care, gacha pulls, adventures, and status tracking, all controlled with three push buttons.
This guide provides a complete wiring diagram, parts list, and step-by-step assembly instructions for building a portable handheld device powered by a rechargeable LiPo battery. The included firmware handles all game logic, display rendering, button input with debouncing, and stat decay over time. Once assembled and programmed, the device is ready to play immediately—no additional setup required.
Wiring diagram

Gather all the parts
Assemble it in 5 steps
1. Siapkan papan dan layar
Letakkan ESP32 DevKit v1 dan layar OLED di atas meja dengan tulisan pin terlihat. Hubungkan VCC OLED ke pin 3V3 ESP32 (power), GND OLED ke GND ESP32 (ground), SDA OLED ke GPIO21 (data), dan SCL OLED ke GPIO22 (data).
- Gunakan kabel pendek agar gambar pada layar stabil.
- Pastikan VCC dan GND tidak tertukar — power yang terbalik dapat merusak layar.
2. Pasang tiga tombol permainan
Setiap tombol memiliki dua sambungan: satu kaki ke GND ESP32 (ground) dan kaki seberangnya ke pin sinyal. Tombol atas: SIGNAL ke GPIO32 (memilih ke atas). Tombol bawah: SIGNAL ke GPIO33 (memilih ke bawah). Tombol tengah: SIGNAL ke GPIO27 (memilih atau menjalankan menu).
- Jika memakai tombol taktil berkaki empat, gunakan dua kaki yang saling berseberangan; dua kaki pada sisi yang sama sudah tersambung di dalam tombol.
- Jangan menghubungkan satu tombol langsung dari 3V3 ke pin sinyal, karena program memakai sambungan tombol ke GND.
3. Hubungkan baterai ke pengisi daya
Hubungkan kabel positif baterai LiPo ke B+ pada modul TP4056 (power), lalu kabel negatif baterai ke B- (ground). Sambungkan port USB 5V khusus pengisian ke IN+ dan IN- pada TP4056 sesuai tanda positif dan negatifnya.
- Gunakan modul TP4056 enam-pad yang memiliki B+, B-, OUT+, dan OUT- agar baterai memiliki perlindungan dasar.
- Jangan pernah menukar kabel baterai — baterai lithium dapat panas, rusak, atau berbahaya bila polaritasnya salah.
4. Atur listrik 3,3 volt untuk ESP32
Hubungkan OUT+ TP4056 ke VIN regulator 3,3V (power), dan OUT- TP4056 ke GND regulator (ground). Hubungkan VOUT regulator ke pin 3V3 ESP32 (power), lalu GND regulator ke GND ESP32 (ground).
- Atur dan ukur keluaran regulator menjadi 3,3V sebelum menghubungkannya ke ESP32 jika modul regulator Anda dapat diatur.
- Jangan sambungkan keluaran regulator yang belum dipastikan 3,3V ke pin 3V3 ESP32 — tegangan terlalu tinggi dapat merusak papan.
5. Nyalakan dan mainkan
Setelah semua sambungan diperiksa, nyalakan rangkaian dari baterai. Layar menampilkan naga awal dan empat menu singkat: Rawat, Gacha, Petualangan, dan Status. Tekan tombol atas atau bawah untuk berpindah, lalu tombol tengah untuk memilih.
- Rawat memberi makan dengan 5 koin, gacha memakai 30 koin untuk mencoba mendapatkan hewan legendaris, dan petualangan memberi koin jika hewan tidak lapar atau lelah.
Review all connections
1. Connections between "oled_1" and "ESP32"
2. Connections between "button_up" and "ESP32"
3. Connections between "button_down" and "ESP32"
4. Connections between "button_select" and "ESP32"
5. Connections between "lipo_1" and "ESP32"
6. Connections between "charger_1" and "ESP32"
7. Connections between "regulator_1" and "ESP32"
Deploy the firmware
#include <Arduino.h>
#include <Wire.h>
#include <Adafruit_GFX.h>
#include <Adafruit_SSD1306.h>

#define OLED_SDA 21
#define OLED_SCL 22
#define BUTTON_UP 32
#define BUTTON_DOWN 33
#define BUTTON_SELECT 27

constexpr int SCREEN_WIDTH = 128;
constexpr int SCREEN_HEIGHT = 64;
constexpr uint8_t OLED_ADDRESS = 0x3C;
constexpr unsigned long DEBOUNCE_MS = 180;
constexpr unsigned long DECAY_INTERVAL_MS = 60000;

Adafruit_SSD1306 display(SCREEN_WIDTH, SCREEN_HEIGHT, &Wire, -1);

enum PetType { DRAGON, PHOENIX, UNICORN };
const char *petNames[] = {"Naga", "Phoenix", "Unicorn"};
const char *menuItems[] = {"Rawat", "Gacha", "Petualangan", "Status"};

PetType pet = DRAGON;
uint8_t petLevel = 1;
int hunger = 65;
int happiness = 65;
int energy = 75;
int coins = 100;
uint8_t menuIndex = 0;
bool messageMode = false;
String messageLine1;
String messageLine2;
unsigned long messageUntil = 0;
unsigned long lastInput = 0;
unsigned long lastDecay = 0;

bool pressed(uint8_t pin) {
  if (digitalRead(pin) == LOW && millis() - lastInput >= DEBOUNCE_MS) {
    lastInput = millis();
    return true;
  }
  return false;
}

void clampStats() {
  hunger = constrain(hunger, 0, 100);
  happiness = constrain(happiness, 0, 100);
  energy = constrain(energy, 0, 100);
}

void showMessage(const String &line1, const String &line2) {
  messageMode = true;
  messageLine1 = line1;
  messageLine2 = line2;
  messageUntil = millis() + 1800;
}

void drawBar(int y, const char *label, int value) {
  display.setCursor(0, y);
  display.print(label);
  display.drawRect(31, y, 70, 7, SSD1306_WHITE);
  int width = map(value, 0, 100, 0, 68);
  if (width > 0) display.fillRect(32, y + 1, width, 5, SSD1306_WHITE);
  display.setCursor(105, y);
  display.print(value);
}

void drawPetIcon() {
  display.setTextSize(2);
  display.setCursor(94, 0);
  if (pet == DRAGON) display.print("D");
  if (pet == PHOENIX) display.print("P");
  if (pet == UNICORN) display.print("U");
  display.setTextSize(1);
}

void render() {
  display.clearDisplay();
  display.setTextColor(SSD1306_WHITE);

  if (messageMode) {
    display.setTextSize(1);
    display.setCursor(4, 15);
    display.println(messageLine1);
    display.setCursor(4, 32);
    display.println(messageLine2);
    display.setCursor(4, 51);
    display.print("Koin: ");
    display.print(coins);
    display.display();
    return;
  }

  display.setTextSize(1);
  display.setCursor(0, 0);
  display.print(petNames[pet]);
  display.print(" Lv.");
  display.print(petLevel);
  drawPetIcon();
  drawBar(13, "Lapar", hunger);
  drawBar(23, "Senang", happiness);
  drawBar(33, "Energi", energy);

  display.setCursor(0, 45);
  display.print("Koin: ");
  display.print(coins);
  for (uint8_t i = 0; i < 4; ++i) {
    display.setCursor(i * 31, 55);
    if (i == menuIndex) display.print(">"); else display.print(" ");
    display.print(menuItems[i][0]);
  }
  display.display();
}

void feedPet() {
  if (coins < 5) {
    showMessage("Koin tidak cukup", "Butuh 5 koin");
    return;
  }
  coins -= 5;
  hunger += 24;
  happiness += 8;
  clampStats();
  showMessage("Peliharaan makan!", "+lapar +senang");
}

void doGacha() {
  if (coins < 30) {
    showMessage("Koin tidak cukup", "Gacha butuh 30");
    return;
  }
  coins -= 30;
  int roll = random(100);
  if (roll < 10) {
    pet = PHOENIX;
    petLevel++;
    showMessage("LEGENDARIS!", "Phoenix menetas");
  } else if (roll < 25) {
    pet = UNICORN;
    petLevel++;
    showMessage("Sangat langka!", "Unicorn menetas");
  } else if (roll < 50) {
    pet = DRAGON;
    petLevel++;
    showMessage("Langka!", "Naga menetas");
  } else {
    coins += 12;
    showMessage("Dapat 12 koin", "Coba lagi nanti");
  }
}

void adventure() {
  if (energy < 25 || hunger < 15) {
    showMessage("Belum siap jalan", "Beri makan/istirahat");
    return;
  }
  energy -= 25;
  hunger -= 15;
  int reward = random(8, 31);
  coins += reward;
  happiness += 12;
  if (random(100) < 30) petLevel++;
  clampStats();
  showMessage("Petualangan selesai!", "+" + String(reward) + " koin");
}

void showStatus() {
  String line = String(petNames[pet]) + " Lv." + String(petLevel);
  showMessage(line, "Rawat agar kuat!");
}

void selectMenu() {
  if (menuIndex == 0) feedPet();
  else if (menuIndex == 1) doGacha();
  else if (menuIndex == 2) adventure();
  else showStatus();
}

void setup() {
  pinMode(BUTTON_UP, INPUT_PULLUP);
  pinMode(BUTTON_DOWN, INPUT_PULLUP);
  pinMode(BUTTON_SELECT, INPUT_PULLUP);
  Wire.begin(OLED_SDA, OLED_SCL);
  display.begin(SSD1306_SWITCHCAPVCC, OLED_ADDRESS);
  randomSeed(esp_random());
  showMessage("Pocket Pet siap!", "Pilih menu");
  render();
}

void loop() {
  bool redraw = false;
  if (messageMode && millis() >= messageUntil) {
    messageMode = false;
    redraw = true;
  }

  if (!messageMode) {
    if (pressed(BUTTON_UP)) {
      menuIndex = (menuIndex + 3) % 4;
      redraw = true;
    }
    if (pressed(BUTTON_DOWN)) {
      menuIndex = (menuIndex + 1) % 4;
      redraw = true;
    }
    if (pressed(BUTTON_SELECT)) {
      selectMenu();
      redraw = true;
    }
  }

  if (millis() - lastDecay >= DECAY_INTERVAL_MS) {
    lastDecay = millis();
    hunger -= 2;
    happiness -= 1;
    energy += 3;
    clampStats();
    redraw = true;
  }

  if (redraw) render();
}
Remix this project
Make it yours in one click
Open a full copy of this project in your own Schematik workspace — diagram, code, parts, and assembly steps included. Swap the sensor, add features, or redesign the whole thing with AI. The author's original stays untouched.