Community project
الكتاب التفاعلي للثقافة والموسيقى
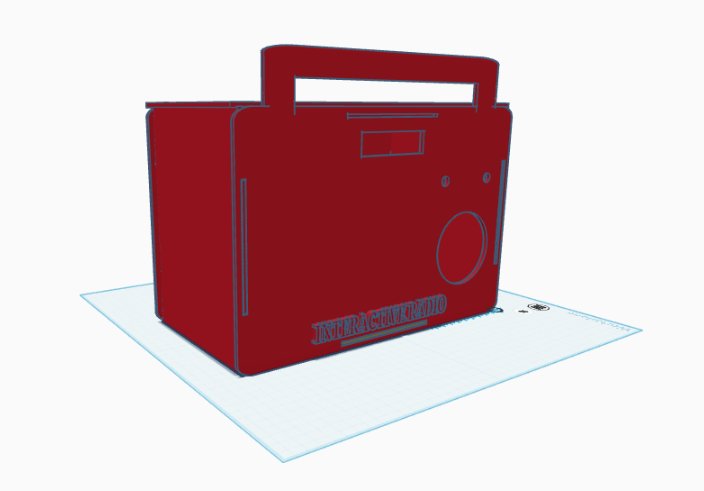
This interactive guide builds a cultural and musical reference device that combines visual information with audio playback. Using an Arduino Uno, a small OLED screen displays facts about Egyptian and Sudanese music and culture, while the DFPlayer Mini module plays corresponding audio clips through a speaker. Pressing buttons lets users explore different topics and hear authentic musical examples.
The guide provides a complete wiring diagram showing how to connect the OLED display, DFPlayer audio module, speaker, and push buttons to the Arduino. Assembly steps walk through component placement, proper serial communication setup with the 1 kΩ resistor on the DFPlayer RX line, and firmware configuration. A parts list and instructions for preparing your SD card with audio files complete the project.
Wiring diagram

Gather all the parts
Assemble it in 6 steps
1. ضع القطع قبل توصيل الكهرباء
ضع Arduino Uno R3 وشاشة OLED ووحدة DFPlayer Mini وثلاثة أزرار والسماعة على لوحة تجارب. اترك بطاقة microSD خارج وحدة الصوت مؤقتاً حتى تنتهي من التوصيلات.
- اجعل سكة الأرضي الزرقاء في لوحة التجارب مشتركة بين كل القطع.
- لا توصل لوحة الأردوينو بمنفذ USB أثناء إدخال الأسلاك؛ توصيل سلك في مكان خاطئ مع وجود الكهرباء قد يسبب سخونة أو تلفاً للقطعة.
2. وصل الشاشة الصغيرة
صل VCC في oled_1 إلى 5V في الأردوينو (طاقة)، وGND إلى GND (أرضي)، وSDA إلى A4 (بيانات)، وSCL إلى A5 (ساعة البيانات).
- ابحث عن الكلمات المطبوعة بجانب أرجل الشاشة؛ لا تعتمد على ترتيب الأرجل وحده.
- تأكد أن VCC وGND غير متبادلين؛ عكس سلكي الطاقة قد يتلف الشاشة.
3. وصل وحدة الصوت والسماعة
صل VCC في dfplayer_1 إلى 5V (طاقة) وGND إلى GND (أرضي). صل TX في dfplayer_1 إلى D10 في الأردوينو (بيانات راجعة). صل D11 في الأردوينو إلى طرف END_A في resistor_dfplayer_rx، ثم صل الطرف الآخر END_B إلى RX في dfplayer_1 (بيانات محمية بالمقاومة). صل SPK1 في dfplayer_1 إلى POS في speaker_1 وSPK2 إلى NEG في speaker_1 (صوت).
- السماعة تتصل بطرفي SPK1 وSPK2 فقط؛ لا توصل أي طرف من السماعة بسكة GND.
- استخدم مقاومة 1 kΩ ذات طرفين متشابهين؛ اتجاهها لا يهم.
- لا توصل السماعة مباشرة بأي رجل من أرجل الأردوينو؛ الصوت يخرج من وحدة DFPlayer فقط.
4. وصل أزرار الاختيار
في كل زر، صل طرف GND إلى GND (أرضي). صل SIGNAL لزر مصر button_egypt إلى D2 (اختيار مصر)، وSIGNAL لزر السودان button_sudan إلى D3 (اختيار السودان)، وSIGNAL لزر المعلومة button_facts إلى D4 (عرض معلومة).
- الزر له وضعان متصلان داخلياً؛ إذا كان زر بأربع أرجل، استخدم رجلين متقابلتين عبر الفجوة الوسطى وليس رجلين بجانب بعضهما.
- هذه الأزرار لا تحتاج مقاومات إضافية لأن البرنامج يستخدم الحماية الداخلية للأردوينو.
5. حضّر بطاقة المقاطع الصوتية
استخدم بطاقة microSD صغيرة مهيأة بنظام FAT32. ضع في جذر البطاقة ملفين صوتيين MP3 باسم 0001.mp3 لمقطع مصر و0002.mp3 لمقطع السودان، ثم أدخل البطاقة في dfplayer_1 قبل تشغيل المشروع.
- اختر مقاطع قصيرة مسجلة بصوتك أو موسيقى لديك حق استعمالها؛ الاسم الرقمي يطابق اختيار الزر.
- يمكنك لاحقاً تغيير الملفات مع الاحتفاظ بالاسمين نفسهما.
- لا تخرج بطاقة الذاكرة أو تدخلها بينما وحدة الصوت مشغلة؛ قد يفسد ذلك الملفات على البطاقة.
6. شغّل الكتاب التفاعلي
راجع التوصيلات، ثم صل Arduino Uno R3 بالحاسوب عبر USB. الشاشة ستعرض عنوان الكتاب؛ زر مصر يشغّل 0001.mp3، وزر السودان يشغّل 0002.mp3، وزر المعلومة يعرض معلومة ثقافية مختلفة كل ضغطة.
- ضع ملصقاً ورقياً على الأزرار: مصر، السودان، معلومة، ليصبح الكتاب واضحاً للأطفال والزوار.
Review all connections
1. Connections between "oled_1" and "Arduino"
2. Connections between "dfplayer_1" and "Arduino"
3. Connections between "resistor_dfplayer_rx" and "Arduino"
4. Connections between "button_egypt" and "Arduino"
5. Connections between "button_sudan" and "Arduino"
6. Connections between "button_facts" and "Arduino"
Deploy the firmware
#include <Wire.h>
#include <SoftwareSerial.h>
#include <DFRobotDFPlayerMini.h>
#include <Adafruit_GFX.h>
#include <Adafruit_SSD1306.h>

const uint8_t BUTTON_EGYPT_PIN = 2;
const uint8_t BUTTON_SUDAN_PIN = 3;
const uint8_t BUTTON_FACT_PIN = 4;
const uint8_t DFPLAYER_RX_PIN = 10; // Arduino receives from DFPlayer TX
const uint8_t DFPLAYER_TX_PIN = 11; // Arduino sends through 1 kOhm resistor to DFPlayer RX
const uint8_t OLED_SDA_PIN = A4;
const uint8_t OLED_SCL_PIN = A5;

const uint8_t SCREEN_WIDTH = 128;
const uint8_t SCREEN_HEIGHT = 64;
const unsigned long DEBOUNCE_MS = 45;

Adafruit_SSD1306 display(SCREEN_WIDTH, SCREEN_HEIGHT, &Wire, -1);
SoftwareSerial dfSerial(DFPLAYER_RX_PIN, DFPLAYER_TX_PIN);
DFRobotDFPlayerMini player;
bool playerReady = false;

struct ButtonState {
  uint8_t pin;
  bool lastReading;
  bool stableState;
  unsigned long lastChange;
};

ButtonState egyptButton = {BUTTON_EGYPT_PIN, HIGH, HIGH, 0};
ButtonState sudanButton = {BUTTON_SUDAN_PIN, HIGH, HIGH, 0};
ButtonState factButton = {BUTTON_FACT_PIN, HIGH, HIGH, 0};

const char *facts[] = {
  "Nile links Egypt and Sudan.",
  "Oud is central to Arab music.",
  "Egyptian tabla marks rhythm.",
  "Sudanese tambour blends poetry and song.",
  "Arabic music uses rich maqam scales."
};
const uint8_t FACT_COUNT = sizeof(facts) / sizeof(facts[0]);
uint8_t factIndex = 0;

void showLines(const __FlashStringHelper *title, const __FlashStringHelper *line1, const __FlashStringHelper *line2) {
  display.clearDisplay();
  display.setTextColor(SSD1306_WHITE);
  display.setTextSize(1);
  display.setCursor(0, 0);
  display.println(title);
  display.drawLine(0, 11, 127, 11, SSD1306_WHITE);
  display.setCursor(0, 19);
  display.println(line1);
  display.setCursor(0, 36);
  display.println(line2);
  display.display();
}

void showFact(const char *fact) {
  display.clearDisplay();
  display.setTextColor(SSD1306_WHITE);
  display.setTextSize(1);
  display.setCursor(0, 0);
  display.println(F("CULTURE FACT"));
  display.drawLine(0, 11, 127, 11, SSD1306_WHITE);
  display.setCursor(0, 20);
  display.println(fact);
  display.setCursor(0, 52);
  display.println(F("Press any country"));
  display.display();
}

bool wasPressed(ButtonState &button) {
  bool reading = digitalRead(button.pin);
  if (reading != button.lastReading) {
    button.lastChange = millis();
    button.lastReading = reading;
  }
  if ((millis() - button.lastChange) > DEBOUNCE_MS && reading != button.stableState) {
    button.stableState = reading;
    return button.stableState == LOW;
  }
  return false;
}

void playTrack(uint8_t track) {
  if (playerReady) {
    player.stop();
    delay(100);
    player.play(track);
  }
}

void selectEgypt() {
  showLines(F("EGYPT"), F("Nile, oud and tabla"), F("Playing track 001"));
  playTrack(1);
}

void selectSudan() {
  showLines(F("SUDAN"), F("Tambour and poetry"), F("Playing track 002"));
  playTrack(2);
}

void selectFact() {
  showFact(facts[factIndex]);
  factIndex = (factIndex + 1) % FACT_COUNT;
}

void setup() {
  pinMode(BUTTON_EGYPT_PIN, INPUT_PULLUP);
  pinMode(BUTTON_SUDAN_PIN, INPUT_PULLUP);
  pinMode(BUTTON_FACT_PIN, INPUT_PULLUP);

  Wire.begin();
  if (!display.begin(SSD1306_SWITCHCAPVCC, 0x3C)) {
    for (;;) { }
  }
  showLines(F("ARABIC CULTURE"), F("Egypt | Sudan | Facts"), F("Choose a button"));

  dfSerial.begin(9600);
  if (player.begin(dfSerial, true, true)) {
    playerReady = true;
    player.volume(20); // 0 to 30
  } else {
    showLines(F("AUDIO NOT FOUND"), F("Check DFPlayer + SD"), F("Buttons still work"));
  }
}

void loop() {
  if (wasPressed(egyptButton)) {
    selectEgypt();
  }
  if (wasPressed(sudanButton)) {
    selectSudan();
  }
  if (wasPressed(factButton)) {
    selectFact();
  }
}
Download project files
Remix this project
Make it yours in one click
Open a full copy of this project in your own Schematik workspace — diagram, code, parts, and assembly steps included. Swap the sensor, add features, or redesign the whole thing with AI. The author's original stays untouched.