Community project
WiFi OLED GIF Display
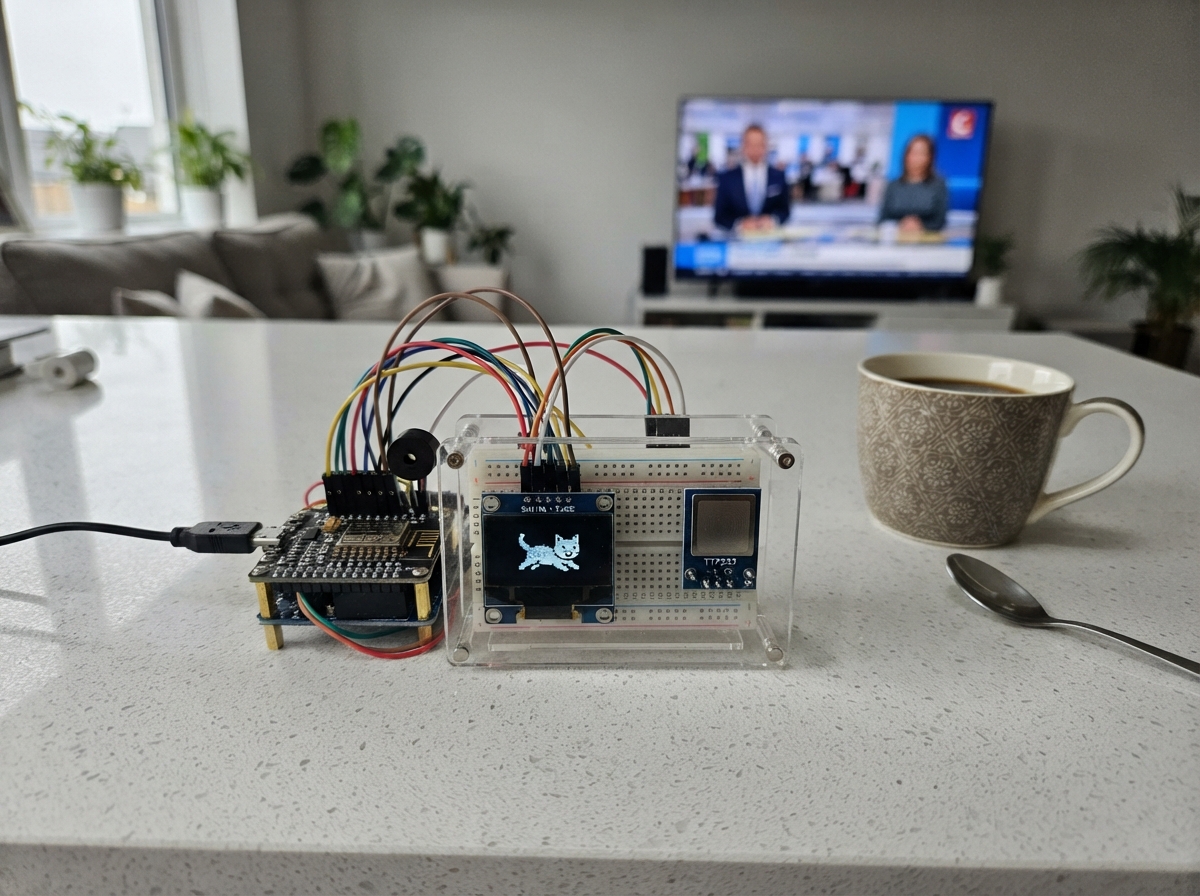
This project builds a WiFi-connected OLED display that shows animated GIFs, controlled via a capacitive touch button. The ESP32 microcontroller manages the display output to a 128x64 SH1106 OLED screen while responding to touch input and providing audio feedback through a buzzer.
The guide includes a complete wiring diagram showing how to connect the OLED display, touch sensor module, and buzzer to the ESP32, along with a parts list, firmware code, and step-by-step assembly instructions. Builders will learn how to configure the display, handle touch events, and deploy the finished project.
Wiring diagram

Gather all the parts
Assemble it in 6 steps
1. Disconnect USB power
पहले ESP32-C3 Super Mini से USB cable निकाल दें। Power हटाकर wiring करने से गलती से wires touch होने पर board या OLED खराब होने का खतरा कम रहता है।
- VCC और GND को उल्टा न जोड़ें — swapped power से OLED या touch module खराब हो सकता है।
2. Wire the OLED screen
OLED का VCC ESP32-C3 Super Mini के 3V3 से जोड़ें (power), GND को GND से जोड़ें (ground), SDA को GPIO20/RX से जोड़ें (data), और SCL को GPIO21/TX से जोड़ें (clock).
- OLED पर SDA और SCL के printed labels ध्यान से देखें; ये दोनों wires उल्टे नहीं होने चाहिए।
- OLED को 3V3 से चलाएँ, 5V से नहीं।
3. Keep the touch button on GPIO1
TTP223 touch module का VCC ESP32-C3 Super Mini के 3V3 से जोड़ें (power), GND को GND से जोड़ें (ground), और SIG या OUT को GPIO1 से जोड़ें (signal). Touch pin GPIO1 पर ही रखा गया है।
- GPIO1 पर केवल TTP223 का SIG wire रखें; OLED SCL wire GPIO21 पर होना चाहिए।
4. Wire the warning buzzer
3.3 V active buzzer का negative/GND leg ESP32 के GND से जोड़ें (ground), और उसका positive/SIGNAL leg GPIO2 से जोड़ें (warning sound). यदि buzzer पर + और - छपा है, + या SIG वाला leg GPIO2 पर और - वाला leg GND पर लगाएँ।
- केवल छोटा 3.3 V active buzzer लगाएँ। बड़ा या 5 V buzzer सीधे GPIO2 पर लगाने से ESP32 pin खराब हो सकती है।
5. Plug in the OBD adapter
Car बंद और parked होने पर Wi-Fi OBD adapter को car के OBD-II port में लगाएँ। ESP32 से adapter तक कोई wire नहीं लगती; ESP32 अपने Wi-Fi से adapter को ढूँढता है।
- Car चलाते समय adapter, screen, या ESP32 wiring को न छेड़ें।
6. Power and deploy
हर wire को labels के अनुसार फिर से देखें, ESP32-C3 Super Mini को USB से computer से जोड़ें, और Schematik में Deploy दबाएँ। ECU reply milne par selected Auto, Manual, ya Gauge dashboard khul jayega.
- Agar battery voltage hi dikhe, ignition ON karke 10 seconds wait karein; firmware 0100 ECU probe ko retry karta hai.
Review all connections
1. Connections between "oled_1" and "ESP32"
2. Connections between "touch_1" and "ESP32"
3. Connections between "buzzer_1" and "ESP32"
Deploy the firmware
#include <BLEDevice.h>
#include <BLEUtils.h>
#include <BLEScan.h>
#include <BLEClient.h>

// Apne OBD scanner ka BLE MAC address yahan daalein
static String targetMac = "b2:97:31:1e:55:e4";
boolean doConnect = false;
boolean connected = false;
BLEAddress *pServerAddress;
BLEScan* pBLEScan;

// ELM327 BLE Standard UUIDs (Kuch devices ke liye ye fff1/fff2 ya sppp hote hain)
static BLEUUID serviceUUID("0000fff0-0000-1000-8000-00805f9b34fb");
static BLEUUID charUUIDWrite("0000fff1-0000-1000-8000-00805f9b34fb");
static BLEUUID charUUIDNotify("0000fff2-0000-1000-8000-00805f9b34fb");

BLERemoteCharacteristic* pRemoteCharWrite = nullptr;
BLERemoteCharacteristic* pRemoteCharNotify = nullptr;
bool newDataReceived = false;
String obdResponse = "";

// Notification callback - Jab OBD scanner data wapas bhejega
void notifyCallback(BLERemoteCharacteristic* pBLERemoteCharacteristic, uint8_t* pData, size_t length, bool isNotify) {
    obdResponse = "";
    for (size_t i = 0; i < length; i++) {
        obdResponse += (char)pData[i];
    }
    newDataReceived = true;
}

class MyClientCallbacks : public BLEClientCallbacks {
  void onConnect(BLEClient* pclient) {
    connected = true;
    Serial.println("-> Bluetooth Connected to OBD Scanner Successfully!");
  }

  void onDisconnect(BLEClient* pclient) {
    connected = false;
    Serial.println("-> Bluetooth Disconnected from OBD Scanner!");
  }
};

class MyAdvertisedDeviceCallbacks: public BLEAdvertisedDeviceCallbacks {
  void onResult(BLEAdvertisedDevice advertisedDevice) {
    if (advertisedDevice.getAddress().toString() == targetMac) {
      Serial.print("Device Found: ");
      Serial.println(advertisedDevice.toString().c_str());

      pServerAddress = new BLEAddress(advertisedDevice.getAddress());
      pBLEScan->stop();
      doConnect = true;
    }
  }
};

bool connectToServer() {
  Serial.print("Connecting to: ");
  Serial.println(pServerAddress->toString().c_str());

  BLEClient* pClient = BLEDevice::createClient();
  pClient->setClientCallbacks(new MyClientCallbacks());

  if (pClient->connect(*pServerAddress)) {
    Serial.println(" - Connected to server");

    // Service aur Characteristics ko dhundhein
    BLERemoteService* pRemoteService = pClient->getService(serviceUUID);
    if (pRemoteService == nullptr) {
      Serial.println("Failed to find OBD service UUID!");
      pClient->disconnect();
      return false;
    }

    pRemoteCharWrite = pRemoteService->getCharacteristic(charUUIDWrite);
    pRemoteCharNotify = pRemoteService->getCharacteristic(charUUIDNotify);

    if (pRemoteCharWrite == nullptr || pRemoteCharNotify == nullptr) {
      Serial.println("Failed to find OBD characteristics!");
      pClient->disconnect();
      return false;
    }

    // Notify enable karein
    if (pRemoteCharNotify->canNotify()) {
      pRemoteCharNotify->registerForNotify(notifyCallback);
    }
    return true;
  } else {
    Serial.println(" - Failed to connect to server");
    return false;
  }
}

void setup() {
  Serial.begin(115200);
  delay(1000);
  Serial.println("ESP32-C3 BLE OBD Scanner Scanning...");

  BLEDevice::init("");
  pBLEScan = BLEDevice::getScan();
  pBLEScan->setAdvertisedDeviceCallbacks(new MyAdvertisedDeviceCallbacks());
  pBLEScan->setActiveScan(true);
  pBLEScan->start(5, false);
}

void loop() {
  if (doConnect == true) {
    if (connectToServer()) {
      Serial.println("Connection process completed.");
    } else {
      Serial.println("Connection failed, restarting scan...");
      doConnect = false;
      pBLEScan->start(5, false);
    }
    doConnect = false;
  }

  // Jab connected ho tab voltage command bhejein
  if (connected) {
    String cmd = "ATRV\r"; // Battery Voltage Command
    pRemoteCharWrite->writeValue(cmd.c_str(), cmd.length());

    unsigned long start = millis();
    newDataReceived = false;
    while (millis() - start < 2000) {
      if (newDataReceived) {
        Serial.print("Battery Voltage: ");
        Serial.println(obdResponse);
        break;
      }
    }
    delay(3000); // Har 3 second me check karein
  } else {
    if (!doConnect) {
      Serial.println("Scanning for OBD Scanner...");
      pBLEScan->start(5, false);
      delay(2000);
    }
  }
}
Remix this project
Make it yours in one click
Open a full copy of this project in your own Schematik workspace — diagram, code, parts, and assembly steps included. Swap the sensor, add features, or redesign the whole thing with AI. The author's original stays untouched.