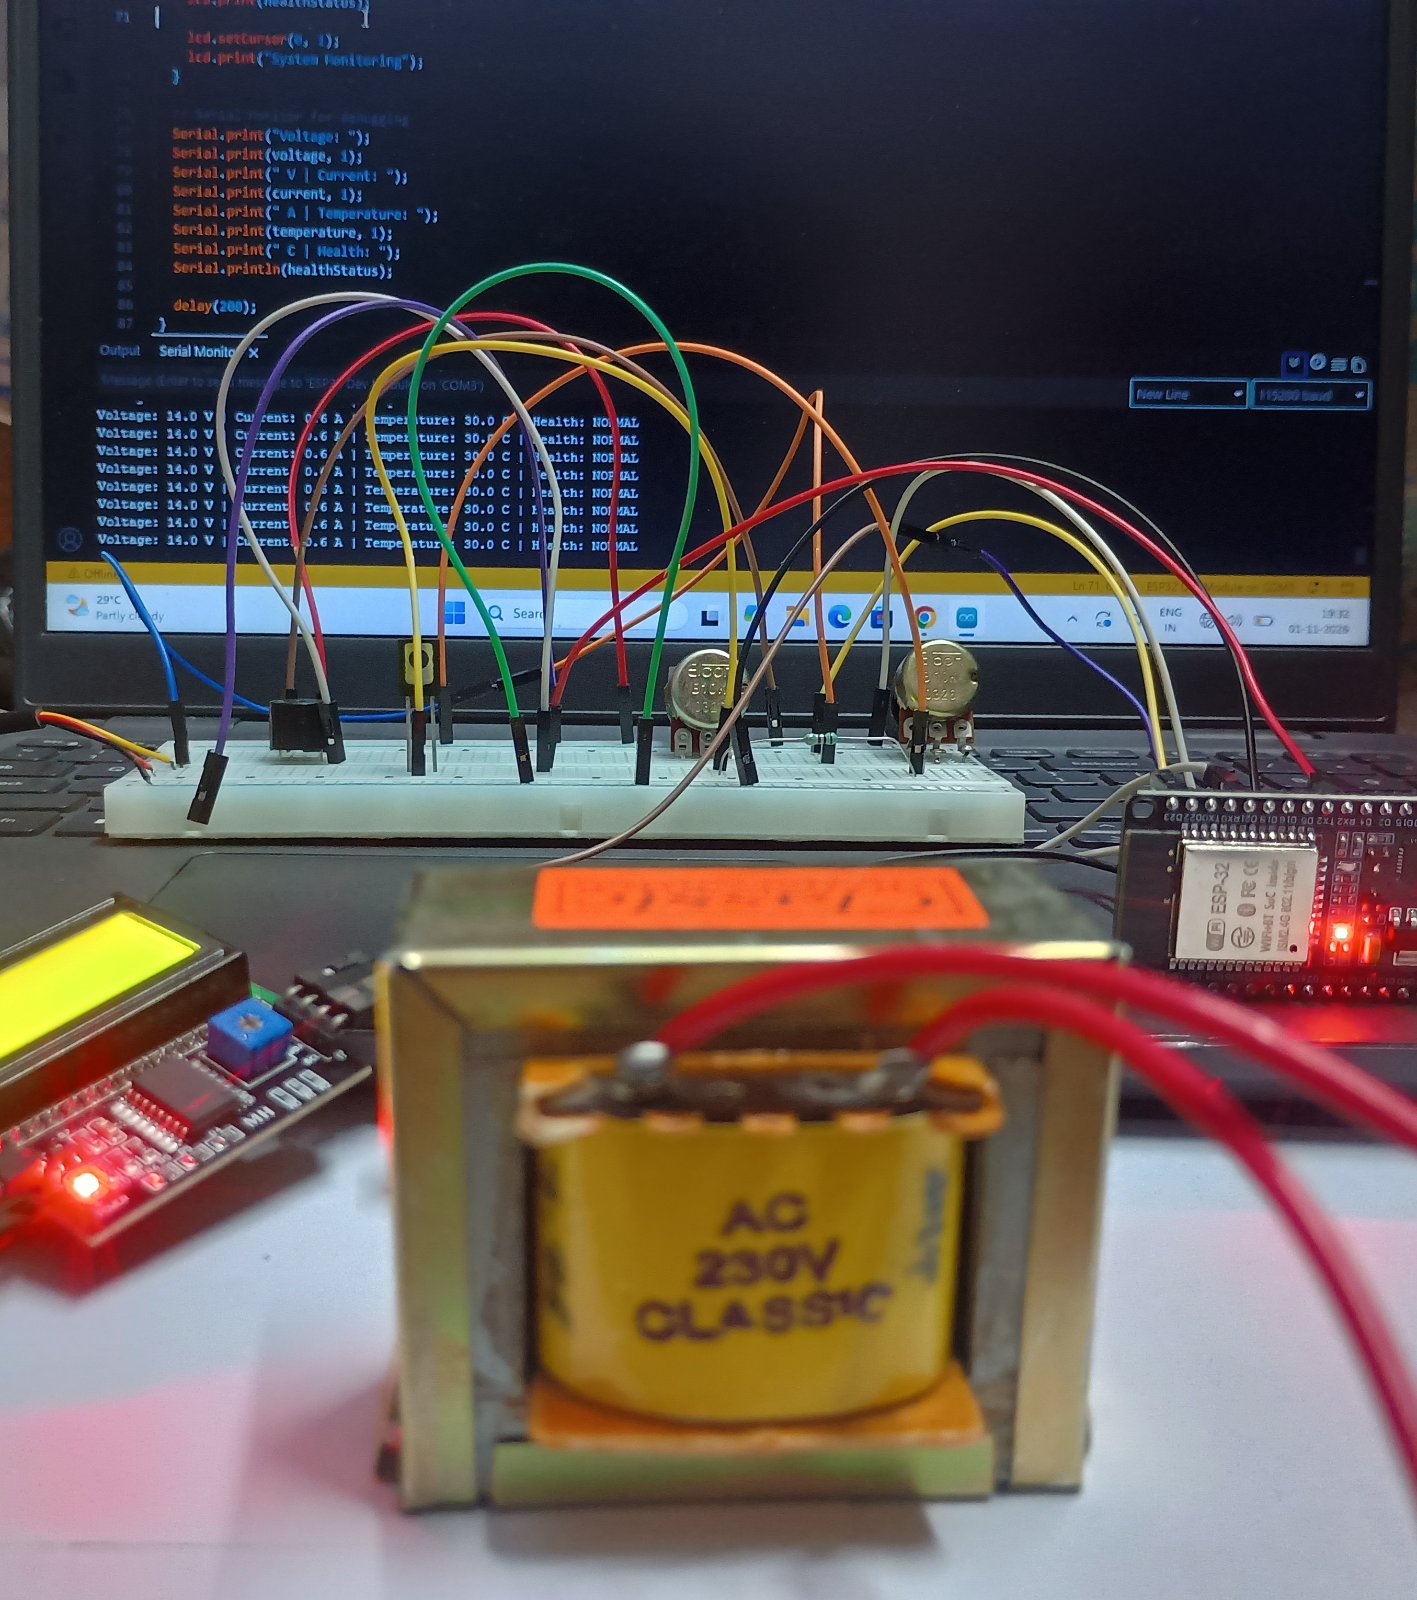
This project builds a real-time health monitoring system for a 230 V / 18-0-18 V AC isolated transformer using an ESP32 microcontroller. The system measures AC voltage and current on the transformer secondary, monitors enclosure temperature with a DS18B20 sensor, and uses statistical anomaly detection to identify abnormal operating conditions. A relay can disconnect the test load, while RGB indicator lights and a piezo buzzer provide visual and auditory feedback.
The guide provides a complete wiring diagram, full parts list with safety specifications, Arduino firmware with web dashboard, and step-by-step assembly instructions for the mains-isolated measurement circuit. Builders will learn how to safely work with AC transformers, calibrate voltage and current sensors, interface multiple I2C devices through a level shifter, and implement condition monitoring logic on an embedded system. The project includes a local web interface to view live measurements and demonstrates all 30 ESP32 header pin assignments.
Wiring diagram
Gather all the parts
Assemble it in 10 steps
1. Use the specified transformer in a safe enclosure
Use a 230 V / 18-0-18 V AC, 1 A isolated transformer installed in a closed mains-rated enclosure by a qualified electrician, with manufacturer-specified primary fuse, strain relief and protective earth where required. No primary wiring belongs on the breadboard or ESP32 circuit. Use A18 and CT for 18 VAC. Individually insulate unused B18; A18 to B18 is 36 VAC and is NOT used here. Power the ESP32 separately by USB. Do not connect either AC output to ESP32 ground.
- Never connect this circuit to exposed mains or a utility transformer. It is an educational prototype
- not certified protection.
2. Build the fused test load loop
With all power unplugged, connect A18 to fuse terminal 1; fuse 2 to ACS712 IP+; IP- to relay COM; relay NO to load terminal 1; load 2 to CT. Use the ACS712 5 A variant. Set the 3.3 V relay module trigger jumper to H. Leave its NC contact unused. Use screw terminals for this loop, not a solderless breadboard.
- The 39 ohm 25 W load dissipates approximately 8.3 W at nominal 18 VAC (more at no-load overvoltage) and gets very hot. Mount it away from wires and people on a heat-resistant surface.
3. Connect the voltage and current measurements
Connect ZMPT101B L to fuse 2 and N to CT. Power both sensor modules from USB 5V and GND. ZMPT OUT goes through rvtop 10 kohm to GPIO32, with rvbottom 15 kohm from GPIO32 to GND. ACS712 VIOUT goes through ritop 10 kohm to GPIO33, with ribottom 15 kohm from GPIO33 to GND. Both dividers reduce a 5 V signal to 3 V maximum. Leave the optional ACS712 FILTER pin unchanged on its breakout.
4. Connect temperature and the relay control
Connect DS18B20 VCC to 3V3, GND to GND, DATA to GPIO4, and the 4.7 kohm pullup between DATA and 3V3. Attach the insulated sensor against the outside of the transformer enclosure, never inside it. This measures case temperature, not winding or oil temperature. Connect relay DC+ to 3V3, DC- to GND and IN to GPIO23. Add the 10 kohm relaydown resistor between IN and GND so the relay stays off during reset. Use a relay module with its own driver and flyback suppression, with coil current within the board regulator's spare capacity.
5. Connect the LCD through the level shifter
Use a standard HD44780 16x2 LCD with PCF8574 I2C backpack at address 0x27. Connect LCD VCC to 5V and GND to GND. Connect level shifter LV to 3V3, HV to 5V, GND to GND, LV1 to GPIO21 and LV2 to GPIO22. Connect HV1 to LCD SDA and HV2 to LCD SCL. Use a BSS138 module with built-in pullups. Adjust the LCD contrast knob if text is invisible.
6. Connect the three lights and alarm
GPIO16 goes through rg 330 ohm to the green LED long leg; GPIO17 through ry 330 ohm to yellow; GPIO18 through rr 330 ohm to red. Each short leg goes to GND. Connect passive piezo SIG to GPIO19 and GND to GND. Green means learned normal, yellow means idle, learning or anomaly, and red means sensor error or a latched trip.
7. Check power and calibrate safely
Check all wiring with power disconnected. Use USB 5 V power capable of 1 A for the ESP32 and modules; do not backfeed a second 5 V supply. Check the board regulator can supply the 3.3 V relay coil. Keep the AC load circuit electrically separate from DC GND. Before enabling monitoring, calibrate against a true-RMS meter following the calibration instructions in step 8. A software trip only opens the demonstration load, not the transformer primary.
- The fuse is required because software and relay contacts can fail. Never deliberately short or overheat the transformer to test this project.
8. Calibrate and operate the demonstration
## Calibration and operation 1. With power off, check every connection. Set relay trigger to H. The normally-open load contact must be open at boot. Secure the hot load on a heat-resistant surface. 2. Deploy firmware. Open Schematik's serial console at 115200 baud, using newline-terminated commands. The load remains OFF at boot, including after a power failure. 3. Power the enclosed transformer. Check the probe is attached to its outside case. Give the temperature sensor two seconds to settle. 4. Measure AC output with a true-RMS meter in voltage mode. Adjust the ZMPT gain so serial `rawVrms` is well above 5 mV, typically 100–500 mV, without SENSOR/clipping alarms. Keep gain low enough to avoid waveform flattening; inspect with an oscilloscope if available. A typical mains-range ZMPT module may need substantial gain at only 18 VAC. 5. Send `v 18.00`, replacing 18.00 with the actual meter voltage. Calibration is stored in ESP32 nonvolatile memory. 6. To calibrate current, disconnect power before inserting a correctly fused AC ammeter **in series** with the load. Never put an ammeter across the transformer. Restore power and send `test`. This enables the known-safe 39 ohm load for at most 60 seconds, with temperature/clipping checks but without calibrated voltage/current protection. Send `i 0.46`, replacing 0.46 with measured AC amps (allowed 0.2–0.8 A). Send `off` when done. Disconnect power before removing the meter and restoring wiring. 7. With calibration completed and the test load connected, send `arm`. Voltage must be 15–22 VAC and case temperature below 55 C. The relay closes and a fresh 60-second baseline is learned. Learn only under known healthy, steady conditions. 8. Send `off` to open the relay. A hard trip is latched until reset; first remove the cause. Calibration survives reset, but arming and learning do not. ## What the program does - Once per second: samples both AC sensor signals over 200 ms; removes their DC offsets and computes RMS. Measures case temperature asynchronously. - Cutoff limits: below 15 VAC, above 22 VAC, above 0.8 A, or at/above 60 C. Invalid temperature or ADC clipping also trips. These thresholds apply to this 18 VAC test circuit, not a full-size transformer. - Software response is approximately one second, not fast short-circuit protection. The physical fuse is essential. Sensor disconnection is not comprehensively detectable; do not rely on this prototype for protection. - The AI demonstration is a tiny on-device statistical anomaly detector: learns mean and variance for voltage/current/temperature over 60 healthy readings, then warns beyond four standard deviations, with minimum noise bands. It does not predict remaining life or diagnose winding faults and has no externally trained model. An anomaly warns; fixed safety limits disconnect. - Green: learned normal; yellow: OFF, TEST, LEARN or anomaly; red: sensor fault or latched trip. Alarm sounds for a sensor fault, anomaly or trip. LCD shows values and status, updating only changed rows. Serial logs provide all readings. - Case temperature is not internal winding temperature. ESP32 ADC noise limits small-current accuracy; verify with a meter. This does not measure power factor, real power, harmonics, oil condition or insulation health. Next: wire with both supplies disconnected, inspect it, plug in USB, press Deploy, then calibrate. Do not test by shorting, exposing mains or overheating the transformer.
9. View the local live dashboard
After powering the ESP32, join its Wi-Fi network Transformer-Monitor using password Monitor12VAC. Open http://192.168.4.1 in a browser. Your phone may say this network has no Internet; stay connected. The page shows calibrated voltage, current, case temperature, state and baseline progress. Null means unavailable or not calibrated. This local dashboard does not send Blynk or Telegram notifications and does not train a predictive AI model. Use the USB serial console for calibration and load control.
10. Identify all 30 ESP32 header pins
Use DOIT ESP32 DevKit V1 with ESP32-WROOM-32 and 15 header pins on each side, NOT a 38-pin DevKitC or WROVER board. The board model's GPIO list does not count power and EN header positions; the physical board has 30 pins. Top view, components facing you, antenna at TOP and USB connector at BOTTOM. Read printed labels before wiring; Dxx means GPIOxx, not a header position number. Left header Right header EN D23 -> relay IN VP (GPIO36) D22 -> LCD SCL via level shifter VN (GPIO39) TX0 (GPIO1), leave free D34 RX0 (GPIO3), leave free D35 D21 -> LCD SDA via level shifter D32 -> voltage D19 -> passive piezo SIG D33 -> current D18 -> red via 330 ohm D25 D5, leave free D26 TX2 (D17) -> yellow via 330 ohm D27 RX2 (D16) -> green via 330 ohm D14 D4 -> DS18B20 DATA D12, leave free D2, leave free D13 D15, leave free GND GND VIN (USB 5V) 3V3 USB BOTTOM D32 and D33 connect ONLY after their respective 10k/15k voltage dividers. VIN is the USB 5 V rail for this circuit, never an AC input. Use GPIO names in the circuit diagram, not physical row numbers. GPIO34/35/36/39 are input-only; leave all unused pins disconnected. The 4.7k resistor joins D4 to 3V3. Existing 12 V calibration is discarded by the revised firmware: calibrate again at 18 VAC before arm.
Review all connections
1. Connections between "transformer" and "ESP32"
2. Connections between "fuse" and "ESP32"
3. Connections between "current" and "ESP32"
4. Connections between "relay" and "ESP32"
5. Connections between "load" and "ESP32"
6. Connections between "voltage" and "ESP32"
7. Connections between "lcd" and "ESP32"
8. Connections between "rvtop" and "ESP32"
9. Connections between "rvbottom" and "ESP32"
10. Connections between "ritop" and "ESP32"
11. Connections between "ribottom" and "ESP32"
12. Connections between "temperature" and "ESP32"
13. Connections between "pullup" and "ESP32"
14. Connections between "shift" and "ESP32"
15. Connections between "relaydown" and "ESP32"
16. Connections between "rg" and "ESP32"
17. Connections between "green" and "ESP32"
18. Connections between "ry" and "ESP32"
19. Connections between "yellow" and "ESP32"
20. Connections between "rr" and "ESP32"
21. Connections between "red" and "ESP32"
22. Connections between "buzzer" and "ESP32"
Deploy the firmware
#include <Arduino.h>
#include <Wire.h>
#include <OneWire.h>
#include <DallasTemperature.h>
#include <LiquidCrystal_I2C.h>
#include <Preferences.h>
#include <WiFi.h>
#include <WebServer.h>
#include <math.h>
OneWire bus(4);
DallasTemperature temp(&bus);
LiquidCrystal_I2C lcd(0x27,16,2);
Preferences prefs;
const int VP=32, IP=33, RELAY=23, GREEN=16, YELLOW=17, RED=18, BUZZ=19;
float vFactor=0, iFactor=0, rawV=0, rawI=0, volts=0, amps=0, temperature=NAN;
bool armed=false, tripped=false, testing=false, clipped=false;
uint32_t testStart=0, tick=0;
int samples=0;
float mean[3]={}, m2[3]={};
String command;
char previous[2][17]={{0},{0}};
WebServer server(80);
String liveState="BOOT";
const char dashboard[] PROGMEM = R"HTML(<!doctype html><html><meta name="viewport" content="width=device-width"><title>Transformer monitor</title><style>body{font:20px sans-serif;max-width:700px;margin:40px auto;padding:16px;background:#102030;color:white}section{padding:20px;background:#20354a;margin:12px 0}strong{color:#7fe0c0}</style><h1>Transformer health demo</h1><section id="values">Connecting...</section><p id="status"></p><p>Isolated 18 VAC educational circuit. Statistical anomaly detection only; not certified protection.</p><p>Load control and calibration are available only through the USB serial console.</p><script>async function update(){try{let r=await fetch('/data');let d=await r.json();document.getElementById('values').textContent='Voltage: '+d.v+' V | Current: '+d.i+' A | Case: '+d.t+' C';document.getElementById('status').textContent='State: '+d.state+' | Baseline: '+d.learn+'/60';}catch(e){document.getElementById('status').textContent='Connection lost — readings unavailable';}}setInterval(update,1500);update();</script></html>)HTML";
void startDashboard(){
 WiFi.mode(WIFI_AP);
 WiFi.softAP("Transformer-Monitor","Monitor12VAC");
 server.on("/",[]{server.send_P(200,"text/html",dashboard);});
 server.on("/data",[]{
  String json="{\"v\":"+String(vFactor>0?String(volts,2):"null")+",\"i\":"+String(iFactor>0?String(amps,3):"null")+",\"t\":"+(isfinite(temperature)?String(temperature,1):String("null"))+",\"state\":\""+liveState+"\",\"learn\":"+String(samples)+"}";
  server.sendHeader("Cache-Control","no-store");server.send(200,"application/json",json);
 });
 server.begin();
 Serial.println("Dashboard: join Transformer-Monitor, password Monitor12VAC; open http://192.168.4.1 (no Internet required)");
}
void line(int row,const char *text){
 char padded[17]; memset(padded,' ',16); padded[16]=0;
 memcpy(padded,text,min((size_t)16,strlen(text)));
 if(strcmp(previous[row],padded)){lcd.setCursor(0,row);lcd.print(padded);strcpy(previous[row],padded);}
}
void acquire(){
 double sv=0,si=0,vv=0,ii=0; unsigned n=0; clipped=false;
 uint32_t start=micros();
 do {
  float v=analogReadMilliVolts(VP),i=analogReadMilliVolts(IP);
  if(v<100 || v>3000 || i<100 || i>3000) clipped=true;
  sv+=v;si+=i;vv+=v*v;ii+=i*i;n++; delayMicroseconds(180);
 }while((uint32_t)(micros()-start)<200000); // ten 50 Hz or twelve 60 Hz cycles
 rawV=sqrt(fmax(0.0,vv/n-(sv/n)*(sv/n)));
 rawI=sqrt(fmax(0.0,ii/n-(si/n)*(si/n)));
 volts=rawV*vFactor;amps=rawI*iFactor;
}
void trip(){tripped=true;armed=false;testing=false;digitalWrite(RELAY,LOW);}
void process(String s){
 s.trim();
 if(s=="test" && !tripped && !clipped && isfinite(temperature) && temperature<55){
  testing=true;armed=false;testStart=millis();digitalWrite(RELAY,HIGH);
  Serial.println("TEST load on for 60 seconds maximum. Use known-safe test load only.");
 }else if(s.startsWith("v ")){
  float ref=s.substring(2).toFloat();
  if(ref>10 && ref<25 && rawV>5 && !clipped){vFactor=ref/rawV;prefs.putFloat("vf",vFactor);Serial.println("Voltage calibrated");}
 }else if(s.startsWith("i ")){
  float ref=s.substring(2).toFloat();
  if(ref>0.2 && ref<0.8 && rawI>5 && testing && !clipped){iFactor=ref/rawI;prefs.putFloat("if",iFactor);Serial.println("Current calibrated");}
 }else if(s=="arm" && vFactor>0 && iFactor>0 && !tripped && !clipped && isfinite(temperature) && temperature<55 && volts>=15 && volts<=22){
  testing=false;armed=true;samples=0;memset(mean,0,sizeof(mean));memset(m2,0,sizeof(m2));digitalWrite(RELAY,HIGH);
  Serial.println("Armed: learning 60 normal readings. Reset or off opens load.");
 }else if(s=="off"){armed=false;testing=false;digitalWrite(RELAY,LOW);}
 else Serial.println("Commands: test, v <meter VAC>, i <meter AAC>, arm, off. Trip is latched: remove fault then reset board.");
}
void setup(){
 digitalWrite(RELAY,LOW);pinMode(RELAY,OUTPUT);
 for(int p:{GREEN,YELLOW,RED})pinMode(p,OUTPUT);
 pinMode(VP,INPUT);pinMode(IP,INPUT);analogReadResolution(12);analogSetAttenuation(ADC_11db);
 Serial.begin(115200);Wire.begin(21,22);lcd.init();lcd.backlight();
 temp.begin();temp.setWaitForConversion(false);temp.requestTemperatures();
 prefs.begin("health18",false);vFactor=prefs.getFloat("vf",0);iFactor=prefs.getFloat("if",0);
 ledcAttach(BUZZ,4000,8);ledcWrite(BUZZ,0);
 line(0,"Transformer demo");line(1,"Load OFF");
 Serial.println("Isolated 18VAC demo only. Calibrate before arm. Commands: test, v 18.0, i 0.46, arm, off");
 startDashboard();
 tick=millis();
}
void loop(){
 server.handleClient();
 while(Serial.available()){
  char c=Serial.read();if(c=='\n'){process(command);command="";}else if(c!='\r' && command.length()<60)command+=c;
 }
 if(testing && millis()-testStart>=60000){testing=false;digitalWrite(RELAY,LOW);}
 if(millis()-tick<1000)return;tick=millis();
 temperature=temp.getTempCByIndex(0);temp.requestTemperatures();
 if(temperature<=-126 || temperature>125)temperature=NAN;
 acquire();
 bool sensorBad=!isfinite(temperature)||clipped;
 if((armed||testing) && (sensorBad || temperature>=60))trip();
 if(armed && (volts<15 || volts>22 || amps>0.8))trip();
 bool anomaly=false;
 if(armed){
  float x[3]={volts,amps,temperature};
  if(samples<60){
   samples++;
   for(int j=0;j<3;j++){float d=x[j]-mean[j];mean[j]+=d/samples;m2[j]+=d*(x[j]-mean[j]);}
  }else{
   const float floorSigma[3]={0.20f,0.07f,1.5f};
   for(int j=0;j<3;j++)if(fabs(x[j]-mean[j])>4*fmax(floorSigma[j],sqrt(m2[j]/59)))anomaly=true;
  }
 }
 const char *state=tripped?"TRIP":sensorBad?"SENSOR":testing?"TEST":!armed?"OFF":samples<60?"LEARN":anomaly?"WARN":"OK";
 liveState=state;
 digitalWrite(GREEN,armed&&samples>=60&&!anomaly);digitalWrite(YELLOW,!tripped&&(!armed||samples<60||anomaly));digitalWrite(RED,tripped||sensorBad);
 ledcWrite(BUZZ,(tripped||anomaly||sensorBad)?128:0);
 char text[48];
 if(vFactor>0 && iFactor>0)snprintf(text,sizeof(text),"%4.1fV %4.2fA",volts,amps);
 else snprintf(text,sizeof(text),"CAL V%3.0f I%3.0f",rawV,rawI);
 line(0,text);snprintf(text,sizeof(text),"%4.1fC %-6s",temperature,state);line(1,text);
 Serial.printf("V=%.2f I=%.3f T=%.2f rawVrms=%.2fmV rawIrms=%.2fmV state=%s learn=%d/60\n",volts,amps,temperature,rawV,rawI,state,samples);
}
Remix this project
Make it yours in one click
Open a full copy of this project in your own Schematik workspace, diagram, code, parts, and assembly steps included. Swap the sensor, add features, or redesign the whole thing with AI. The author's original stays untouched.