Community project
Air Quality Monitoring
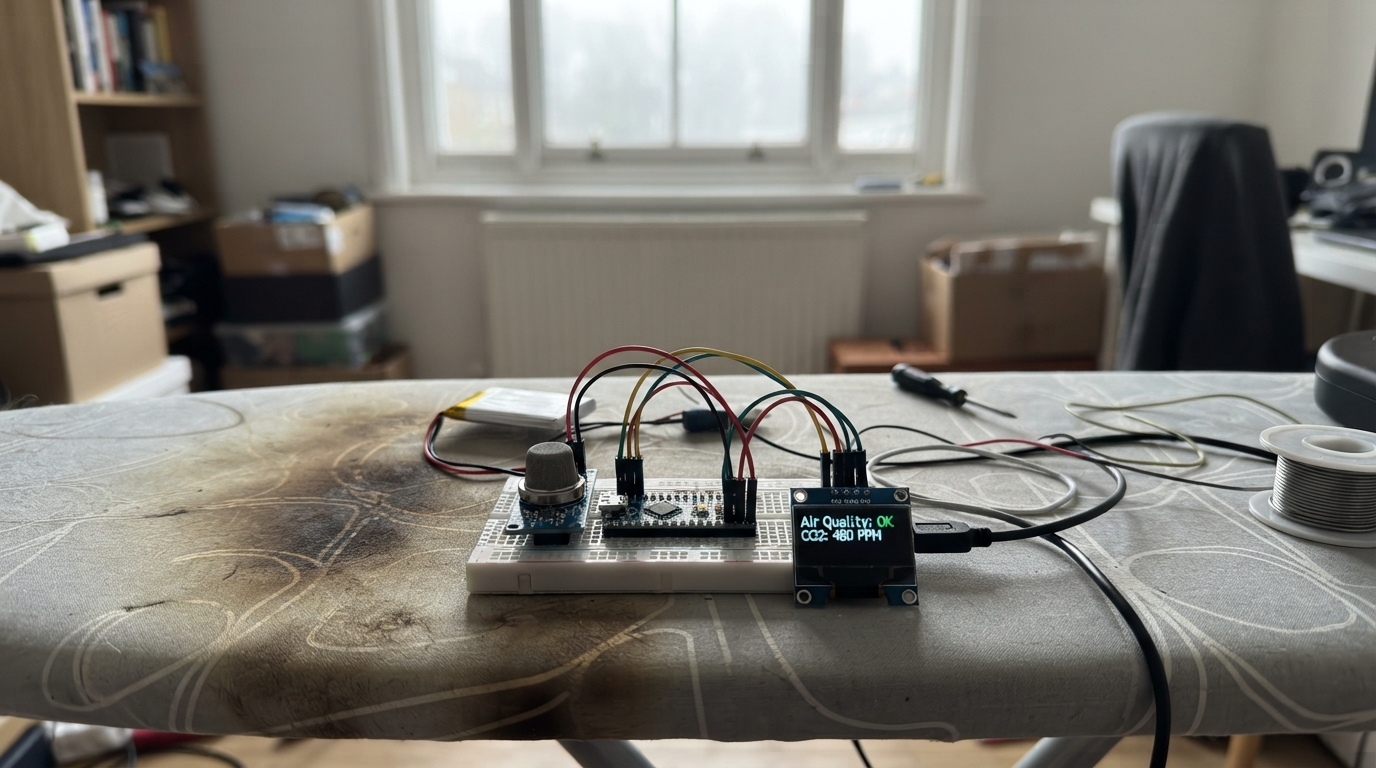
This project uses an MQ-135 gas sensor connected to an Arduino Uno to monitor air quality by detecting changes in ambient gas levels. The sensor outputs an analog voltage that varies with air composition, allowing the Arduino to sample and log readings over time.
This guide provides a wiring diagram, parts list, and complete firmware to get the sensor reading within minutes. The sketch samples the MQ-135 every second, averages multiple readings for stability, and outputs raw sensor values and approximate voltage over serial. Note that uncalibrated readings reflect relative air quality changes rather than absolute gas concentrations in ppm.
Wiring diagram
Gather all the parts
Assemble it in 2 steps
1. Connect the MQ-135 module
Unplug USB first. Use the common MQ-135 module with VCC, GND, AO (or A0), and DO pins. Connect VCC to the UNO R4 WiFi 5V pin, GND to GND, and AO to A0. Leave DO disconnected.
- Use a module, not a bare six-leg sensor. Wrong power wiring can damage the board or sensor.
- The sensor heater gets hot. Keep it clear of skin and flammable materials. Do not test with a flame or released fuel gas.
2. Power and let the sensor settle
Power the UNO through USB. Leave the module in ventilated clean air to warm up; readings drift during warm-up. Allow at least 24-48 hours of initial conditioning and follow the module maker's instructions for subsequent warm-up.
- Readings are relative raw signal levels, not a calibrated gas concentration. Several gases, humidity and temperature affect them.
- This project is not a smoke, carbon-monoxide, or gas-leak alarm. Use a certified alarm for safety.
Review all connections
1. Connections between "gas" and "Arduino"
Deploy the firmware
#include <Arduino.h>

constexpr int GAS_PIN = A0;
constexpr unsigned long SAMPLE_INTERVAL_MS = 1000;
unsigned long lastSample = 0;

void setup() {
  Serial.begin(115200);
  analogReadResolution(10); // Explicit 0..1023 readings on UNO R4.
  pinMode(GAS_PIN, INPUT);
  // Do not wait for Serial: sensing also runs without a computer connected.
}

void loop() {
  const unsigned long now = millis();
  if (now - lastSample < SAMPLE_INTERVAL_MS) return;
  lastSample = now;

  unsigned long total = 0;
  for (int i = 0; i < 16; ++i) {
    total += analogRead(GAS_PIN);
    delay(2);
  }
  const float raw = total / 16.0f;
  const float volts = raw * (5.0f / 1023.0f);
  Serial.print("MQ135 raw: ");
  Serial.print(raw, 1);
  Serial.print(" / 1023 | Approx. voltage: ");
  Serial.print(volts, 3);
  Serial.println(" V | Uncalibrated: not ppm or a safety reading");
}
Remix this project
Make it yours in one click
Open a full copy of this project in your own Schematik workspace, diagram, code, parts, and assembly steps included. Swap the sensor, add features, or redesign the whole thing with AI. The author's original stays untouched.