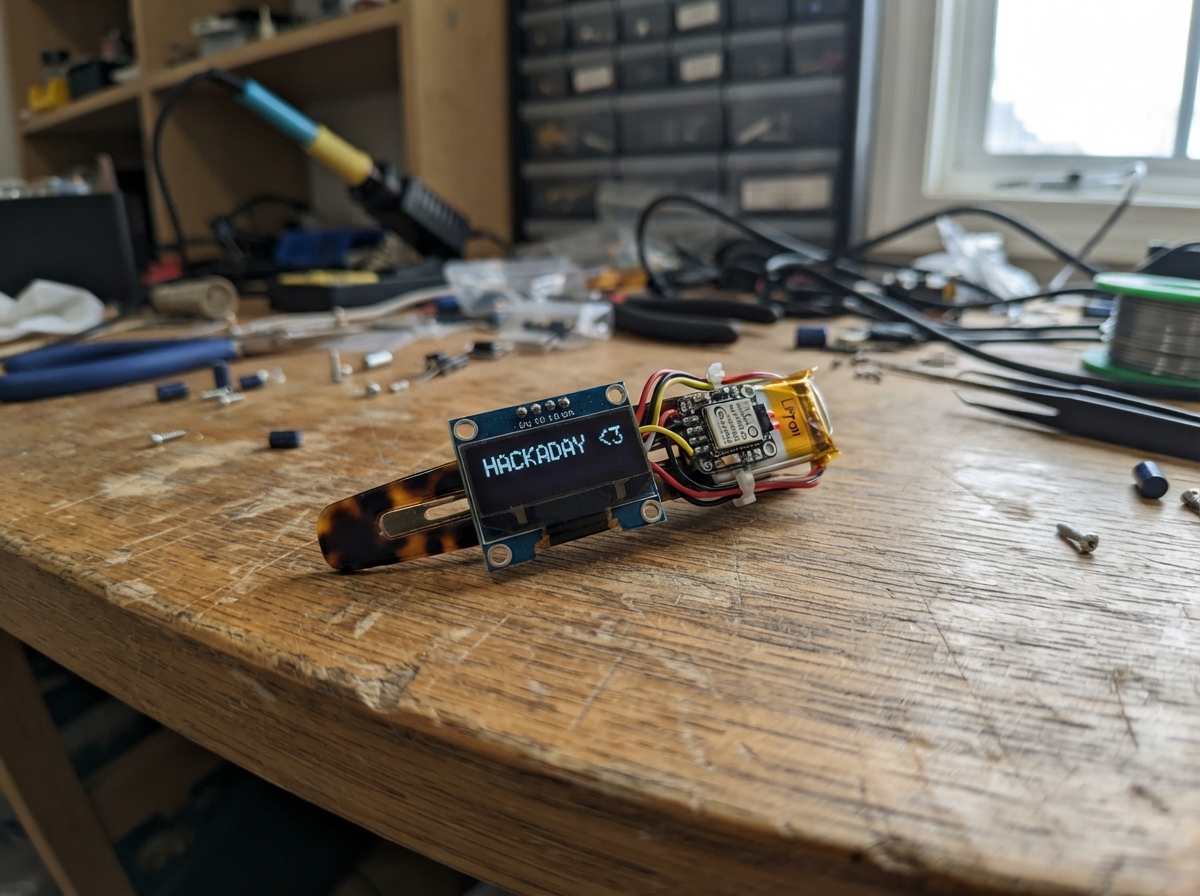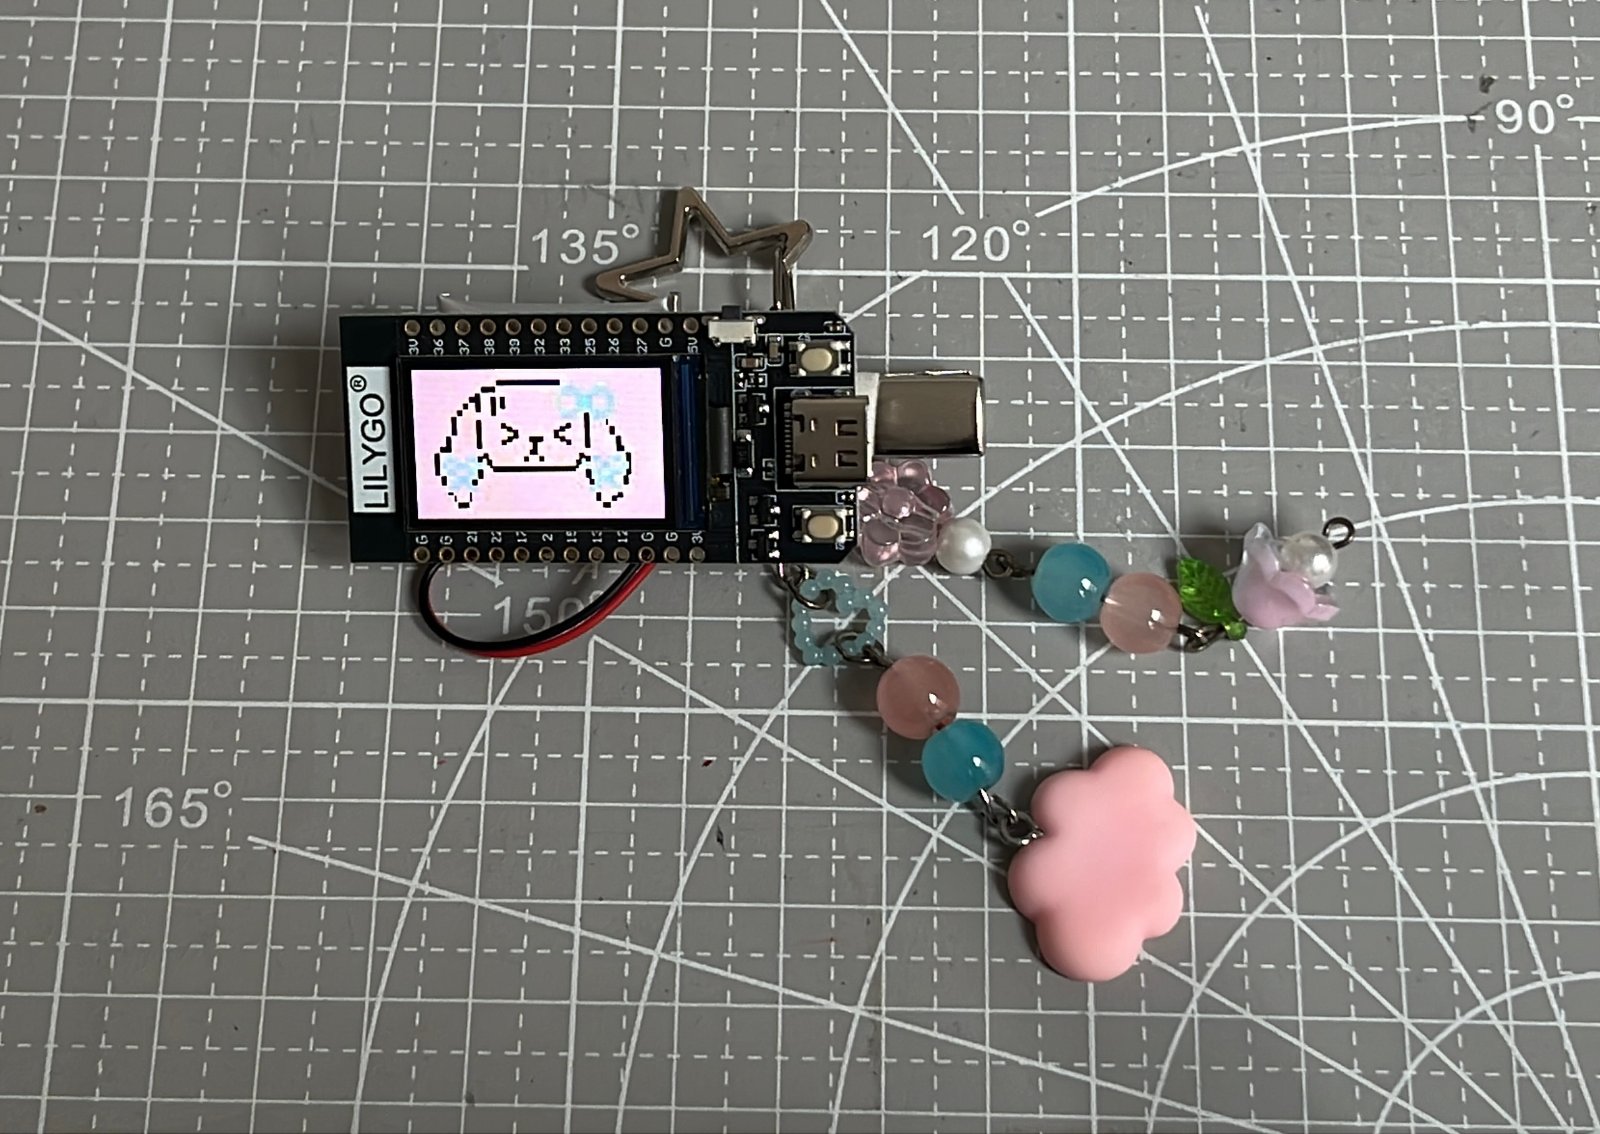
This wearable mood tracker is a tiny ESP32-powered hairclip or keychain that displays pixel art bunny expressions. Use the built-in buttons to cycle through different moods and watch smooth animated transitions between states. The device runs on a compact 350 mAh LiPo battery, making it light enough for everyday wear.
This guide provides a complete parts list, wiring diagram for the display and battery connections, and the full Arduino firmware with pixel art animations. Assembly is straightforward: connect the battery to the ESP32, program the firmware, mount everything on a proto board backing, and glue on the hair clip or keychain hardware. No soldering required for basic assembly.
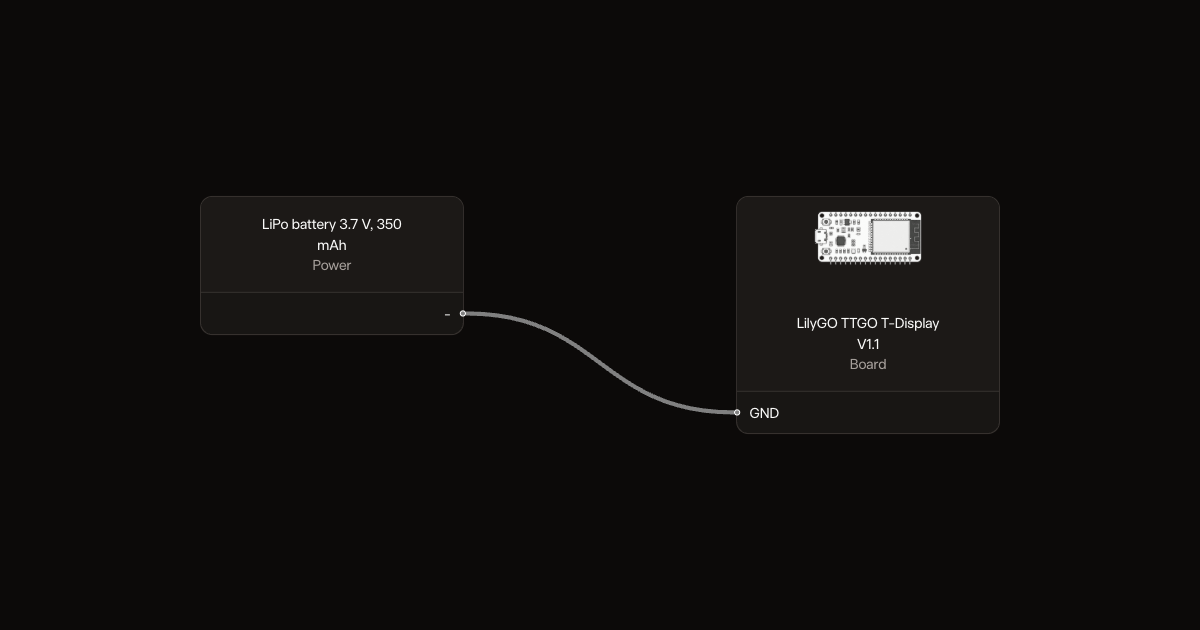
Wiring diagram
Gather all the parts
Assemble it in 6 steps
1. Use the built-in buttons
No extra wires are needed. The top button changes to the next image. Press the bottom button once to turn the screen off and put the board into low-power sleep; press the bottom button again to wake it and show the first image again.
- Use a quick, firm tap. The bottom button is now only for off and wake, so it will not change the image.
- While the board is asleep the screen stays blank; this is expected and saves battery power.
2. Power the board
Plug the TTGO T-Display into USB for programming or power. After waking from sleep, the display starts again with the first image.
- The board’s built-in screen and buttons are already connected inside the board.
- Use a USB cable that carries data when you want to press Deploy; some charging-only cables cannot program the board.
3. Connect the battery
If your LiPo already has a Micro JST 1.25 mm connector that fits the board, plug it in and skip ahead. Otherwise solder the red wire to the battery positive pad and the black wire to ground.
- Buying a battery with the right connector removes the only soldering in this build.
- Never let the bare red and black wires touch. A shorted LiPo can be damaged permanently and can vent.
- Check polarity against the board silkscreen, not against a photo. Connector wiring varies between batteries and reversing it will kill the board.
4. Hold it together for a first wear
Put a rubber band around the battery and the board so the battery sits flat against the back. This survives movement and costs nothing.
- Tape looks fine on the bench but peels within an hour of wearing it, because the battery hangs off the back and every head movement works it loose.
5. Add a proto board backing
For a version that lasts, solder female header rows to a small piece of proto board and plug the T-Display into them. You get a flat rigid back, somewhere for the battery to sit, and you can pull the board off later to reuse it.
- Dry-fit the headers against the board before soldering so the spacing lines up.
6. Glue on the hair clip
Super glue the metal hair clip to the back of the proto board.
- Let the glue cure fully before wearing it.
- Glue the flat plate of the clip, never the hinge. Adhesive in the hinge means the clip will not open again.
Review all connections
1. Connections between "battery" and "ESP32"
Deploy the firmware
#include <Arduino.h>
#include <Arduino_GFX_Library.h>
#include <esp_sleep.h>
#include "pixel_art.h"


constexpr int TFT_SCLK = 18;
constexpr int TFT_MOSI = 19;
constexpr int TFT_CS = 5;
constexpr int TFT_DC = 16;
constexpr int TFT_RST = 23;
constexpr int TFT_BL = 4;
constexpr int BUTTON_NEXT = 35;
constexpr int BUTTON_BOTTOM = 0;
constexpr uint16_t BLACK = 0x0000;
constexpr uint32_t DEBOUNCE_MS = 35;

Arduino_DataBus *bus = new Arduino_ESP32SPI(TFT_DC, TFT_CS, TFT_SCLK, TFT_MOSI, GFX_NOT_DEFINED);
Arduino_GFX *display = new Arduino_ST7789(bus, TFT_RST, 1, true, 135, 240, 52, 40, 53, 40);

uint8_t imageIndex = 0;
bool previousTopReading = HIGH;
bool stableTopState = HIGH;
uint32_t lastTopChange = 0;
bool previousBottomReading = HIGH;
bool stableBottomState = HIGH;
bool bottomButtonArmed = true;
uint32_t lastBottomChange = 0;
// Cached source-pixel colors avoid resending unchanged 3x3 blocks.
// Artwork stays untouched; only the short transition adds a glittering wave.
uint16_t rendered[IMAGE_WIDTH * IMAGE_HEIGHT];
bool cacheValid = false;
bool transitioning = false;
uint8_t outgoingIndex = 0;
uint32_t transitionStarted = 0;
uint32_t lastAnimationFrame = 0;
constexpr uint32_t TRANSITION_MS = 950;
constexpr uint32_t FRAME_MS = 25;

void drawImage() {
  constexpr int scale = 3;
  static_assert(IMAGE_WIDTH * scale == 240 && IMAGE_HEIGHT * scale == 135,
                "Artwork must fill the screen at exactly 3x");
  const uint32_t elapsed = millis() - transitionStarted;
  const bool active = transitioning && elapsed < TRANSITION_MS;
  const int progress = active ? int(elapsed * 160 / TRANSITION_MS) - 16 : 160;
  const uint16_t *pixels = IMAGE_SEQUENCE[imageIndex];
  const uint16_t *oldPixels = IMAGE_SEQUENCE[outgoingIndex];
  for (int y = 0; y < IMAGE_HEIGHT; ++y) {
    for (int x = 0; x < IMAGE_WIDTH; ++x) {
      const int i = y * IMAGE_WIDTH + x;
      uint16_t color = pgm_read_word(&pixels[i]);
      if (active) {
        // Diagonal, scattered reveal; every effect pixel remains a hard 3x3 block.
        const uint32_t hash = uint32_t(x * 73856093u) ^ uint32_t(y * 19349663u);
        const int edge = x + y + int(hash % 13) - 6;
        const int distance = edge - progress;
        if (distance > 3) color = pgm_read_word(&oldPixels[i]);
        else if (distance >= -3) {
          const uint32_t twinkle = hash ^ (elapsed / FRAME_MS * 83492791u);
          if ((twinkle % 5) == 0) color = 0xFFFF;       // white sparkle
          else if ((twinkle % 7) == 0) color = 0xFFE0;  // gold sparkle
          else if (distance >= 0) color = pgm_read_word(&oldPixels[i]);
        }
      }
      if (!cacheValid || rendered[i] != color) {
        display->fillRect(x * scale, y * scale, scale, scale, color);
        rendered[i] = color;
      }
    }
  }
  cacheValid = true;
  if (!active) transitioning = false;
}

void nextImage() {
  outgoingIndex = imageIndex;
  imageIndex = (imageIndex + 1) % IMAGE_COUNT;
  transitionStarted = millis();
  lastAnimationFrame = transitionStarted;
  transitioning = true;
  drawImage();
}

void powerOff() {
  // The press that switches the board off holds GPIO0 low. Wait for its release
  // before arming GPIO0, otherwise the ESP32 would wake immediately.
  display->fillScreen(BLACK);
  digitalWrite(TFT_BL, LOW);
  while (digitalRead(BUTTON_BOTTOM) == LOW) {
    delay(10);
  }
  delay(DEBOUNCE_MS);
  esp_sleep_enable_ext0_wakeup(static_cast<gpio_num_t>(BUTTON_BOTTOM), LOW);
  esp_deep_sleep_start();
}

void setup() {
  pinMode(TFT_BL, OUTPUT);
  digitalWrite(TFT_BL, HIGH);
  pinMode(BUTTON_NEXT, INPUT);
  pinMode(BUTTON_BOTTOM, INPUT_PULLUP);

  // A deep-sleep wake happens while the bottom button is still held down.
  // Do not treat that same press as a new request to switch off again.
  previousTopReading = stableTopState = digitalRead(BUTTON_NEXT);
  previousBottomReading = stableBottomState = digitalRead(BUTTON_BOTTOM);
  bottomButtonArmed = (stableBottomState == HIGH);

  display->begin();
  drawImage();
}

void handleButton(bool reading, bool &previousReading, bool &stableState,
                  uint32_t &lastChange) {
  const uint32_t now = millis();
  if (reading != previousReading) {
    lastChange = now;
    previousReading = reading;
  }
  if ((now - lastChange) >= DEBOUNCE_MS && reading != stableState) {
    stableState = reading;
    if (stableState == LOW) {
      // Each top-button press changes the image exactly once.
      nextImage();
    }
  }
}

void loop() {
  const uint32_t now = millis();
  // The top button cycles through all six images. The bottom button is power only.
  handleButton(digitalRead(BUTTON_NEXT), previousTopReading, stableTopState,
               lastTopChange);

  const bool bottomReading = digitalRead(BUTTON_BOTTOM);
  if (!bottomButtonArmed) {
    // The wake press must be released before a later press can switch off again.
    if (bottomReading == HIGH) {
      bottomButtonArmed = true;
      previousBottomReading = HIGH;
      stableBottomState = HIGH;
      lastBottomChange = now;
    }
  } else {
    if (bottomReading != previousBottomReading) {
      lastBottomChange = now;
      previousBottomReading = bottomReading;
    }
    if ((now - lastBottomChange) >= DEBOUNCE_MS && bottomReading != stableBottomState) {
      stableBottomState = bottomReading;
      if (stableBottomState == LOW) {
        // One bottom-button press turns the screen off and enters deep sleep.
        // That same button is configured as the wake source in powerOff().
        powerOff();
      }
    }
  }

  // Nonblocking animation: both buttons remain polled between frames.
  if (transitioning && millis() - lastAnimationFrame >= FRAME_MS) {
    lastAnimationFrame = millis();
    drawImage();
  }
  delay(1);

}
Remix this project
Make it yours in one click
Open a full copy of this project in your own Schematik workspace, diagram, code, parts, and assembly steps included. Swap the sensor, add features, or redesign the whole thing with AI. The author's original stays untouched.