Community project
DIY Android Foldable Display Case
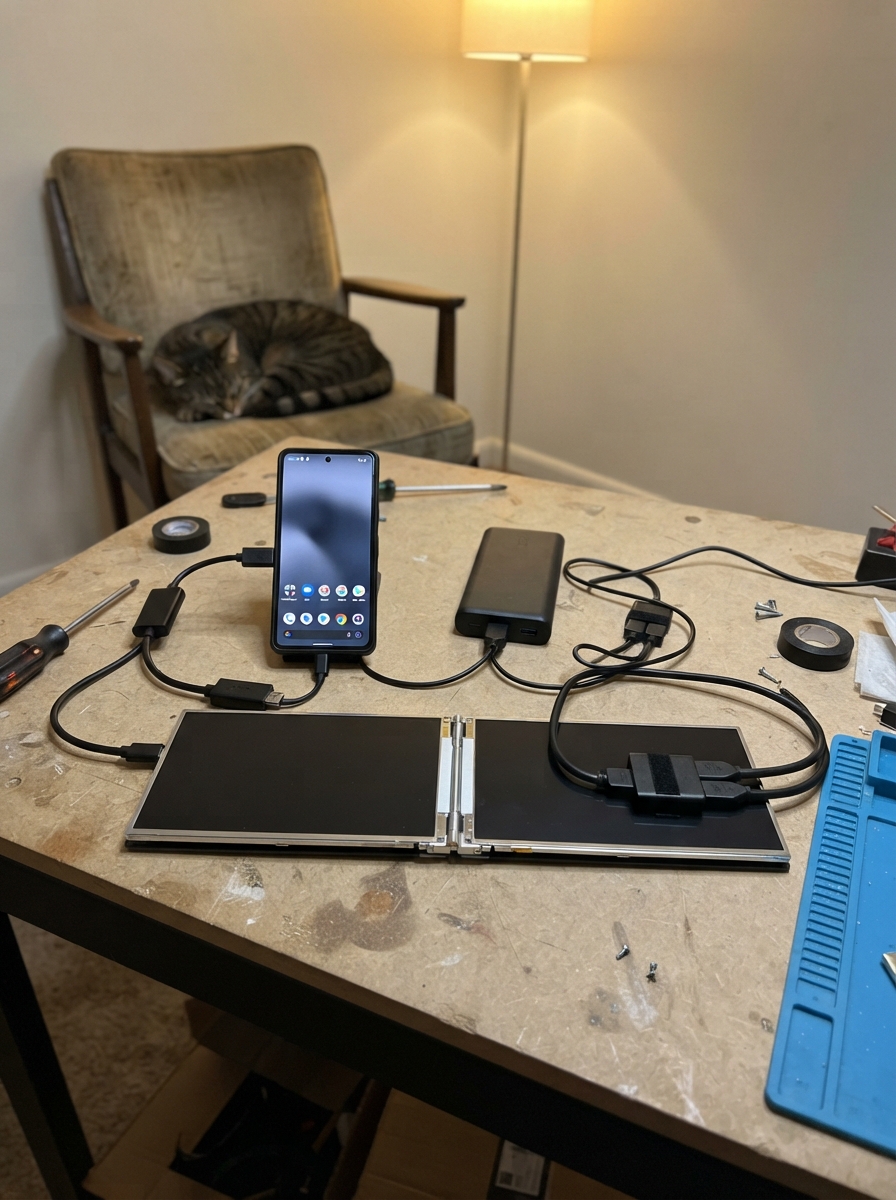
This project transforms a compatible Android phone into a dual-screen portable workstation by mounting two 7-inch HDMI displays in a hinged enclosure. The phone connects via USB-C DisplayPort Alt Mode to mirror or extend its display across both screens, while a power bank supplies all the power needed for the displays and phone charging through a single USB-C connection.
This guide provides a complete parts list, wiring diagram showing how to route HDMI and power cables through the hinge assembly, and step-by-step instructions for assembling the display case. Builders will learn how to integrate the HDMI splitter, power distribution, and adapter components to create a functional dual-screen setup that folds flat for portability.
Wiring diagram

Gather all the parts
Assemble it in 6 steps
1. Prepare the two display halves
Place display_left_1 and display_right_1 face down on a clean soft cloth. Make two rigid backing plates that match the panels, then attach each panel using only its mounting holes and short screws. Keep every screw away from the bare circuit boards on the rear of the panels.
- Leave a small opening near each panel's HDMI and 5 V sockets so cables can plug in after mounting.
- A 3D-printed frame or thin plastic sheet works well as a backing plate.
- Do not press on the front glass or drive a screw into a display circuit board — either can crack or permanently damage the panel.
2. Join the screens with the hinge
Fasten hinge_1 between the inner long edges of the two backing plates. Set the hinge so the screens face outward when the assembly is opened like a book, then slowly open and close it before tightening the screws. Leave a narrow gap between the panels so their frames do not collide.
- Open the assembly flat before checking that both screen faces line up.
- Add a soft strip of tape along the inner edges so the frames do not rub when closed.
- Do not place the hinge over a screen's flexible cable or rear circuit board — pinching a cable can stop that panel from working.
3. Route the HDMI picture cables
Connect the HDMI OUT socket of pd_hub_1 to the HDMI IN socket of hdmi_splitter_1. Connect HDMI OUT 1 on hdmi_splitter_1 to the HDMI socket on display_left_1, and HDMI OUT 2 to the HDMI socket on display_right_1. Secure the HDMI cables to the backs of the panels with removable cable clips, leaving a gentle loose loop beside the hinge so it can open and close.
- Label the two HDMI cables left and right before hiding them in the case.
- Use short, flexible HDMI cables; stiff cables make the folding case hard to close.
- Do not sharply bend or trap an HDMI cable in the hinge — a damaged cable causes a blank or flickering picture.
4. Connect the display power
Plug the USB-A OUT cable from power_bank_1 into the 5V IN socket of usb_power_splitter_1. Plug 5V OUT 1 into the 5 V socket of display_left_1, 5V OUT 2 into the 5 V socket of display_right_1, and 5V OUT 3 into the 5V IN socket of hdmi_splitter_1. These connections provide power; their USB shells also carry the ground return.
- Keep the power bank and splitter in a rear pocket or pouch so their weight does not hang from the screens.
- Use a power bank rated for at least 20 W; weak supplies may make one or both displays turn off.
- Use only 5 V USB power at the display and splitter sockets — higher voltage can damage them.
5. Connect the phone last
Connect USB-C OUT on power_bank_1 to the PD IN socket of pd_hub_1. With the displays already powered, plug the phone_1 USB-C socket into the HOST USB-C plug on pd_hub_1. The phone should then send its external picture through the adapter to both panels.
- Unlock the phone and choose its external-display or desktop mode if it asks.
- The two panels intentionally show the same picture, so the fold is a mirrored visual effect rather than one seamless extra-wide screen.
- Plug the adapter into the phone gently and do not use the phone's USB-C connector as a handle — side force can damage the phone socket.
6. Test before closing the case
Turn on power_bank_1, confirm that both display panels show the same phone picture, then fold and unfold the assembly slowly while watching the cables. Only fit the rear cover or cable straps after the picture stays stable in both positions.
- If only one panel lights, swap its HDMI cable with the other output to locate a cable, panel, or splitter problem.
- This accessory does not alter the phone's own screen and does not make two touch panels behave as one phone touchscreen.
- Stop if a cable pulls tight during folding — continued pulling can tear a connector from a display board.
Review all connections
1. Connections between "pd_hub_1" and "ESP32"
2. Connections between "hdmi_splitter_1" and "ESP32"
3. Connections between "power_bank_1" and "ESP32"
4. Connections between "usb_power_splitter_1" and "ESP32"
5. Connections between "display_left_1" and "ESP32"
6. Connections between "display_right_1" and "ESP32"
7. Connections between "phone_1" and "ESP32"
Deploy the firmware
// This project is a cable-and-display accessory. It has no microcontroller-controlled functions.
// The selected development board is not required for normal operation.
void setup() {
}

void loop() {
}
Remix this project
Make it yours in one click
Open a full copy of this project in your own Schematik workspace — diagram, code, parts, and assembly steps included. Swap the sensor, add features, or redesign the whole thing with AI. The author's original stays untouched.
Related projects

Create A Complete Electrical Schematic Esp32 Sma
ESP32 · September 17, 2026Ayansh Agrawal
ESP32 Kare Ekran Projeleri
ESP32 · September 16, 2026Seref Ai
Component Qty --------------------------- ------
ESP32 · September 16, 2026Yathartha Chakrawal