Community project
Lobster Companion Pet Bot
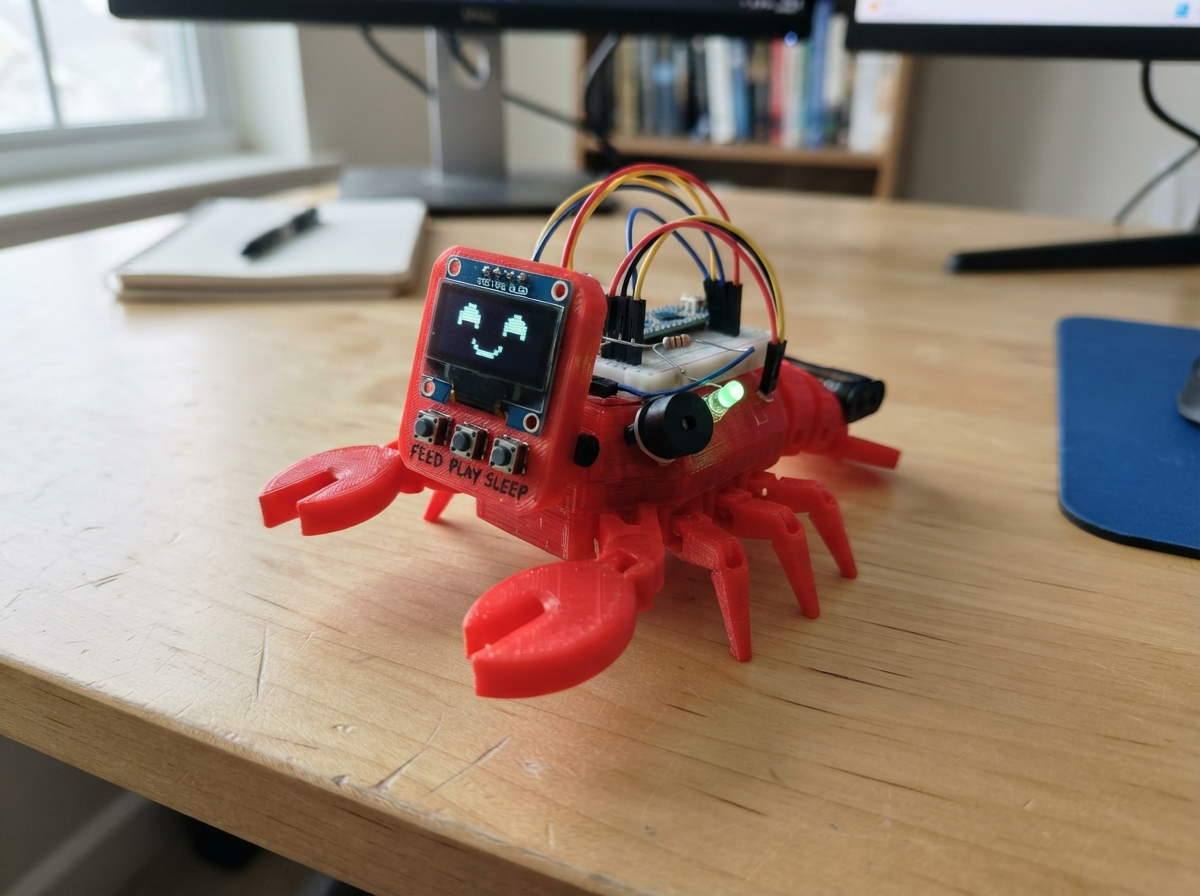
Build a digital lobster companion that lives on an ESP32-powered OLED display and responds to care interactions. This tiny pet cycles through moods—happy, hungry, sleepy, bored, and cranky—based on how well it's fed, played with, and rested. The guide includes a complete wiring diagram, parts list, Arduino firmware with mood logic, and step-by-step assembly instructions to get the lobster bot up and interacting within minutes.
Press the Feed button to keep your lobster happy and boost its care score, trigger Play for entertainment and mood boosts, or hit Sleep to let it rest. The piezo buzzer chirps cheerfully with each interaction, the status LED provides visual feedback, and the SSD1306 face displays your pet's current mood with ASCII expressions. Perfect for learning ESP32 programming, I2C communication, and simple state-machine logic in a fun, tactile project.
Wiring diagram

Gather all the parts
Assemble it in 4 steps
1. Wire the OLED face display
Connect OLED VCC to 3.3V, GND to ground, SDA to GPIO21, and SCL to GPIO22.
- Confirm the I2C address — most modules use 0x3C.
2. Add the three care buttons
Wire Feed button between GPIO32 and GND, Play button between GPIO33 and GND, and Sleep button between GPIO25 and GND. Internal pull-ups are enabled in code.
- Color-code the buttons (green=feed, blue=play, purple=sleep) for easier identification.
3. Connect buzzer and status LED
Wire piezo buzzer signal to GPIO26 (other lead to GND). Connect status LED anode to GPIO27 through a 220 Ω resistor, cathode to GND.
- The LED blinks fast when cranky, slow when sleepy, and stays solid when happy.
4. Upload and interact
Flash the sketch. ClawdBot starts happy — if you ignore it for 30 seconds it gets hungry, then bored, then cranky. Press the buttons to keep it happy and maintain the care score.
- Adjust the idle thresholds in code to make ClawdBot needier or more independent.
Review all connections
1. Connections between "clawdbot-oled-1" and "ESP32"
2. Connections between "feed-button-1" and "ESP32"
3. Connections between "play-button-1" and "ESP32"
4. Connections between "sleep-button-1" and "ESP32"
5. Connections between "clawdbot-buzzer-1" and "ESP32"
6. Connections between "clawdbot-led-1" and "ESP32"
7. Connections between "clawdbot-tamagotchi-220-ohm-resistor-1" and "ESP32"
Deploy the firmware
#include <Wire.h>
#include <Adafruit_GFX.h>
#include <Adafruit_SSD1306.h>

#define SDA_PIN 21
#define SCL_PIN 22
#define BTN_FEED 32
#define BTN_PLAY 33
#define BTN_SLEEP 25
#define BUZZER_PIN 26
#define STATUS_LED 27

Adafruit_SSD1306 display(128, 64, &Wire, -1);

enum Mood { HAPPY, HUNGRY, SLEEPY, BORED, CRANKY };
Mood mood = HAPPY;
unsigned long lastCareMs = 0;
unsigned long lastBtnMs = 0;
unsigned long lastDecayMs = 0;
int careScore = 100;

const char* moodName(Mood m) {
  switch (m) {
    case HAPPY:  return "Happy  ^_^";
    case HUNGRY: return "Hungry >_<";
    case SLEEPY: return "Sleepy -_-";
    case BORED:  return "Bored  ._.";
    case CRANKY: return "Cranky !!!";
    default:     return "Unknown";
  }
}

void playTone(int freq, int dur) {
  tone(BUZZER_PIN, freq, dur);
  delay(dur + 10);
  noTone(BUZZER_PIN);
}

void feedAction() {
  playTone(1760, 60);
  playTone(2100, 60);
  mood = HAPPY;
  careScore = min(100, careScore + 30);
  lastCareMs = millis();
}

void playAction() {
  playTone(1480, 50);
  playTone(1760, 50);
  playTone(2200, 60);
  mood = HAPPY;
  careScore = min(100, careScore + 20);
  lastCareMs = millis();
}

void sleepAction() {
  playTone(980, 90);
  playTone(780, 120);
  mood = SLEEPY;
  careScore = min(100, careScore + 15);
  lastCareMs = millis();
}

void setup() {
  Serial.begin(115200);
  delay(100);

  Wire.begin(SDA_PIN, SCL_PIN);
  display.begin(SSD1306_SWITCHCAPVCC, 0x3C);
  display.setTextSize(1);
  display.setTextColor(SSD1306_WHITE);

  pinMode(BTN_FEED, INPUT_PULLUP);
  pinMode(BTN_PLAY, INPUT_PULLUP);
  pinMode(BTN_SLEEP, INPUT_PULLUP);
  pinMode(BUZZER_PIN, OUTPUT);
  pinMode(STATUS_LED, OUTPUT);
  digitalWrite(STATUS_LED, HIGH);

  lastCareMs = millis();
  Serial.println("ClawdBot ready");
}

void loop() {
  unsigned long idleMs = millis() - lastCareMs;
  unsigned long now = millis();

  if (idleMs > 90000) {
    mood = CRANKY;
    if (now - lastDecayMs >= 1000) {
      careScore = max(0, careScore - 1);
      lastDecayMs = now;
    }
  }
  else if (idleMs > 60000) mood = BORED;
  else if (idleMs > 30000) mood = HUNGRY;

  if (now - lastBtnMs > 200) {
    if (!digitalRead(BTN_FEED))  { feedAction();  lastBtnMs = now; }
    if (!digitalRead(BTN_PLAY))  { playAction();  lastBtnMs = now; }
    if (!digitalRead(BTN_SLEEP)) { sleepAction(); lastBtnMs = now; }
  }

  display.clearDisplay();
  display.setCursor(0, 0);
  display.println("  ClawdBot Tamagochi");
  display.println("--------------------");
  display.print("Mood:  ");
  display.println(moodName(mood));
  display.printf("Care:  %d%%\n", careScore);
  display.printf("Idle:  %lus\n", idleMs / 1000);
  display.println();
  display.println("Feed / Play / Sleep");
  display.display();

  if (mood == CRANKY) {
    digitalWrite(STATUS_LED, (millis() / 180) % 2);
  } else if (mood == SLEEPY) {
    digitalWrite(STATUS_LED, (millis() / 800) % 2);
  } else {
    digitalWrite(STATUS_LED, HIGH);
  }

  delay(30);
}
Remix this project
Make it yours in one click
Open a full copy of this project in your own Schematik workspace — diagram, code, parts, and assembly steps included. Swap the sensor, add features, or redesign the whole thing with AI. The author's original stays untouched.