Community project
OLED Command Remote
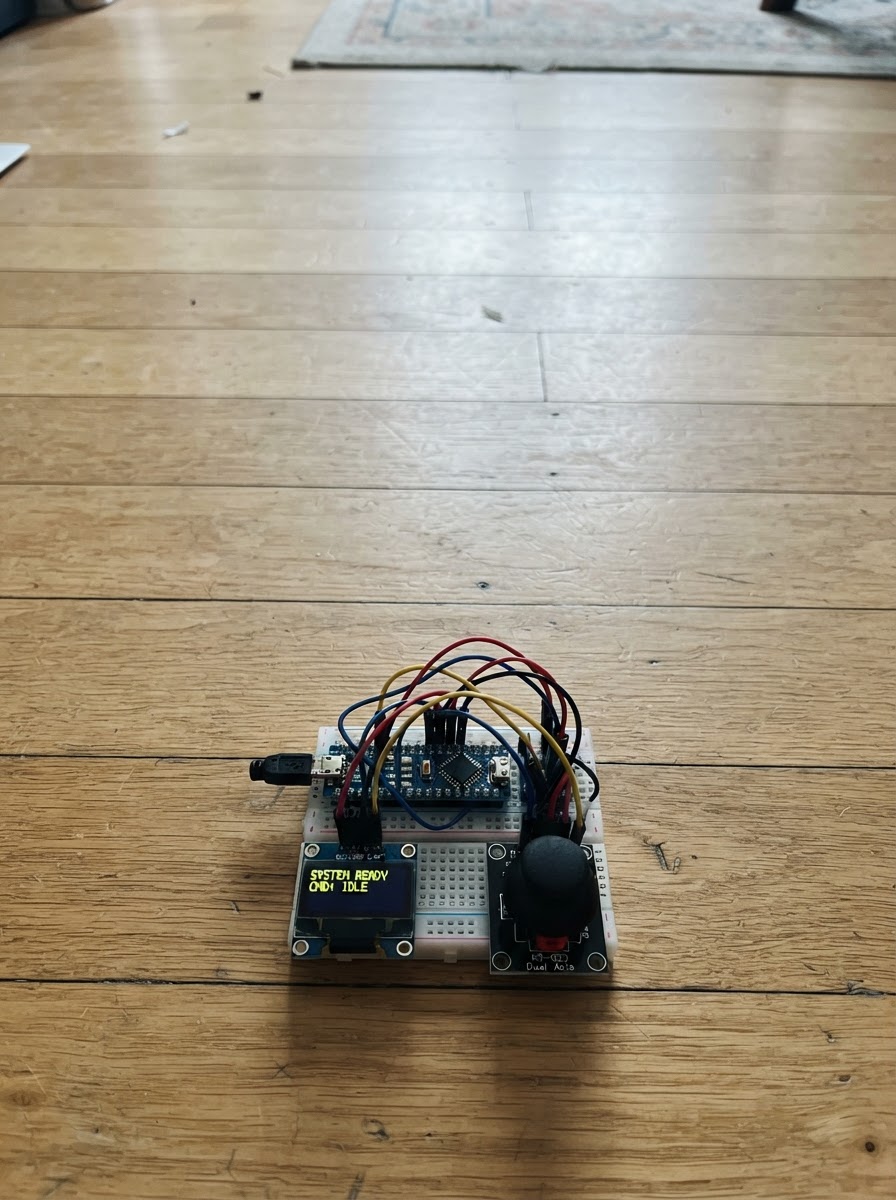
Build a handheld remote control with a 128x64 OLED display and dual-axis joystick module powered by an ESP32. This project combines the SSD1306 display driver with the KY-023 joystick to create an interactive command interface that responds to directional input and button presses. The guide includes a complete wiring diagram, parts list, and MicroPython firmware that handles I2C communication, analog joystick reading, and debouncing logic.
Assembly takes about 30 minutes and requires only basic soldering skills. Readers will learn how to interface multiple sensors with the ESP32, implement display rendering with framebuffer operations, and handle real-time input polling. The firmware is provided as a single MicroPython file ready to flash, with serial command output for debugging and integration into larger projects.
Wiring diagram

Gather all the parts
Assemble it in 5 steps
1. Keep power off while wiring
Disconnect the ESP32 DevKitC from USB before making or moving connections. Leave the external Wi-Fi antenna attached to the WROOM-32U antenna connector.
- The ESP32 DevKitC normally provides more than one GND header pin; either one may be used because they are common ground.
- Do not connect any OLED or joystick signal to 5 V.
2. Share the 3.3 V and ground rails
Use a small breadboard only as a power distribution point: connect ESP32 3V3 to its positive rail and any ESP32 GND pin to its ground rail. Connect both the OLED and joystick VCC pins to the 3.3 V rail, and both GND pins to the ground rail.
- A mini breadboard is fine for this low-current display and joystick.
- Using 3.3 V makes the joystick's analog outputs safe for the ESP32 ADC inputs.
- Never power the KY-023 from 5 V when its VRx/VRy pins are connected directly to ESP32 GPIOs; that could exceed the 3.3 V ADC limit.
3. Wire the OLED
Connect OLED SDA to ESP32 GPIO21 and OLED SCL to ESP32 GPIO22. Its VCC and GND should already be tied to the shared 3.3 V and ground rails from step 2.
- Most 0.96-inch modules use I2C address 0x3C, which this firmware expects.
- Keep SDA and SCL separate; reversing them prevents the screen from being detected.
4. Wire the thumbstick
Connect KY-023 VRx to GPIO34, VRy to GPIO35, and SW to GPIO27. Connect its VCC/GND to the shared 3.3 V/GND rails. GPIO34 and GPIO35 are input-only ADC pins, which is exactly what the analog stick axes need.
- If a direction appears reversed after testing, the single-file code has clearly marked comparisons you can swap.
- The stick button uses the ESP32's internal pull-up, so no external resistor is required.
- Do not connect the joystick's 5 V pin/rail to this project; use only its VCC pin at 3.3 V.
5. Power and test the interface
Reconnect USB to power the ESP32. The OLED plays a short boot animation then opens the four-tile launcher. Move the stick to select a tile; press it to activate the selection. You can still send up, down, left, right, or click followed by Enter through the serial terminal.
- The external antenna requires no GPIO wiring or special command; Wi-Fi uses it automatically.
- If the OLED stays blank, disconnect USB before rechecking all four OLED connections.
Review all connections
1. Connections between "oled_096" and "ESP32"
2. Connections between "joystick_1" and "ESP32"
Deploy the firmware
# ESP32 DevKitC (ESP32-WROOM-32U) — single-file MicroPython OLED launcher
# OLED: SDA=GPIO21, SCL=GPIO22, VCC=3V3, GND=GND
# KY-023 joystick: VRx=GPIO34, VRy=GPIO35, SW=GPIO27, VCC=3V3, GND=GND
# Serial commands: up, down, left, right, click
from machine import Pin, I2C, ADC
import framebuf
import sys
import uselect
import time

OLED_SDA = 21
OLED_SCL = 22
OLED_ADDRESS = 0x3C
JOY_X = 34
JOY_Y = 35
JOY_SW = 27
FRAME_MS = 16
DISPLAY_FRAME_MS = 50
BOOT_DURATION_MS = 1800
DEAD_LOW = 1300
DEAD_HIGH = 2800
DEBOUNCE_MS = 180

class SSD1306:
    def __init__(self, i2c, address=OLED_ADDRESS):
        self.i2c = i2c
        self.address = address
        self.buffer = bytearray(1024)
        self.fb = framebuf.FrameBuffer(self.buffer, 128, 64, framebuf.MONO_VLSB)
        for cmd in (0xAE,0x20,0x00,0x40,0xA1,0xA8,0x3F,0xC8,0xD3,0x00,
                    0xDA,0x12,0xD5,0x80,0xD9,0xF1,0xDB,0x30,0x81,0xCF,
                    0xA4,0xA6,0x8D,0x14,0xAF):
            self.cmd(cmd)
        self.fill(0)
        self.show()
    def cmd(self, value):
        self.i2c.writeto(self.address, bytes((0x80, value)))
    def show(self):
        self.cmd(0x21); self.cmd(0); self.cmd(127)
        self.cmd(0x22); self.cmd(0); self.cmd(7)
        self.i2c.writeto(self.address, b'\x40' + self.buffer)
    def fill(self, c): self.fb.fill(c)
    def text(self, s, x, y, c=1): self.fb.text(s, x, y, c)
    def line(self, x0, y0, x1, y1, c=1): self.fb.line(x0, y0, x1, y1, c)
    def rect(self, x, y, w, h, c=1): self.fb.rect(x, y, w, h, c)
    def fill_rect(self, x, y, w, h, c=1): self.fb.fill_rect(x, y, w, h, c)

ITEMS = ('STATUS', 'TOOLS', 'RADIO', 'ABOUT')
selected = 0
last_action = 'READY'
stick_armed = True
last_move = 0
last_press = 0

def draw_boot(display, progress, pulse):
    display.fill(0)
    display.rect(55, 8, 18, 18, 1)
    display.fill_rect(62, 22, 4, 12, 1)
    display.line(64, 8, 64, 1, 1)
    display.line(59, 5, 64, 0, 1)
    display.line(69, 5, 64, 0, 1)
    if pulse:
        display.rect(50, 3, 28, 30, 1)
    display.text('ESP LAUNCH', 28, 39)
    display.rect(14, 54, 100, 6, 1)
    display.fill_rect(16, 56, min(96, progress), 2, 1)
    display.show()

def draw_gui(display):
    display.fill(0)
    display.fill_rect(0, 0, 128, 10, 1)
    display.text('ESP32  GUI', 29, 1, 0)
    display.text('ANT: EXT', 2, 12)
    display.text('ACTION: ' + last_action[:12], 2, 21)
    for index, label in enumerate(ITEMS):
        x = 4 + (index % 2) * 62
        y = 34 + (index // 2) * 15
        if index == selected:
            display.fill_rect(x, y, 58, 13, 1)
            display.text(label, x + 4, y + 3, 0)
        else:
            display.rect(x, y, 58, 13, 1)
            display.text(label, x + 4, y + 3, 1)
    display.show()

def move(direction, display):
    global selected
    row = selected // 2
    col = selected % 2
    if direction == 'left': col = (col - 1) % 2
    elif direction == 'right': col = (col + 1) % 2
    elif direction == 'up': row = (row - 1) % 2
    elif direction == 'down': row = (row + 1) % 2
    else: return
    selected = row * 2 + col
    print('Command:', direction, '| selected:', ITEMS[selected])
    draw_gui(display)

def click(display):
    global last_action
    last_action = ITEMS[selected]
    print('CLICK:', last_action)
    draw_gui(display)

def serial_command(command, display):
    command = command.strip().lower()
    if command in ('up', 'down', 'left', 'right'):
        move(command, display)
    elif command == 'click':
        click(display)
    elif command:
        print('Use: up, down, left, right, click')

def read_joystick(x_axis, y_axis, button, display):
    global stick_armed, last_move, last_press
    now = time.ticks_ms()
    x = x_axis.read()
    y = y_axis.read()
    direction = None
    if x < DEAD_LOW: direction = 'left'
    elif x > DEAD_HIGH: direction = 'right'
    elif y < DEAD_LOW: direction = 'up'
    elif y > DEAD_HIGH: direction = 'down'
    if direction is None:
        stick_armed = True
    elif stick_armed and time.ticks_diff(now, last_move) >= DEBOUNCE_MS:
        stick_armed = False
        last_move = now
        move(direction, display)
    if button.value() == 0 and time.ticks_diff(now, last_press) >= DEBOUNCE_MS:
        last_press = now
        click(display)

def main():
    i2c = I2C(0, scl=Pin(OLED_SCL), sda=Pin(OLED_SDA), freq=400000)
    if OLED_ADDRESS not in i2c.scan():
        print('OLED not found at 0x3C. Check 3V3, GND, SDA=21, SCL=22.')
        return
    x_axis = ADC(Pin(JOY_X)); x_axis.atten(ADC.ATTN_11DB)
    y_axis = ADC(Pin(JOY_Y)); y_axis.atten(ADC.ATTN_11DB)
    button = Pin(JOY_SW, Pin.IN, Pin.PULL_UP)
    display = SSD1306(i2c)
    start = time.ticks_ms()
    last_draw = start - DISPLAY_FRAME_MS
    while time.ticks_diff(time.ticks_ms(), start) < BOOT_DURATION_MS:
        now = time.ticks_ms()
        elapsed = time.ticks_diff(now, start)
        if time.ticks_diff(now, last_draw) >= DISPLAY_FRAME_MS:
            draw_boot(display, (elapsed * 96) // BOOT_DURATION_MS, (elapsed // 180) % 2)
            last_draw = now
        time.sleep_ms(FRAME_MS)
    draw_gui(display)
    print('Launcher ready. Serial: up, down, left, right, click.')
    print('Joystick: move to navigate, press to select.')
    poller = uselect.poll()
    poller.register(sys.stdin, uselect.POLLIN)
    while True:
        if poller.poll(0):
            serial_command(sys.stdin.readline(), display)
        read_joystick(x_axis, y_axis, button, display)
        time.sleep_ms(FRAME_MS)

main()
Remix this project
Make it yours in one click
Open a full copy of this project in your own Schematik workspace — diagram, code, parts, and assembly steps included. Swap the sensor, add features, or redesign the whole thing with AI. The author's original stays untouched.
Related projects

Create A Complete Electrical Schematic Esp32 Sma
ESP32 · September 17, 2026Ayansh Agrawal
ESP32 Kare Ekran Projeleri
ESP32 · September 16, 2026Seref Ai
Component Qty --------------------------- ------
ESP32 · September 16, 2026Yathartha Chakrawal