Community project
Round TFT Dashboard
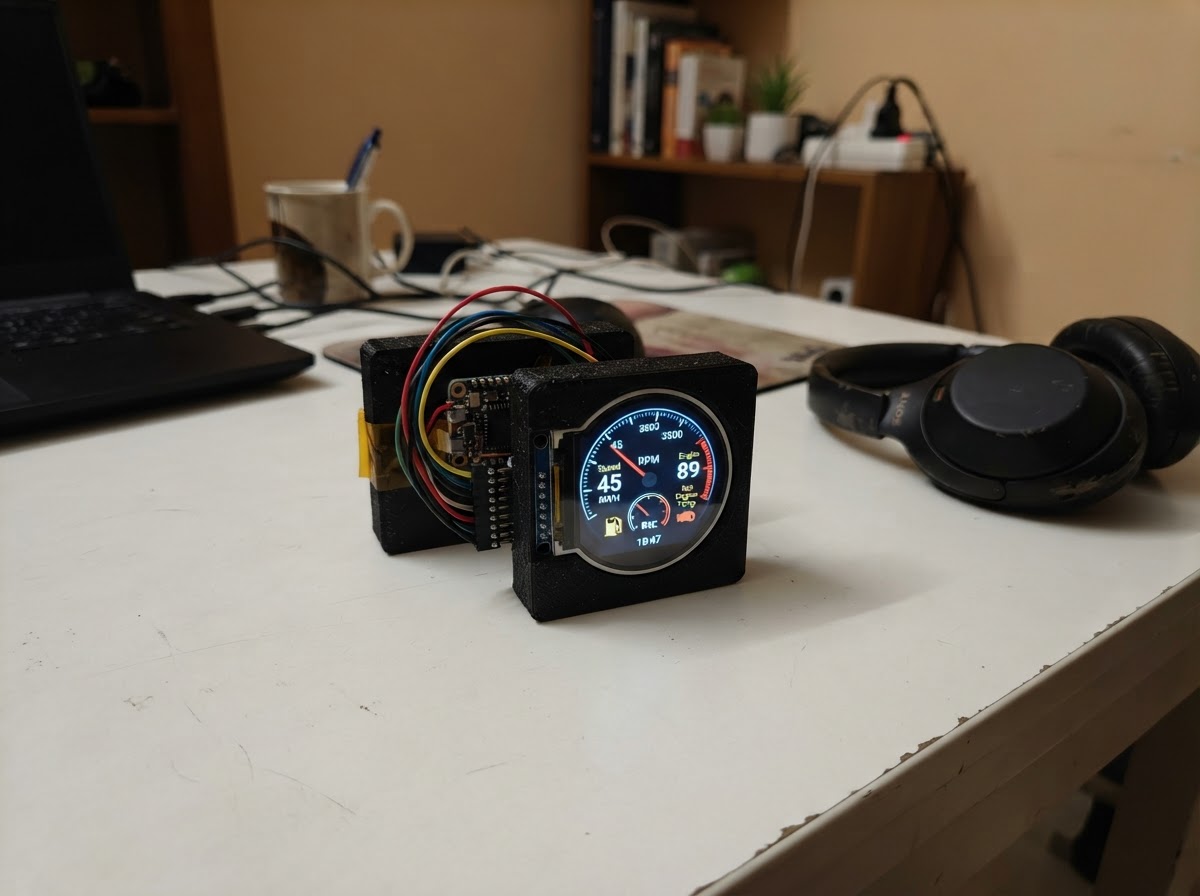
Build a charming round dashboard powered by an ESP32 and a 1.28-inch GC9A01 circular TFT display. This project combines WiFi connectivity and real-time clock synchronization to create a Minecraft-themed visual display that shows the current time with pixel-art clouds, terrain, and a golden sun on a 240x240 round screen.
This guide provides a complete parts list, wiring diagram for connecting the display to the ESP32, step-by-step assembly instructions, and ready-to-use firmware. Follow the assembly outline to verify power and signal connections, then configure the clock via WiFi to bring your dashboard to life.
Wiring diagram

Gather all the parts
Assemble it in 4 steps
1. Disconnect USB power
Unplug the ESP32-C3 SuperMini before touching or moving any of the display wires.
- Keep the six signal wires short, as in your photo, to help the SPI display run reliably.
- The ESP32-C3 GPIO pins are 3.3 V only; never connect any display signal to 5 V.
2. Check power wiring
Confirm the GC9A01 VCC wire goes to the ESP32 3V3 pin and the display GND wire goes to ESP32 GND.
- The display needs a common ground with the ESP32.
- Do not use the ESP32 5V pin for the display VCC connection shown in this project.
3. Check the screen signal connections
Confirm: display RST to GPIO 0, CS to GPIO 1, DC to GPIO 10, SDA/DIN/MOSI to GPIO 3, and SCL/CLK/SCK to GPIO 4. Leave MISO unconnected because this display does not send data back to the ESP32.
- On this display, SDA means SPI data (MOSI), and SCL means SPI clock (SCK); they are not I2C wires.
- If your module has BL or BLK, it may be left as its module default if the backlight already lights; otherwise connect BL to 3V3 for always-on backlight.
- Inspect for adjacent solder bridges, especially around GPIO 0 and GPIO 1.
4. Power and configure the clock
Plug the ESP32 into USB power and use Schematik’s Deploy button. On its first run, connect a phone or computer to the Wi-Fi network named BlockClock-Setup and follow the captive page to give it your home Wi-Fi details. The display then obtains time from the internet in UTC.
- The scene is deliberately original block-style pixel art: grass, dirt, stone, clouds, a square sun, and redstone-coloured accents.
- After initial Wi-Fi setup, it reconnects automatically when that network is available.
- If the screen stays blank, unplug power first and recheck VCC is 3.3 V, not 5 V.
Review all connections
1. Connections between "gc9a01_display" and "ESP32"
Deploy the firmware
#include <Arduino.h>
#include <SPI.h>
#include <WiFi.h>
#include <WiFiManager.h>
#include <time.h>
#include <Adafruit_GFX.h>
#include <Adafruit_GC9A01A.h>

#define TFT_RST 0
#define TFT_CS 1
#define TFT_DC 10
#define TFT_MOSI 3
#define TFT_SCK 4


// Forward declarations
void block(int x, int y, int w, int h, uint16_t color);
void cloud(int x, int y);
void drawWorld();
void drawTime(int hour, int minute);
void drawSecondMarker(int second);
void statusLine(const char *message, uint16_t color);
void connectWiFi();
void synchroniseTime();

Adafruit_GC9A01A tft(TFT_CS, TFT_DC, TFT_MOSI, TFT_SCK, TFT_RST);

const uint16_t SKY = 0x5DDF;
const uint16_t GRASS = 0x3D86;
const uint16_t DIRT = 0x8A42;
const uint16_t STONE = 0x7BEF;
const uint16_t DEEPSLATE = 0x3186;
const uint16_t WHITE = 0xFFFF;
const uint16_t GOLD = 0xFEA0;
const uint16_t REDSTONE = 0xF800;
const uint16_t OBSIDIAN = 0x1082;

bool timeReady = false;
int lastMinute = -1;
int lastHour = -1;

void block(int x, int y, int w, int h, uint16_t color) {
  tft.fillRect(x, y, w, h, color);
}

void cloud(int x, int y) {
  block(x, y + 8, 40, 8, WHITE);
  block(x + 8, y, 24, 24, WHITE);
  block(x + 32, y + 8, 16, 8, WHITE);
}

void drawWorld() {
  tft.fillScreen(SKY);
  cloud(22, 45);
  cloud(170, 64);
  block(184, 27, 24, 24, GOLD);
  block(190, 21, 12, 36, GOLD);

  block(0, 166, 240, 10, GRASS);
  block(0, 176, 240, 28, DIRT);
  block(0, 204, 240, 36, DEEPSLATE);
  for (int x = 4; x < 240; x += 31) {
    block(x, 183 + ((x / 31) % 2) * 7, 12, 7, 0xA343);
    block(x + 12, 211 + ((x / 31) % 3) * 6, 14, 7, STONE);
  }

  tft.drawRoundRect(18, 78, 204, 80, 8, OBSIDIAN);
  tft.drawRoundRect(19, 79, 202, 78, 8, WHITE);
  tft.setTextWrap(false);
  tft.setTextColor(OBSIDIAN);
  tft.setTextSize(1);
  tft.setCursor(77, 88);
  tft.print("BLOCK TIME");
  tft.setCursor(76, 148);
  tft.print("NTP CLOCK");
  block(20, 80, 8, 8, REDSTONE);
  block(212, 80, 8, 8, REDSTONE);
  block(20, 149, 8, 8, REDSTONE);
  block(212, 149, 8, 8, REDSTONE);
}

void drawTime(int hour, int minute) {
  char text[6];
  snprintf(text, sizeof(text), "%02d:%02d", hour, minute);
  tft.fillRect(42, 101, 156, 42, WHITE);
  tft.setTextSize(5);
  tft.setTextColor(OBSIDIAN);
  tft.setCursor(46, 105);
  tft.print(text);
}

void statusLine(const char *message, uint16_t color) {
  tft.fillRect(43, 216, 154, 14, DEEPSLATE);
  tft.setTextSize(1);
  tft.setTextColor(color);
  tft.setCursor(50, 219);
  tft.print(message);
}

void connectWiFi() {
  WiFiManager wm;
  wm.setConfigPortalTimeout(180);
  statusLine("JOIN BLOCKCLOCK-SETUP", GOLD);
  if (wm.autoConnect("BlockClock-Setup")) {
    statusLine("WIFI CONNECTED", GRASS);
  } else {
    statusLine("WIFI OFFLINE", REDSTONE);
  }
}

void synchroniseTime() {
  setenv("TZ", "UTC0", 1);
  tzset();
  configTime(0, 0, "pool.ntp.org", "time.nist.gov");
  struct tm now;
  timeReady = getLocalTime(&now, 12000);
  statusLine(timeReady ? "TIME SYNCED (UTC)" : "WAITING FOR NTP", timeReady ? GRASS : GOLD);
}

void setup() {
  Serial.begin(115200);
  tft.begin();
  tft.setRotation(0);
  drawWorld();
  statusLine("STARTING...", GOLD);
  connectWiFi();
  if (WiFi.status() == WL_CONNECTED) synchroniseTime();
}

void loop() {
  if (WiFi.status() != WL_CONNECTED) {
    static uint32_t lastRetry = 0;
    if (millis() - lastRetry > 30000) {
      lastRetry = millis();
      WiFi.reconnect();
    }
    delay(50);
    return;
  }

  struct tm now;
  if (!getLocalTime(&now, 50)) {
    if (!timeReady) synchroniseTime();
    delay(250);
    return;
  }
  timeReady = true;

  // The pixel-art world remains untouched; only the numeric time changes.
  if (now.tm_min != lastMinute || now.tm_hour != lastHour) {
    drawTime(now.tm_hour, now.tm_min);
    lastMinute = now.tm_min;
    lastHour = now.tm_hour;
  }
  delay(50);
}
Remix this project
Make it yours in one click
Open a full copy of this project in your own Schematik workspace — diagram, code, parts, and assembly steps included. Swap the sensor, add features, or redesign the whole thing with AI. The author's original stays untouched.
Related projects

Create A Complete Electrical Schematic Esp32 Sma
ESP32 · September 17, 2026Ayansh Agrawal
ESP32 Kare Ekran Projeleri
ESP32 · September 16, 2026Seref Ai
Component Qty --------------------------- ------
ESP32 · September 16, 2026Yathartha Chakrawal