Community project
Automatic Trash Bin Lid
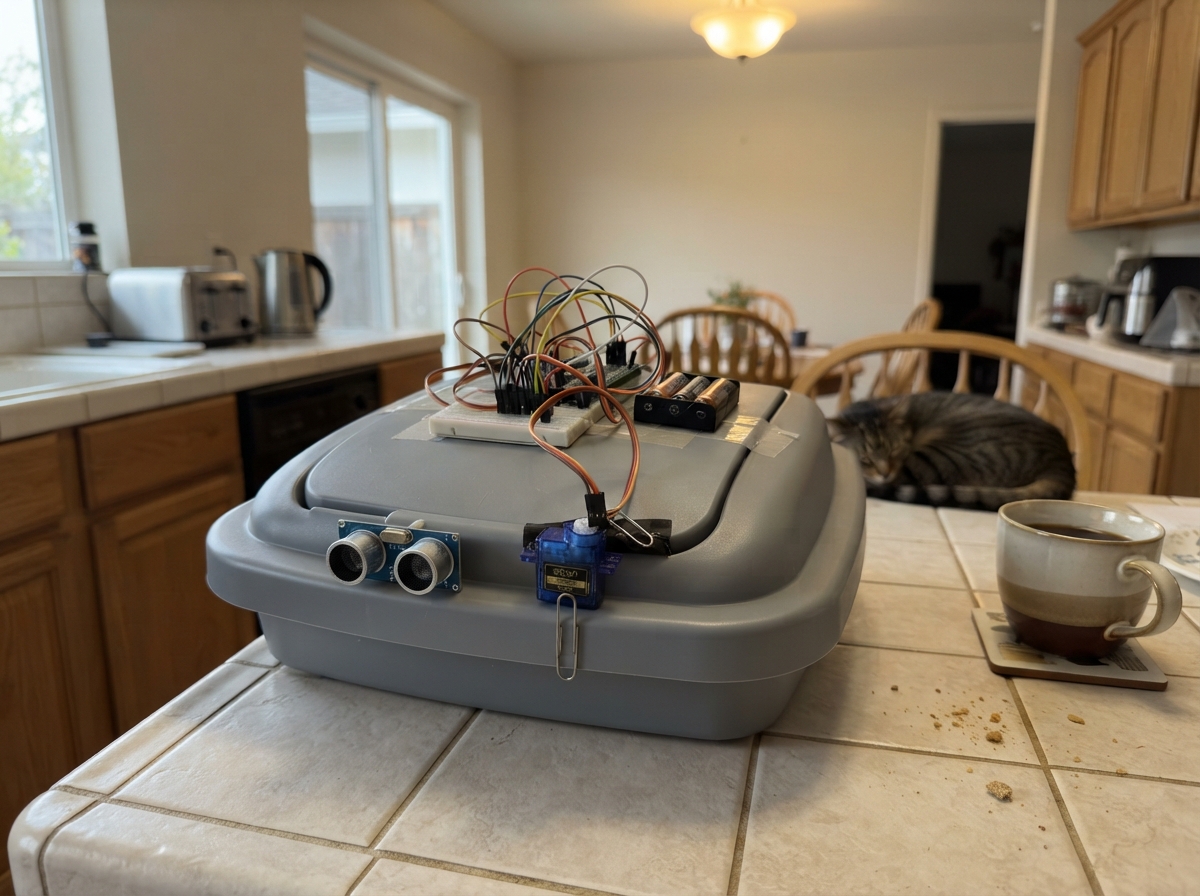
This project builds a hands-free trash bin that automatically opens its lid when a hand approaches within 20 centimeters. An Arduino Uno reads distance measurements from an HC-SR04 ultrasonic sensor and controls an SG90 servo motor to lift and lower the lid smoothly. The guide includes a complete wiring diagram, parts list, and step-by-step assembly instructions for mounting the sensor and servo to a standard trash bin.
Followers will receive the full Arduino firmware, calibration steps, and testing procedures to get the bin operating reliably. The sensor checks for nearby objects every 100 milliseconds, opens the lid instantly when motion is detected, and automatically closes it after three seconds of inactivity. This is an ideal beginner project for learning sensor integration and servo control on the Arduino platform.
Wiring diagram

Gather all the parts
Assemble it in 4 steps
1. Place the Arduino and sensor
Put the Arduino Uno beside the trash bin and point the HC-SR04 sensor's two round eyes toward the place where a hand will approach. Keep the sensor clear of the lid so the moving lid cannot block its view.
- Mount the sensor near the front or top of the bin, facing outward at hand height.
- Do not let metal, tape, or the moving lid cover either round sensor opening, or the bin may not detect a hand reliably.
2. Wire the distance sensor
Use jumper wires to connect the HC-SR04: VCC → Arduino 5V (power), GND → Arduino GND (ground), TRIG → D7 (the wire that starts each distance measurement), and ECHO → D6 (the wire that carries the measured distance back).
- The pin names are usually printed beside the four pins. Follow the labels rather than the left-to-right order if your module is turned around.
- Make sure VCC and GND are not swapped — swapped power can damage the sensor.
3. Wire and mount the lid motor
Attach the SG90 servo arm to the bin lid with a stiff linkage, such as a small wire rod. Connect its red wire to Arduino 5V (power), brown or black wire to Arduino GND (ground), and orange or yellow wire to D9 (the lid-position signal).
- Before fastening the servo arm, keep the lid closed and fit the arm so the servo can rotate toward the open position without forcing the hinge.
- Do not force the servo arm by hand while it is powered; this can strip its small plastic gears. If the servo chatters, stalls, or the Uno resets, use a separate regulated 5V supply for the servo and connect that supply's GND to Arduino GND.
4. Power and test the bin
With the lid able to move freely, plug the Arduino Uno into USB. The lid should move to its closed position. Hold your hand about 20 cm in front of the sensor; the servo should open the lid, then close it about three seconds after you move your hand away.
- If the lid moves the wrong way, remove the servo arm, rotate it to suit the linkage, and refit it while the code's closed position is active.
- Keep fingers away from the lid linkage during testing because the servo can pinch them when it closes.
Review all connections
1. Connections between "ultrasonic_1" and "Arduino"
2. Connections between "lid_servo_1" and "Arduino"
Deploy the firmware
#include <Arduino.h>
#include <Servo.h>


// Forward declarations
int readDistanceCm();
void openLid();
void closeLid();

const byte TRIG_PIN = 7;
const byte ECHO_PIN = 6;
const byte SERVO_PIN = 9;

const int OPEN_ANGLE = 90;
const int CLOSED_ANGLE = 0;
const int OPEN_DISTANCE_CM = 20;
const unsigned long SENSOR_INTERVAL_MS = 100;
const unsigned long CLOSE_DELAY_MS = 3000;

Servo lidServo;
bool lidIsOpen = false;
unsigned long lastSensorReadMs = 0;
unsigned long lastHandSeenMs = 0;

int readDistanceCm() {
  digitalWrite(TRIG_PIN, LOW);
  delayMicroseconds(2);
  digitalWrite(TRIG_PIN, HIGH);
  delayMicroseconds(10);
  digitalWrite(TRIG_PIN, LOW);

  unsigned long echoTime = pulseIn(ECHO_PIN, HIGH, 30000);
  if (echoTime == 0) {
    return -1;
  }

  return (int)(echoTime / 58UL);
}

void openLid() {
  if (!lidIsOpen) {
    lidServo.write(OPEN_ANGLE);
    lidIsOpen = true;
  }
}

void closeLid() {
  if (lidIsOpen) {
    lidServo.write(CLOSED_ANGLE);
    lidIsOpen = false;
  }
}

void setup() {
  pinMode(TRIG_PIN, OUTPUT);
  pinMode(ECHO_PIN, INPUT);
  digitalWrite(TRIG_PIN, LOW);

  lidServo.attach(SERVO_PIN);
  closeLid();
}

void loop() {
  unsigned long now = millis();

  if (now - lastSensorReadMs >= SENSOR_INTERVAL_MS) {
    lastSensorReadMs = now;
    int distanceCm = readDistanceCm();

    if (distanceCm > 0 && distanceCm <= OPEN_DISTANCE_CM) {
      lastHandSeenMs = now;
      openLid();
    }
  }

  if (lidIsOpen && now - lastHandSeenMs >= CLOSE_DELAY_MS) {
    closeLid();
  }
}
Remix this project
Make it yours in one click
Open a full copy of this project in your own Schematik workspace — diagram, code, parts, and assembly steps included. Swap the sensor, add features, or redesign the whole thing with AI. The author's original stays untouched.