Community project
Bluetooth Air Mouse
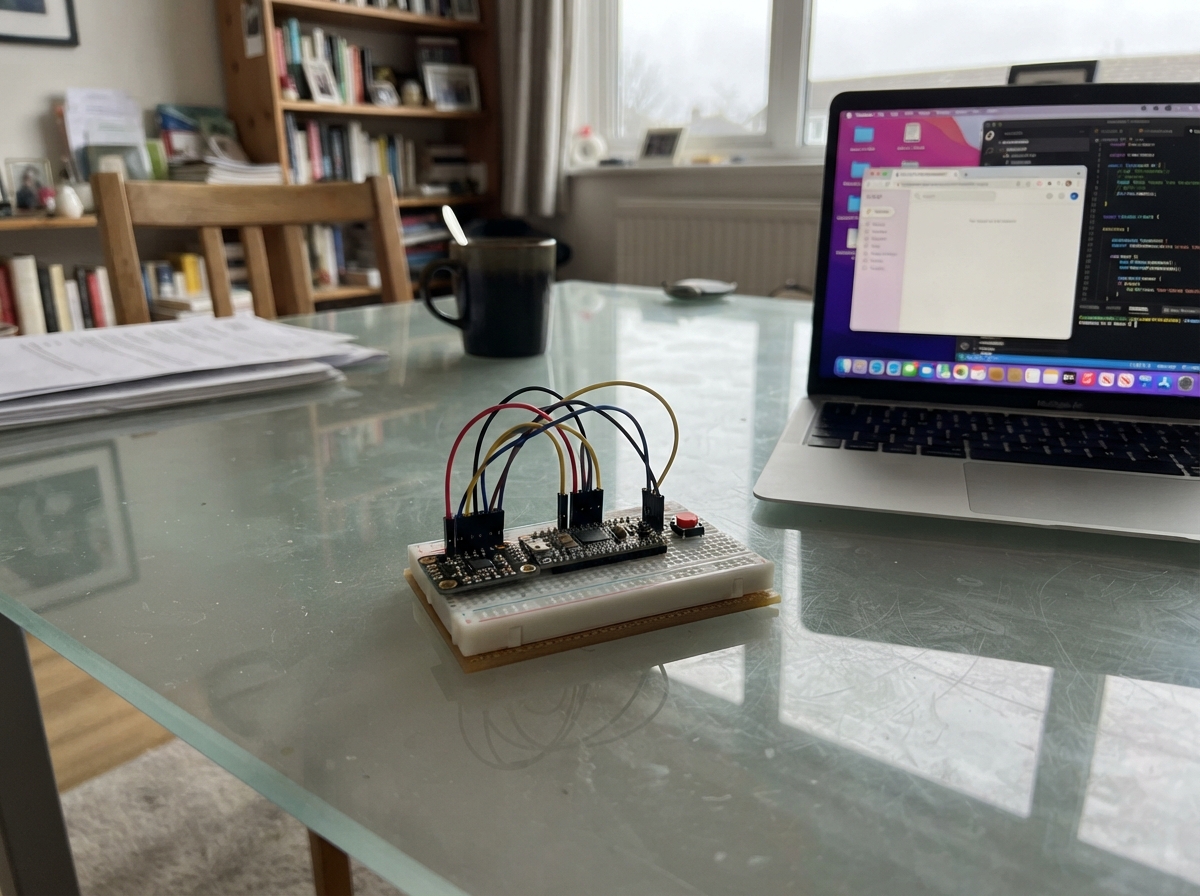
Build a wireless air mouse that controls your computer using hand motion and button clicks. This project uses an ESP32 microcontroller paired with an MPU-6050 motion sensor to detect movement in 3D space, translating gestures into cursor control over Bluetooth. Two push buttons provide left and right-click functionality for a complete pointing device.
This guide includes a complete wiring diagram showing how to connect the motion sensor and buttons to the ESP32, a full parts list, and the Arduino firmware with Bluetooth HID support. Follow the step-by-step assembly instructions to wire the components, load the firmware, and pair your air mouse with a Windows, Mac, or Linux computer.
Wiring diagram

Gather all the parts
Assemble it in 5 steps
1. Keep the ESP32 powered only by USB while building
Place the ESP32 DevKit on a non-metal surface with its USB socket easy to reach. Do not connect any battery or other power supply; this project uses the board’s USB socket.
- Leave the USB cable unplugged until all small wires have been checked.
- Do not feed 5 volts into the MPU-6050 signal pins; the ESP32 pins use 3.3-volt signals.
2. Connect the motion sensor
Use four jumper wires between the MPU-6050 module and the ESP32: VIN → 3V3 (power), GND → GND (ground), SDA → GPIO21 (data), and SCL → GPIO22 (clock). Leave the MPU-6050 INT pin empty.
- Use the labels printed beside the holes on the MPU-6050 board, not the order the holes happen to be in.
- Keep the sensor board flat and firmly attached to the hand-held case later, because its physical orientation sets the pointer direction.
- Make sure VIN and GND are not swapped — swapped power can damage the sensor.
3. Wire the left-click button
Put the left-click push button across the center gap of a breadboard if it has four legs. Connect one side of the switch to GPIO25 (signal) and the opposite side to GND (ground). The firmware supplies the small internal resistor that normally holds this input steady.
- For a four-leg tactile button, the two legs on each same side are already joined; use one leg from each opposite side.
- A press connects GPIO25 to ground and becomes a left mouse click.
- Do not connect the button signal wire to 3V3; this design expects the button to connect the input to GND.
4. Wire the right-click button
Put the right-click push button across a breadboard center gap. Connect one side of the switch to GPIO26 (signal) and the opposite side to GND (ground).
- Both buttons may share the same GND rail, but each needs its own separate GPIO wire.
- A press connects GPIO26 to ground and becomes a right mouse click.
- Make sure the two button signal wires do not touch each other, or pressing one button could cause the wrong click.
5. Mount and pair the air mouse
After deploying the firmware, attach the ESP32, MPU-6050, and buttons securely in a small non-metal case. Keep the MPU-6050 level and still while the ESP32 first starts, then on the phone or laptop open Bluetooth settings and pair with “ESP32 Air Mouse.”
- If movement feels reversed after mounting, rotate the sensor board or case by 180 degrees before changing wiring.
- The air mouse appears only after the ESP32 has power and has finished its brief still start-up period.
- Keep bare wires from touching inside the case — a short circuit can reset or damage the board.
Review all connections
1. Connections between "mpu6050_1" and "ESP32"
2. Connections between "left_button" and "ESP32"
3. Connections between "right_button" and "ESP32"
Deploy the firmware
#include <Arduino.h>
#include <Wire.h>
#include <MPU6050.h>
#include <BLEDevice.h>
#include <BLEUtils.h>
#include <BLEServer.h>
#include <BLE2902.h>

#define MPU_SDA_PIN 21
#define MPU_SCL_PIN 22
#define LEFT_BUTTON_PIN 25
#define RIGHT_BUTTON_PIN 26

MPU6050 mpu;

// HID Report Descriptor for Mouse
static const uint8_t hidReportDescriptor[] = {
  0x05, 0x01,  // Usage Page (Generic Desktop)
  0x09, 0x02,  // Usage (Mouse)
  0xA1, 0x01,  // Collection (Application)
  0x09, 0x01,  //   Usage (Pointer)
  0xA1, 0x00,  //   Collection (Physical)
  0x05, 0x09,  //     Usage Page (Button)
  0x19, 0x01,  //     Usage Minimum (1)
  0x29, 0x03,  //     Usage Maximum (3)
  0x15, 0x00,  //     Logical Minimum (0)
  0x25, 0x01,  //     Logical Maximum (1)
  0x95, 0x03,  //     Report Count (3)
  0x75, 0x01,  //     Report Size (1)
  0x81, 0x02,  //     Input (Data, Variable, Absolute)
  0x95, 0x01,  //     Report Count (1)
  0x75, 0x05,  //     Report Size (5)
  0x81, 0x01,  //     Input (Constant) - padding
  0x05, 0x01,  //     Usage Page (Generic Desktop)
  0x09, 0x30,  //     Usage (X)
  0x09, 0x31,  //     Usage (Y)
  0x09, 0x38,  //     Usage (Wheel)
  0x15, 0x81,  //     Logical Minimum (-127)
  0x25, 0x7F,  //     Logical Maximum (127)
  0x75, 0x08,  //     Report Size (8)
  0x95, 0x03,  //     Report Count (3)
  0x81, 0x06,  //     Input (Data, Variable, Relative)
  0xC0,        //   End Collection
  0xC0         // End Collection
};

BLEServer* pServer = nullptr;
BLECharacteristic* pInputCharacteristic = nullptr;
bool deviceConnected = false;

class ServerCallbacks : public BLEServerCallbacks {
  void onConnect(BLEServer* pSvr) override { deviceConnected = true; }
  void onDisconnect(BLEServer* pSvr) override {
    deviceConnected = false;
    pSvr->startAdvertising();
  }
};

void sendMouseReport(int8_t x, int8_t y, uint8_t buttons) {
  if (!deviceConnected || !pInputCharacteristic) return;
  uint8_t report[4];
  report[0] = buttons & 0x07;
  report[1] = (uint8_t)x;
  report[2] = (uint8_t)y;
  report[3] = 0;
  pInputCharacteristic->setValue(report, 4);
  pInputCharacteristic->notify();
}

void setupBLE() {
  BLEDevice::init("ESP32 BLE Mouse");

  pServer = BLEDevice::createServer();
  pServer->setCallbacks(new ServerCallbacks());

  // HID Service
  BLEService* pHIDService = pServer->createService(BLEUUID((uint16_t)0x1812));

  // HID Information Characteristic
  BLECharacteristic* pHIDInfo = pHIDService->createCharacteristic(
    BLEUUID((uint16_t)0x2A4A),
    BLECharacteristic::PROPERTY_READ
  );
  uint8_t hidInfo[] = {0x11, 0x01, 0x00, 0x03};
  pHIDInfo->setValue(hidInfo, sizeof(hidInfo));

  // Report Map Characteristic
  BLECharacteristic* pReportMap = pHIDService->createCharacteristic(
    BLEUUID((uint16_t)0x2A4B),
    BLECharacteristic::PROPERTY_READ
  );
  pReportMap->setValue((uint8_t*)hidReportDescriptor, sizeof(hidReportDescriptor));

  // HID Control Point
  BLECharacteristic* pHIDCP = pHIDService->createCharacteristic(
    BLEUUID((uint16_t)0x2A4C),
    BLECharacteristic::PROPERTY_WRITE_NR
  );
  uint8_t cpVal = 0;
  pHIDCP->setValue(&cpVal, 1);

  // Protocol Mode
  BLECharacteristic* pProtocolMode = pHIDService->createCharacteristic(
    BLEUUID((uint16_t)0x2A4E),
    BLECharacteristic::PROPERTY_READ | BLECharacteristic::PROPERTY_WRITE_NR
  );
  uint8_t pm = 1;
  pProtocolMode->setValue(&pm, 1);

  // Input Report Characteristic
  pInputCharacteristic = pHIDService->createCharacteristic(
    BLEUUID((uint16_t)0x2A4D),
    BLECharacteristic::PROPERTY_READ | BLECharacteristic::PROPERTY_NOTIFY
  );
  pInputCharacteristic->addDescriptor(new BLE2902());

  // Report Reference Descriptor
  BLEDescriptor* pReportRef = new BLEDescriptor(BLEUUID((uint16_t)0x2908));
  uint8_t reportRef[] = {0x00, 0x01};
  pReportRef->setValue(reportRef, 2);
  pInputCharacteristic->addDescriptor(pReportRef);

  pHIDService->start();

  // Device Information Service
  BLEService* pDevInfo = pServer->createService(BLEUUID((uint16_t)0x180A));
  BLECharacteristic* pManuf = pDevInfo->createCharacteristic(
    BLEUUID((uint16_t)0x2A29),
    BLECharacteristic::PROPERTY_READ
  );
  pManuf->setValue(String("ESP32"));
  pDevInfo->start();

  // Battery Service
  BLEService* pBattService = pServer->createService(BLEUUID((uint16_t)0x180F));
  BLECharacteristic* pBattLevel = pBattService->createCharacteristic(
    BLEUUID((uint16_t)0x2A19),
    BLECharacteristic::PROPERTY_READ | BLECharacteristic::PROPERTY_NOTIFY
  );
  uint8_t battLevel = 100;
  pBattLevel->setValue(&battLevel, 1);
  pBattLevel->addDescriptor(new BLE2902());
  pBattService->start();

  // Advertising
  BLEAdvertising* pAdvertising = BLEDevice::getAdvertising();
  pAdvertising->addServiceUUID(BLEUUID((uint16_t)0x1812));
  pAdvertising->setAppearance(0x03C2); // Mouse
  pAdvertising->setScanResponse(false);
  pAdvertising->setMinPreferred(0x06);
  BLEDevice::startAdvertising();
}

void setup() {
  Serial.begin(115200);

  Wire.begin(MPU_SDA_PIN, MPU_SCL_PIN);
  mpu.initialize();

  pinMode(LEFT_BUTTON_PIN, INPUT_PULLUP);
  pinMode(RIGHT_BUTTON_PIN, INPUT_PULLUP);

  setupBLE();
}

void loop() {
  static unsigned long lastSend = 0;
  if (millis() - lastSend < 20) return;
  lastSend = millis();

  int16_t ax, ay, az, gx, gy, gz;
  mpu.getMotion6(&ax, &ay, &az, &gx, &gy, &gz);

  int8_t moveX = (int8_t)constrain(gx / 500, -127, 127);
  int8_t moveY = (int8_t)constrain(gy / 500, -127, 127);

  uint8_t buttons = 0;
  if (digitalRead(LEFT_BUTTON_PIN) == LOW)  buttons |= 0x01;
  if (digitalRead(RIGHT_BUTTON_PIN) == LOW) buttons |= 0x02;

  sendMouseReport(moveX, moveY, buttons);
}
Remix this project
Make it yours in one click
Open a full copy of this project in your own Schematik workspace — diagram, code, parts, and assembly steps included. Swap the sensor, add features, or redesign the whole thing with AI. The author's original stays untouched.