Community project
Capacitive Soil Moisture Tester
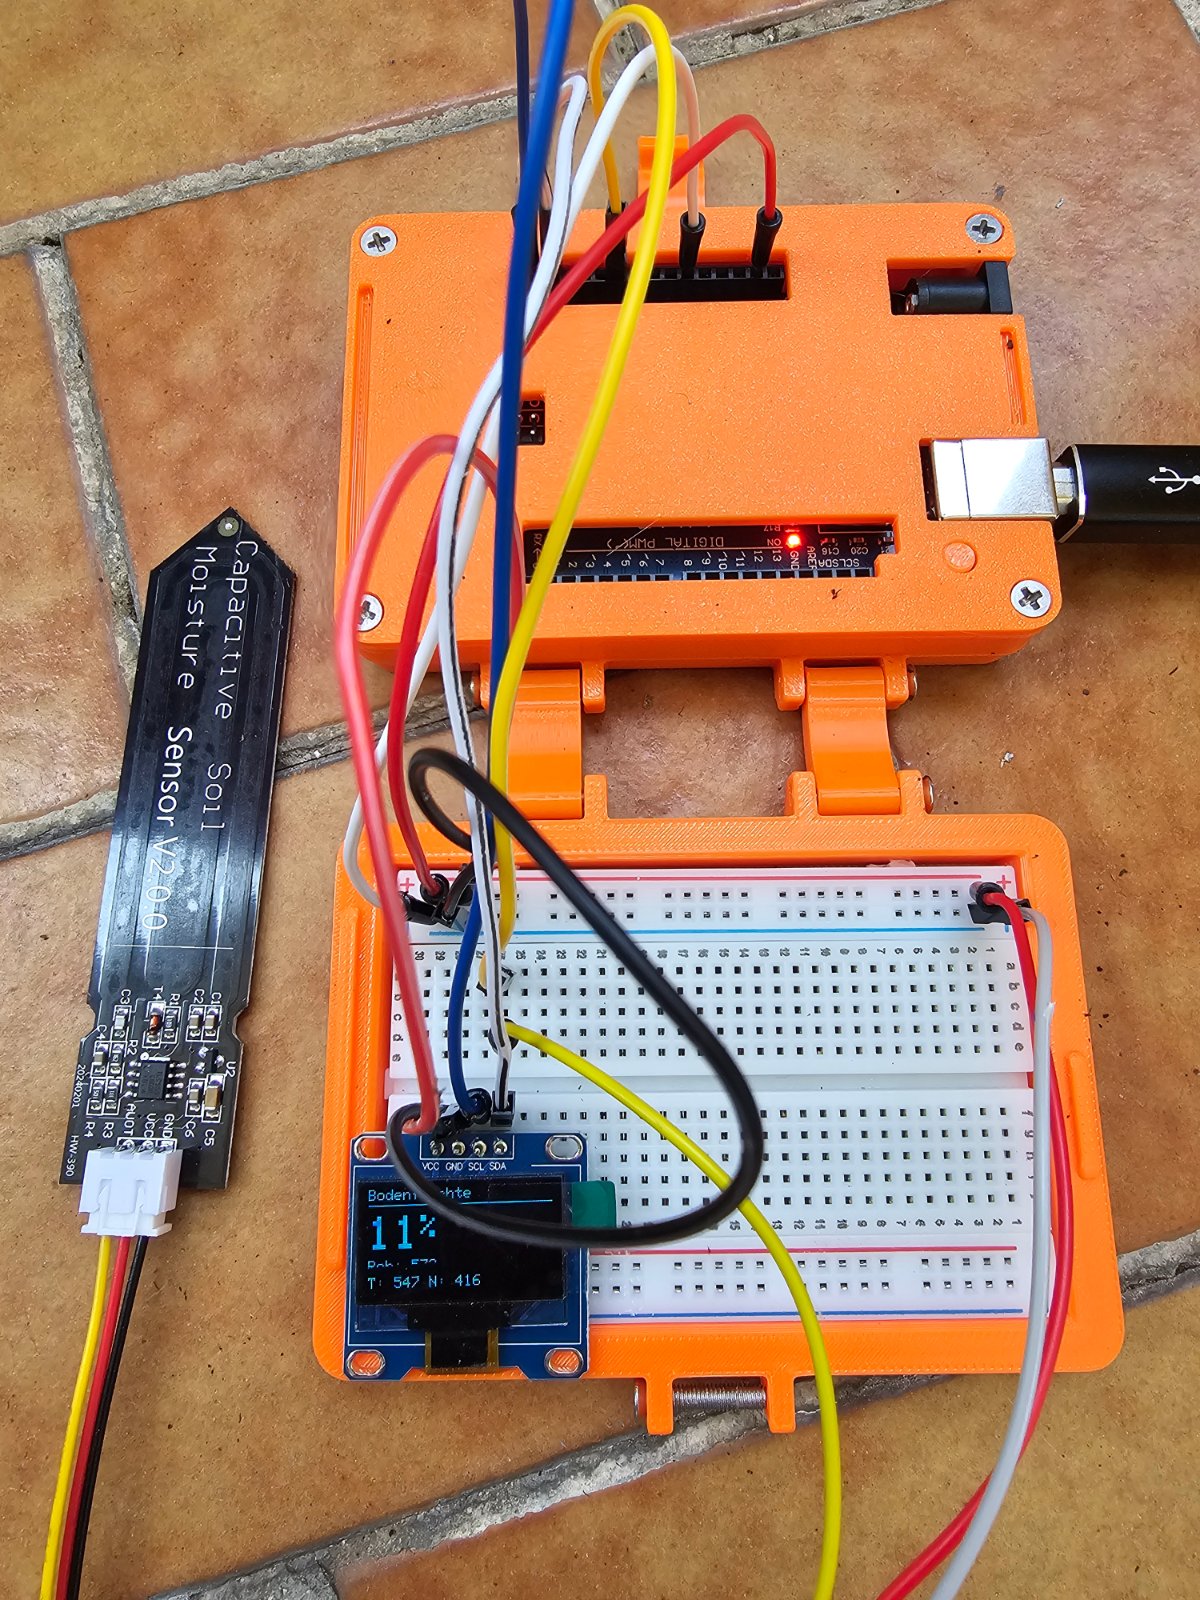
This project builds a soil moisture meter that reads capacitive sensor data and displays real-time moisture levels on an OLED screen. The Arduino Uno collects analog readings from the IP65-rated soil sensor, applies calibration to convert raw values into percentage readings, and refreshes the display every second with filtered measurements.
The guide provides a complete parts list, wiring diagram showing sensor and display connections to the Arduino, and firmware with built-in calibration routines. Makers will learn how to interface analog sensors with I2C displays, implement moving-average filtering for stable readings, and store calibration data in EEPROM for persistent configuration across power cycles.
Wiring diagram

Gather all the parts
Assemble it in 4 steps
1. Arduino vom USB trennen
Trenne den Arduino Uno vom USB-Kabel, bevor du Sensor und OLED verdrahtest.
- Lege die Bauteile so hin, dass die Pin-Beschriftungen gut lesbar sind.
- VCC und GND niemals vertauschen.
2. Bodensensor anschließen
Verbinde den Capacitive Soil Sensor: VCC mit 5V des Uno, GND mit GND und AOUT mit A0.
- Der Sensor darf laut deiner Angabe mit 3,3 bis 5 V betrieben werden; sein AOUT-Signal von maximal 3,0 V ist für A0 sicher.
- AOUT nicht an einen Digitalpin anschließen.
- Nur die beschichtete Messfläche darf in feuchte Erde; die Elektronik am oberen Ende muss trocken bleiben.
3. OLED in der Steckerreihenfolge verbinden
Verbinde das 0,96-Zoll-OLED in der aufgedruckten Reihenfolge: VCC mit 5V, GND mit GND, SCL mit A5 und SDA mit A4 des Uno.
- Bei diesem OLED ist die physische Anschlussreihenfolge VCC, GND, SCL, SDA.
- A4/A5 sind beim Uno zugleich die vorgesehenen I²C-Pins.
- Die Pins SCL und SDA nicht vertauschen.
- Diese Verdrahtung setzt voraus, dass dein OLED-Modul als 3,3–5-V-kompatibel gekennzeichnet ist.
4. Prüfen und mit USB versorgen
Kontrolliere alle Verbindungen und stecke den Uno wieder per USB an. Das OLED zeigt Bodenfeuchte in Prozent, Rohwert sowie die gespeicherten Trocken- und Nasswerte. Die Befehle d, w, p und c im seriellen Monitor funktionieren weiterhin bei 115200 Baud.
- Falls das OLED leer bleibt, prüfe zuerst die Beschriftung und die vier Leitungen; der Sketch verwendet die häufige I²C-Adresse 0x3C.
- Nicht gleichzeitig an USB und eine andere Spannungsquelle anschließen.
Review all connections
1. Connections between "soil_sensor_1" and "Arduino"
2. Connections between "oled_1" and "Arduino"
Deploy the firmware
#include <Arduino.h>
#include <EEPROM.h>
#include <Wire.h>
#include <Adafruit_GFX.h>
#include <Adafruit_SSD1306.h>

struct CalibrationData {
  int magic;
  int dryValue;
  int wetValue;
};


// Forward declarations
int readAverageRaw();
void printCalibration();
void saveCalibration();
void loadCalibration();
int moisturePercent(int rawValue);
void updateDisplay(int rawValue);
void printHelp();
void handleSerial();

const uint8_t SOIL_SENSOR_PIN = A0;
const uint8_t OLED_ADDRESS = 0x3C;
const uint8_t SCREEN_WIDTH = 128;
const uint8_t SCREEN_HEIGHT = 64;
const unsigned long SAMPLE_INTERVAL_MS = 250;
const unsigned long REPORT_INTERVAL_MS = 1000;
const int SAMPLE_COUNT = 10;
const int EEPROM_MAGIC = 0x51A7;

Adafruit_SSD1306 display(SCREEN_WIDTH, SCREEN_HEIGHT, &Wire, -1);
CalibrationData calibration;
unsigned long lastSampleMs = 0;
unsigned long lastReportMs = 0;
long sampleSum = 0;
int sampleCounter = 0;
int filteredRaw = 0;
int lastDisplayedRaw = -1;
int lastDisplayedPercent = -1;
bool displayAvailable = false;

int readAverageRaw() {
  long total = 0;
  for (int i = 0; i < SAMPLE_COUNT; i++) {
    total += analogRead(SOIL_SENSOR_PIN);
    delay(5);
  }
  return total / SAMPLE_COUNT;
}

void printCalibration() {
  Serial.print(F("Trockenwert: "));
  Serial.println(calibration.dryValue);
  Serial.print(F("Nasswert:    "));
  Serial.println(calibration.wetValue);
}

void saveCalibration() {
  calibration.magic = EEPROM_MAGIC;
  EEPROM.put(0, calibration);
  lastDisplayedRaw = -1;
}

void loadCalibration() {
  EEPROM.get(0, calibration);
  if (calibration.magic != EEPROM_MAGIC || calibration.dryValue == calibration.wetValue) {
    calibration.magic = EEPROM_MAGIC;
    calibration.dryValue = 800;
    calibration.wetValue = 400;
  }
}

int moisturePercent(int rawValue) {
  long percent = map(rawValue, calibration.dryValue, calibration.wetValue, 0, 100);
  return constrain(percent, 0, 100);
}

void updateDisplay(int rawValue) {
  if (!displayAvailable) return;

  int percent = moisturePercent(rawValue);
  if (rawValue == lastDisplayedRaw && percent == lastDisplayedPercent) return;

  display.clearDisplay();
  display.setTextColor(SSD1306_WHITE);
  display.setTextSize(1);
  display.setCursor(0, 0);
  display.println(F("Bodenfeuchte"));
  display.drawLine(0, 10, SCREEN_WIDTH - 1, 10, SSD1306_WHITE);

  display.setTextSize(3);
  display.setCursor(0, 17);
  display.print(percent);
  display.setTextSize(2);
  display.print(F("%"));

  display.setTextSize(1);
  display.setCursor(0, 45);
  display.print(F("Roh: "));
  display.print(rawValue);
  display.setCursor(0, 55);
  display.print(F("T: "));
  display.print(calibration.dryValue);
  display.print(F(" N: "));
  display.print(calibration.wetValue);
  display.display();

  lastDisplayedRaw = rawValue;
  lastDisplayedPercent = percent;
}

void printHelp() {
  Serial.println(F("\nKapazitiver Bodensensor: Kalibrierung"));
  Serial.println(F("Befehle im seriellen Monitor (115200 Baud):"));
  Serial.println(F("  d = aktuellen Messwert als TROCKEN speichern"));
  Serial.println(F("  w = aktuellen Messwert als NASS speichern"));
  Serial.println(F("  p = gespeicherte Kalibrierwerte anzeigen"));
  Serial.println(F("  c = Kalibrierung auf Standardwerte zuruecksetzen"));
  Serial.println(F("Messwerte werden einmal pro Sekunde ausgegeben."));
}

void handleSerial() {
  while (Serial.available() > 0) {
    char command = Serial.read();
    if (command == '\n' || command == '\r' || command == ' ') continue;

    int currentValue = readAverageRaw();
    if (command == 'd' || command == 'D') {
      calibration.dryValue = currentValue;
      saveCalibration();
      Serial.print(F("TROCKEN gespeichert: "));
      Serial.println(currentValue);
    } else if (command == 'w' || command == 'W') {
      calibration.wetValue = currentValue;
      saveCalibration();
      Serial.print(F("NASS gespeichert: "));
      Serial.println(currentValue);
    } else if (command == 'p' || command == 'P') {
      printCalibration();
    } else if (command == 'c' || command == 'C') {
      calibration.dryValue = 800;
      calibration.wetValue = 400;
      saveCalibration();
      Serial.println(F("Standardwerte gespeichert. Bitte neu kalibrieren."));
    } else if (command == 'h' || command == 'H' || command == '?') {
      printHelp();
    } else {
      Serial.println(F("Unbekannter Befehl. 'h' fuer Hilfe."));
    }
  }
}

void setup() {
  pinMode(SOIL_SENSOR_PIN, INPUT);
  Serial.begin(115200);
  loadCalibration();

  Wire.begin();
  displayAvailable = display.begin(SSD1306_SWITCHCAPVCC, OLED_ADDRESS);
  if (!displayAvailable) {
    Serial.println(F("OLED nicht gefunden. Adresse und Verdrahtung pruefen."));
  }

  delay(300);
  printHelp();
  printCalibration();
  filteredRaw = readAverageRaw();
  updateDisplay(filteredRaw);
}

void loop() {
  handleSerial();

  unsigned long now = millis();
  if (now - lastSampleMs >= SAMPLE_INTERVAL_MS) {
    lastSampleMs = now;
    sampleSum += analogRead(SOIL_SENSOR_PIN);
    sampleCounter++;
    if (sampleCounter >= 4) {
      filteredRaw = sampleSum / sampleCounter;
      sampleSum = 0;
      sampleCounter = 0;
    }
  }

  if (now - lastReportMs >= REPORT_INTERVAL_MS) {
    lastReportMs = now;
    int rawValue = (sampleCounter > 0) ? (sampleSum / sampleCounter) : filteredRaw;
    Serial.print(F("Rohwert: "));
    Serial.print(rawValue);
    Serial.print(F(" | Feuchte: "));
    Serial.print(moisturePercent(rawValue));
    Serial.println(F(" %"));
    updateDisplay(rawValue);
  }
}
Remix this project
Make it yours in one click
Open a full copy of this project in your own Schematik workspace — diagram, code, parts, and assembly steps included. Swap the sensor, add features, or redesign the whole thing with AI. The author's original stays untouched.