Community project
Digital Spirit Level
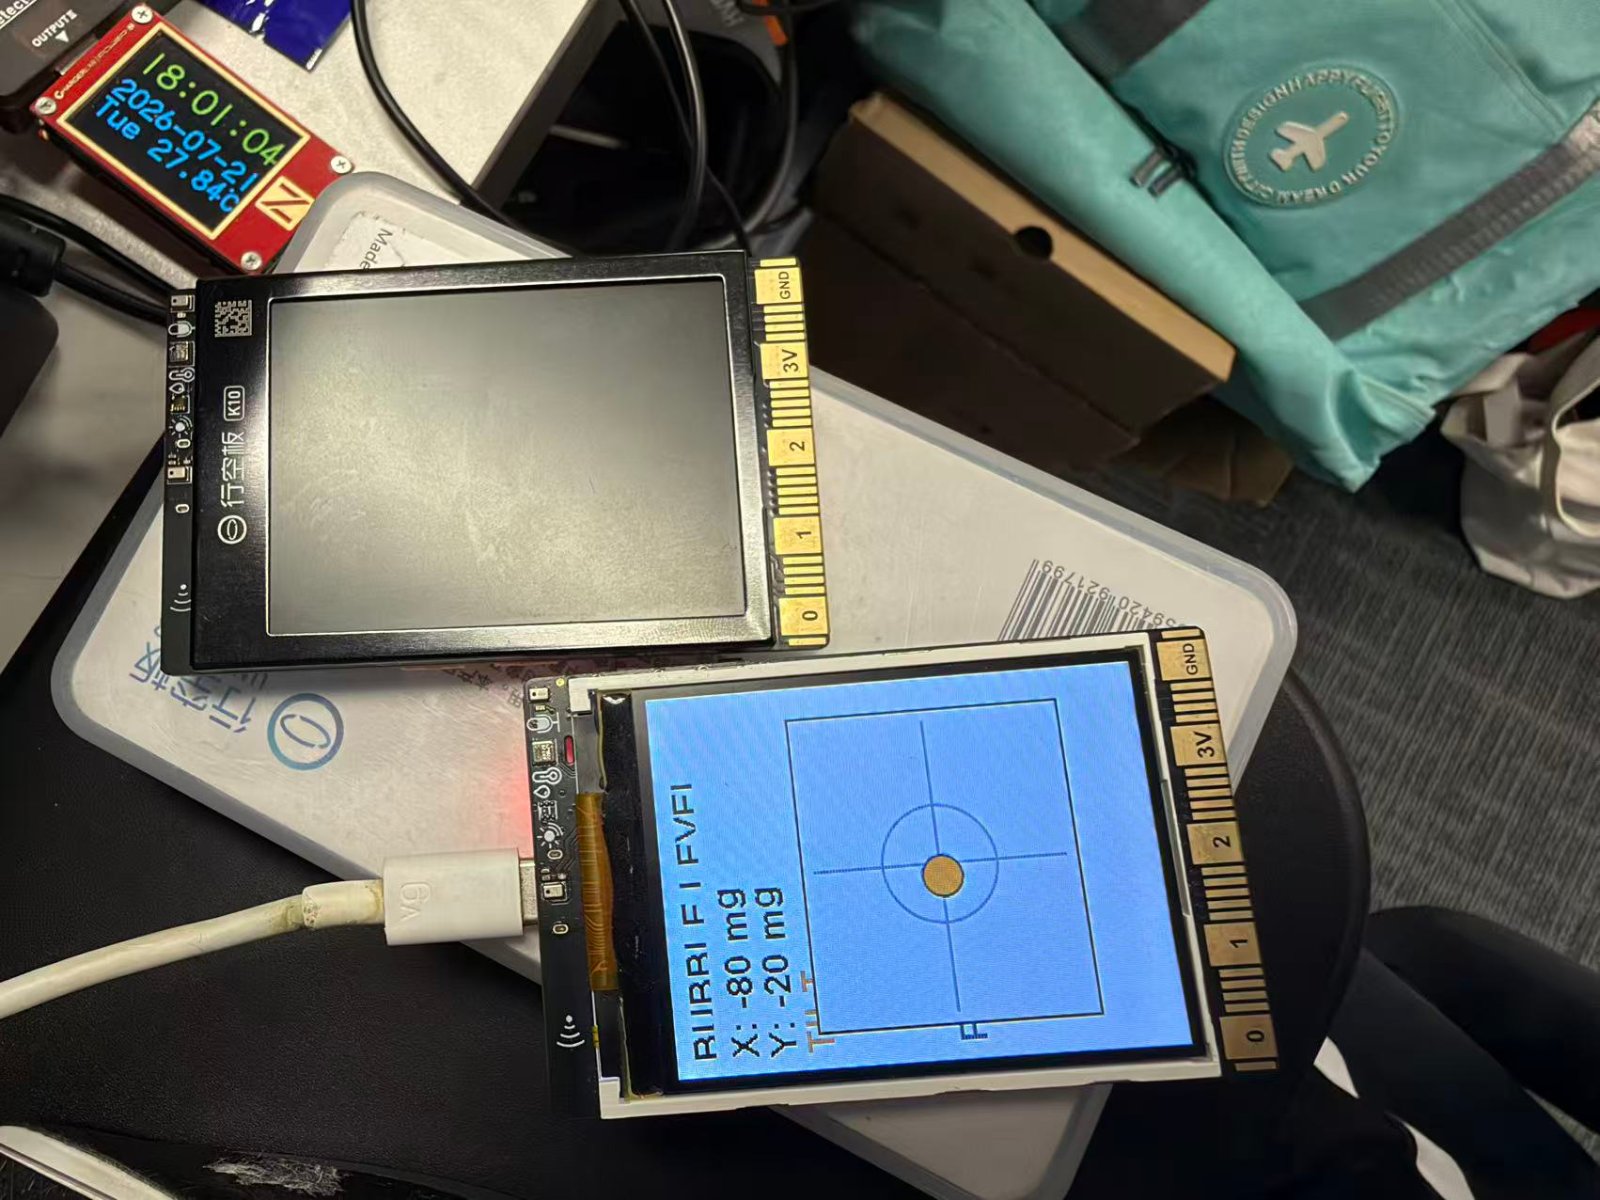
This digital spirit level uses an ESP32 with an accelerometer to detect and display whether a surface is level. The project combines the ESP32 microcontroller with a K10 accelerometer module and a display to create a precise leveling tool that shows real-time tilt measurements as a moving bubble on screen.
Builders will receive a complete wiring diagram showing how to connect the accelerometer and display to the ESP32, a full parts list, the complete firmware with calibration routines, and step-by-step assembly instructions including board component verification, power connection, and zero-point calibration for accurate readings.
Wiring diagram
Assemble it in 3 steps
1. 检查板载部件
本项目只使用 UNIHIKER K10 自带的屏幕、SC7A20H 三轴加速度计和 A 键;不接任何外部传感器或导线。
- 保持屏幕和外壳干净,避免遮挡按键。
- 不要把外部电源直接接到 GPIO、SDA 或 SCL 引脚。
2. 连接供电
使用正常的数据 USB 线连接 UNIHIKER K10 的 USB 接口,为开发板供电并用于 Schematik Deploy。
- 将板子放在稳定、尽量平整的表面上进行初次测试。
- 仅使用 USB 供电;在接线或检查接口时先断开 USB。
3. 确定安装方向并校零
将 K10 固定或平放在需要测量的平面上,屏幕朝上。部署后,按一次板载 A 键,将当前姿态设为零点参考面。之后移动板子,气泡会朝倾斜方向移动;绿色 LEVEL 表示在约 ±35 mg 的容差内。
- 若希望测量绝对水平,将板子放到已知水平的表面后再按 A 键。
- 若设备安装后 X/Y 方向与习惯相反,可将整块板旋转 180 度使用。
- 加速度计会受手持晃动和振动影响;读数稳定后再判断水平。
Deploy the firmware
#include <Arduino.h>
#include "unihiker_k10.h"
#include <math.h>


// Forward declarations
int clampInt(int value, int lower, int upper);
void drawStaticInterface();
void drawDynamicLevel(int displayX, int displayY, int bubbleX, int bubbleY);

UNIHIKER_K10 k10;

// K10 accelerometer readings are in milli-g.  This scale gives a useful
// bubble travel range for ordinary tabletop levelling.
static const int SCREEN_W = 240;
static const int BUBBLE_AREA_LEFT = 20;
static const int BUBBLE_AREA_TOP = 90;
static const int BUBBLE_AREA_W = 200;
static const int BUBBLE_AREA_H = 180;
static const int BUBBLE_RADIUS = 14;
static const int BUBBLE_SCALE_MG = 700;
static const int LEVEL_TOLERANCE_MG = 35;
// The K10 Canvas transfers a complete frame on updateCanvas().  A modest
// cadence plus a render dead-band prevents visible whole-screen flicker.
static const unsigned long SAMPLE_INTERVAL_MS = 120;
static const int DISPLAY_STEP_MG = 10;
static const int BUBBLE_MOVE_THRESHOLD_PX = 3;

float filteredX = 0.0f;
float filteredY = 0.0f;
float filteredZ = 1000.0f;
float zeroX = 0.0f;
float zeroY = 0.0f;
bool wasButtonAPressed = false;
bool haveFrame = false;
int lastBubbleX = -1;
int lastBubbleY = -1;
int lastDisplayX = 99999;
int lastDisplayY = 99999;
unsigned long lastSampleMs = 0;

int clampInt(int value, int lower, int upper) {
  if (value < lower) return lower;
  if (value > upper) return upper;
  return value;
}

void drawStaticInterface() {
  // This is the only full Canvas clear.  All moving content is redrawn into
  // small buffer regions below, so refreshes never show a blank intermediate
  // frame to the display controller.
  k10.canvas->canvasClear();
  k10.canvas->canvasText("BUBBLE LEVEL", 1, 0x000000);
  k10.canvas->canvasText("Press A: set zero", 8, 0x404040);
}

void drawDynamicLevel(int displayX, int displayY, int bubbleX, int bubbleY) {
  const bool isLevel = abs(displayX) <= LEVEL_TOLERANCE_MG &&
                       abs(displayY) <= LEVEL_TOLERANCE_MG;
  const uint32_t bubbleColor = isLevel ? 0x00B050 : 0xE07000;

  // Erase just the changing text rows in the off-screen Canvas buffer.
  // The title and A-button instruction remain untouched.
  k10.canvas->canvasRectangle(0, 25, SCREEN_W, 58, 0xFFFFFF, 0xFFFFFF, true);
  k10.canvas->canvasText(String("X: ") + String(displayX) + " mg", 2, 0x000000);
  k10.canvas->canvasText(String("Y: ") + String(displayY) + " mg", 3, 0x000000);
  k10.canvas->canvasText(isLevel ? "LEVEL" : "TILT", 4, bubbleColor);

  // Redraw only the instrument region in the buffer.  This restores the
  // crosshair beneath the old bubble without clearing the screen buffer.
  k10.canvas->canvasRectangle(BUBBLE_AREA_LEFT, BUBBLE_AREA_TOP,
                              BUBBLE_AREA_W, BUBBLE_AREA_H,
                              0x202020, 0xF4F4F4, true);
  const int centerX = BUBBLE_AREA_LEFT + BUBBLE_AREA_W / 2;
  const int centerY = BUBBLE_AREA_TOP + BUBBLE_AREA_H / 2;
  k10.canvas->canvasSetLineWidth(2);
  k10.canvas->canvasLine(centerX, BUBBLE_AREA_TOP + 8,
                          centerX, BUBBLE_AREA_TOP + BUBBLE_AREA_H - 8, 0x909090);
  k10.canvas->canvasLine(BUBBLE_AREA_LEFT + 8, centerY,
                          BUBBLE_AREA_LEFT + BUBBLE_AREA_W - 8, centerY, 0x909090);
  k10.canvas->canvasCircle(centerX, centerY, 38, 0x909090, 0xF4F4F4, false);
  k10.canvas->canvasCircle(centerX, centerY, 4, 0x202020, 0x202020, true);
  k10.canvas->canvasCircle(bubbleX, bubbleY, BUBBLE_RADIUS,
                           0x202020, bubbleColor, true);

  // K10 submits the Canvas as one frame, but this frame was composed without
  // a preceding blank-screen clear.
  k10.canvas->updateCanvas();
}

void setup() {
  k10.begin();
  k10.initScreen(2);
  k10.creatCanvas();
  k10.setScreenBackground(0xFFFFFF);

  // Seed the low-pass filter from the stationary reading at power-up.
  filteredX = k10.getAccelerometerX();
  filteredY = k10.getAccelerometerY();
  filteredZ = k10.getAccelerometerZ();
  drawStaticInterface();
}

void loop() {
  const unsigned long now = millis();
  if (now - lastSampleMs < SAMPLE_INTERVAL_MS) {
    return;
  }
  lastSampleMs = now;

  // A small low-pass filter makes the bubble steady without making it sluggish.
  const float alpha = 0.22f;
  filteredX += alpha * (k10.getAccelerometerX() - filteredX);
  filteredY += alpha * (k10.getAccelerometerY() - filteredY);
  filteredZ += alpha * (k10.getAccelerometerZ() - filteredZ);

  const bool buttonAPressed = k10.buttonA->isPressed();
  if (buttonAPressed && !wasButtonAPressed) {
    // Store the present orientation as the user's reference plane.
    zeroX = filteredX;
    zeroY = filteredY;
    haveFrame = false;
  }
  wasButtonAPressed = buttonAPressed;

  // K10's physical X-axis is opposite to the desired screen convention.
  const int displayX = (int)lroundf(zeroX - filteredX);
  const int displayY = (int)lroundf(filteredY - zeroY);
  const int centerX = BUBBLE_AREA_LEFT + BUBBLE_AREA_W / 2;
  const int centerY = BUBBLE_AREA_TOP + BUBBLE_AREA_H / 2;

  // Invert Y so that the on-screen bubble moves in the intuitive direction.
  const int bubbleX = clampInt(centerX + (displayX * 70) / BUBBLE_SCALE_MG,
                               BUBBLE_AREA_LEFT + BUBBLE_RADIUS,
                               BUBBLE_AREA_LEFT + BUBBLE_AREA_W - BUBBLE_RADIUS);
  const int bubbleY = clampInt(centerY - (displayY * 70) / BUBBLE_SCALE_MG,
                               BUBBLE_AREA_TOP + BUBBLE_RADIUS,
                               BUBBLE_AREA_TOP + BUBBLE_AREA_H - BUBBLE_RADIUS);

  // Round the text values to 10 mg.  The accelerometer's tiny resting noise
  // then does not cause a new full-screen Canvas transfer.
  const int renderedX = (int)lroundf((float)displayX / DISPLAY_STEP_MG) * DISPLAY_STEP_MG;
  const int renderedY = (int)lroundf((float)displayY / DISPLAY_STEP_MG) * DISPLAY_STEP_MG;

  // Canvas updateCanvas() is a complete-frame transfer on this board. Redraw
  // only after a clearly visible bubble move or a meaningful text change.
  const bool bubbleMoved = !haveFrame || abs(bubbleX - lastBubbleX) >= BUBBLE_MOVE_THRESHOLD_PX ||
                           abs(bubbleY - lastBubbleY) >= BUBBLE_MOVE_THRESHOLD_PX;
  const bool textChanged = !haveFrame || renderedX != lastDisplayX || renderedY != lastDisplayY;
  if (bubbleMoved || textChanged) {
    drawDynamicLevel(renderedX, renderedY, bubbleX, bubbleY);
    lastBubbleX = bubbleX;
    lastBubbleY = bubbleY;
    lastDisplayX = renderedX;
    lastDisplayY = renderedY;
    haveFrame = true;
  }
}
Remix this project
Make it yours in one click
Open a full copy of this project in your own Schematik workspace — diagram, code, parts, and assembly steps included. Swap the sensor, add features, or redesign the whole thing with AI. The author's original stays untouched.