Community project
ESP32-CAM Live Security Stream
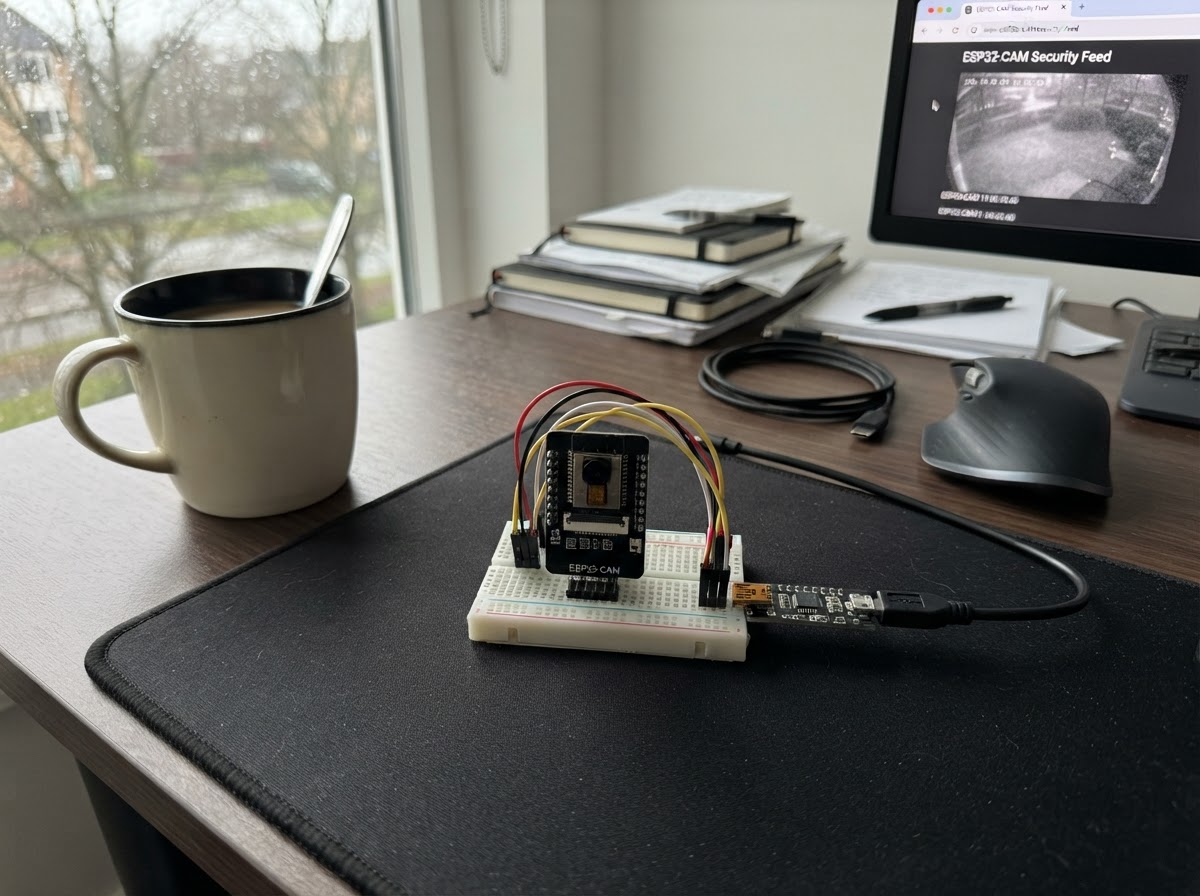
This project turns an ESP32-CAM module into a password-protected live security camera that streams video over WiFi. The camera connects to a local network and serves a web interface where authorized users can view the live feed in real time.
The guide provides a complete parts list, wiring diagram, and ready-to-flash firmware with HTTP Basic authentication built in. Assembly takes just a few minutes: seat the camera module, supply stable 5V power, flash the code via USB-to-serial adapter, and open the protected stream in a web browser.
Wiring diagram
Assemble it in 4 steps
1. Inspect and seat the camera
With power disconnected, make sure the OV2640 camera ribbon is fully inserted in the ESP32-CAM connector and the connector latch is closed. The camera is built into this board design, so no camera signal wires are required.
- Avoid touching the camera lens; remove any protective film before use.
- Do not force the ribbon cable or connect/disconnect it while powered.
2. Connect a stable 5 V supply
Power the ESP32-CAM from its 5V pin and GND using a regulated supply capable of at least 500 mA. A short USB lead from a suitable USB-to-serial adapter can supply it during programming if that adapter provides a stable 5 V output.
- Brownouts, random resets, or corrupted video usually indicate an inadequate 5 V supply.
- Use the 5V pin for normal operation; the ESP32-CAM GPIO pins are 3.3 V logic and must not receive 5 V signals.
3. Connect the USB-to-serial adapter for flashing
For deployment, connect adapter GND to ESP32-CAM GND, adapter TX to ESP32-CAM U0R (GPIO3), and adapter RX to ESP32-CAM U0T (GPIO1). Connect GPIO0 to GND only while entering flash mode, then reset or power-cycle the board. Use Schematik's Deploy button to compile and flash the project.
- After Deploy finishes, remove the GPIO0-to-GND link and reset or power-cycle the ESP32-CAM to start the camera application.
- Ensure the USB-to-serial adapter uses 3.3 V TX/RX logic. Do not connect a 5 V serial TX signal to GPIO3.
4. Open the protected live stream
After rebooting in normal mode, open the serial output to find the printed local address in the form http://192.168.x.x. Open that address from a phone or computer on the same Wi-Fi network, then sign in with user name camera and password Stream-CAM-2026.
- The ESP32-CAM joins only a 2.4 GHz Wi-Fi network; a phone may use 5 GHz as long as both devices are on the same local network.
- This is local-network streaming only. Do not expose the camera directly to the internet without a proper secure remote-access solution.
Deploy the firmware
#include <Arduino.h>
#include <WiFi.h>
#include "esp_camera.h"
#include "esp_http_server.h"
#include "esp_timer.h"
#include "img_converters.h"

// Wi-Fi network supplied for this project.

// Forward declarations
static bool isAuthorized(httpd_req_t *req);
static esp_err_t requireAuthorization(httpd_req_t *req);
static esp_err_t indexHandler(httpd_req_t *req);
static esp_err_t streamHandler(httpd_req_t *req);
static void startWebServer();
static bool startCamera();

static const char *WIFI_SSID = "Htan Yeit Nyo";
static const char *WIFI_PASSWORD = "aeiouzaw";

// Stream-page login. Change these before sharing the camera outside your home.
static const char *CAMERA_USER = "camera";
static const char *CAMERA_PASSWORD = "Stream-CAM-2026";
// Base64 text for "camera:Stream-CAM-2026" used by HTTP Basic authentication.
static const char *AUTH_HEADER = "Basic Y2FtZXJhOlN0cmVhbS1DQU0tMjAyNg==";

// AI Thinker ESP32-CAM: fixed, PCB-wired OV2640 camera pins.
#define PWDN_GPIO_NUM     32
#define RESET_GPIO_NUM    -1
#define XCLK_GPIO_NUM      0
#define SIOD_GPIO_NUM     26
#define SIOC_GPIO_NUM     27
#define Y9_GPIO_NUM       35
#define Y8_GPIO_NUM       34
#define Y7_GPIO_NUM       39
#define Y6_GPIO_NUM       36
#define Y5_GPIO_NUM       21
#define Y4_GPIO_NUM       19
#define Y3_GPIO_NUM       18
#define Y2_GPIO_NUM        5
#define VSYNC_GPIO_NUM    25
#define HREF_GPIO_NUM     23
#define PCLK_GPIO_NUM     22

static httpd_handle_t server = nullptr;

static bool isAuthorized(httpd_req_t *req) {
  char authorization[96] = {0};
  const size_t length = httpd_req_get_hdr_value_len(req, "Authorization");
  if (length == 0 || length >= sizeof(authorization)) return false;
  if (httpd_req_get_hdr_value_str(req, "Authorization", authorization, sizeof(authorization)) != ESP_OK) return false;
  return strcmp(authorization, AUTH_HEADER) == 0;
}

static esp_err_t requireAuthorization(httpd_req_t *req) {
  if (isAuthorized(req)) return ESP_OK;
  httpd_resp_set_status(req, "401 Unauthorized");
  httpd_resp_set_hdr(req, "WWW-Authenticate", "Basic realm=\"ESP32-CAM\"");
  return httpd_resp_send(req, "Login required", HTTPD_RESP_USE_STRLEN);
}

static esp_err_t indexHandler(httpd_req_t *req) {
  if (!isAuthorized(req)) return requireAuthorization(req);
  const char page[] PROGMEM = R"HTML(<!doctype html><html><head><meta name="viewport" content="width=device-width,initial-scale=1"><title>ESP32-CAM Live View</title><style>body{margin:0;background:#111;color:#eee;font-family:Arial;text-align:center}header{padding:14px}img{width:100%;max-width:800px;height:auto;border-radius:4px}small{color:#aaa}</style></head><body><header><b>ESP32-CAM Live View</b><br><small>Local network stream</small></header><img src="/stream" alt="Camera stream"></body></html>)HTML";
  httpd_resp_set_type(req, "text/html");
  return httpd_resp_send(req, page, HTTPD_RESP_USE_STRLEN);
}

static esp_err_t streamHandler(httpd_req_t *req) {
  if (!isAuthorized(req)) return requireAuthorization(req);
  static const char *CONTENT_TYPE = "multipart/x-mixed-replace;boundary=frame";
  static const char *BOUNDARY = "\r\n--frame\r\n";
  static const char *PART_HEADER = "Content-Type: image/jpeg\r\nContent-Length: %u\r\n\r\n";
  char header[80];
  httpd_resp_set_type(req, CONTENT_TYPE);
  httpd_resp_set_hdr(req, "Access-Control-Allow-Origin", "");

  while (true) {
    camera_fb_t *fb = esp_camera_fb_get();
    if (!fb) return ESP_FAIL;
    esp_err_t result = httpd_resp_send_chunk(req, BOUNDARY, strlen(BOUNDARY));
    if (result == ESP_OK) {
      const int headerLength = snprintf(header, sizeof(header), PART_HEADER, fb->len);
      result = httpd_resp_send_chunk(req, header, headerLength);
    }
    if (result == ESP_OK) result = httpd_resp_send_chunk(req, (const char *)fb->buf, fb->len);
    esp_camera_fb_return(fb);
    if (result != ESP_OK) break; // Browser closed the stream.
    delay(1);
  }
  return ESP_OK;
}

static void startWebServer() {
  httpd_config_t config = HTTPD_DEFAULT_CONFIG();
  config.server_port = 80;
  config.lru_purge_enable = true;

  httpd_uri_t indexUri = {.uri = "/", .method = HTTP_GET, .handler = indexHandler, .user_ctx = nullptr};
  httpd_uri_t streamUri = {.uri = "/stream", .method = HTTP_GET, .handler = streamHandler, .user_ctx = nullptr};

  if (httpd_start(&server, &config) == ESP_OK) {
    httpd_register_uri_handler(server, &indexUri);
    httpd_register_uri_handler(server, &streamUri);
  }
}

static bool startCamera() {
  camera_config_t config = {};
  config.ledc_channel = LEDC_CHANNEL_0;
  config.ledc_timer = LEDC_TIMER_0;
  config.pin_d0 = Y2_GPIO_NUM;
  config.pin_d1 = Y3_GPIO_NUM;
  config.pin_d2 = Y4_GPIO_NUM;
  config.pin_d3 = Y5_GPIO_NUM;
  config.pin_d4 = Y6_GPIO_NUM;
  config.pin_d5 = Y7_GPIO_NUM;
  config.pin_d6 = Y8_GPIO_NUM;
  config.pin_d7 = Y9_GPIO_NUM;
  config.pin_xclk = XCLK_GPIO_NUM;
  config.pin_pclk = PCLK_GPIO_NUM;
  config.pin_vsync = VSYNC_GPIO_NUM;
  config.pin_href = HREF_GPIO_NUM;
  config.pin_sccb_sda = SIOD_GPIO_NUM;
  config.pin_sccb_scl = SIOC_GPIO_NUM;
  config.pin_pwdn = PWDN_GPIO_NUM;
  config.pin_reset = RESET_GPIO_NUM;
  config.xclk_freq_hz = 20000000;
  config.pixel_format = PIXFORMAT_JPEG;

  if (psramFound()) {
    config.frame_size = FRAMESIZE_VGA;
    config.jpeg_quality = 12;
    config.fb_count = 2;
    config.fb_location = CAMERA_FB_IN_PSRAM;
  } else {
    config.frame_size = FRAMESIZE_QVGA;
    config.jpeg_quality = 15;
    config.fb_count = 1;
    config.fb_location = CAMERA_FB_IN_DRAM;
  }
  return esp_camera_init(&config) == ESP_OK;
}

void setup() {
  Serial.begin(115200);
  Serial.setDebugOutput(false);

  if (!startCamera()) {
    Serial.println("Camera initialization failed; check that the OV2640 ribbon cable is fully seated.");
    return;
  }

  WiFi.mode(WIFI_STA);
  WiFi.begin(WIFI_SSID, WIFI_PASSWORD);
  Serial.print("Connecting to Wi-Fi");
  const unsigned long started = millis();
  while (WiFi.status() != WL_CONNECTED && millis() - started < 30000) {
    delay(500);
    Serial.print('.');
  }
  Serial.println();
  if (WiFi.status() != WL_CONNECTED) {
    Serial.println("Wi-Fi connection failed. Check the network name, password, and 2.4 GHz coverage.");
    return;
  }

  startWebServer();
  Serial.print("Open http://");
  Serial.println(WiFi.localIP());
  Serial.println("Login user: camera");
}

void loop() {
  delay(1000);
}
Remix this project
Make it yours in one click
Open a full copy of this project in your own Schematik workspace — diagram, code, parts, and assembly steps included. Swap the sensor, add features, or redesign the whole thing with AI. The author's original stays untouched.