Community project
ESP32 Overview
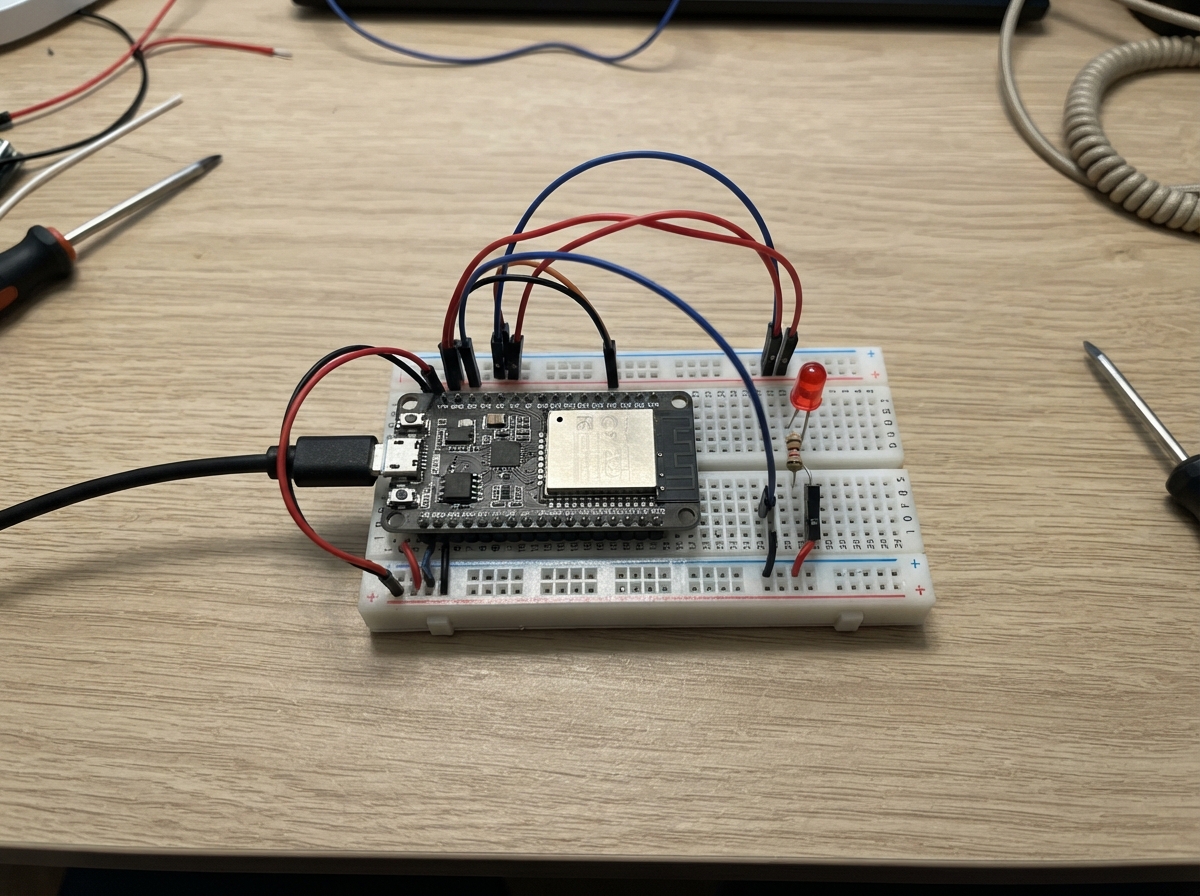
This guide introduces PWM (Pulse Width Modulation) control on the ESP32 microcontroller using a simple LED circuit. PWM is a fundamental technique for controlling power delivery to devices, and this project demonstrates the concept with an LED that brightens and dims based on duty cycle commands sent over the serial connection.
Builders will learn how to configure the ESP32's PWM hardware, map percentage values to duty cycles, and communicate with the board via the Arduino IDE Serial Monitor. The guide includes a complete wiring diagram showing LED and current-limiting resistor connections, a parts list, and firmware with serial input handling. This foundation prepares makers to later drive more powerful loads like DC pumps or motors using appropriate driver circuits.
Wiring diagram

Gather all the parts
Assemble it in 3 steps
1. วางบอร์ดและ LED
วาง ESP32 DevKit และ LED บนเบรดบอร์ด โดยให้ขา LED สองขาอยู่คนละแถว ขาที่ยาวกว่าคือขาบวก และขาที่สั้นกว่าหรือด้านแบนของหลอดคือขาลบ.
- ถ้าขา LED สั้นยาวเท่ากัน ให้ดูด้านแบนที่ขอบหลอดแทน เพราะด้านนั้นคือขาลบ.
- อย่าสลับขาบวกและขาลบของ LED เพราะ LED จะไม่ติด และการต่อผิดร่วมกับไฟที่สูงเกินไปอาจทำให้ LED เสียได้.
2. ต่อ LED ผ่านตัวต้านทาน
ต่อ GPIO25 ของ ESP32 ไปยังขาหนึ่งของตัวต้านทาน 220 Ω แล้วต่อตัวต้านทานอีกขาไปที่ขายาวของ LED; ต่อขาสั้นของ LED ไปที่ GND ของ ESP32. ตัวต้านทานเป็นตัวจำกัดกระแสเพื่อป้องกัน LED.
- GPIO25 → ตัวต้านทาน 220 Ω (สัญญาณ PWM), ตัวต้านทาน → ขายาว LED (จำกัดกระแส), ขาสั้น LED → GND (ทางกลับไฟ).
- ห้ามต่อ LED จาก GPIO25 ไป GND โดยไม่มีตัวต้านทาน เพราะกระแสที่มากเกินไปอาจทำให้ LED หรือขา ESP32 เสียหาย.
3. ทดลองคำสั่ง PWM
เสียบ ESP32 เข้าคอมพิวเตอร์ด้วยสาย USB แล้วกด Deploy ใน Schematik. LED จะค่อย ๆ หรี่และสว่างขึ้นลง ซึ่งแทนการเพิ่มและลดความเร็วของปั๊ม. ในหน้าต่าง Serial Monitor ให้พิมพ์ตัวเลข 0 ถึง 100 แล้วส่ง เพื่อทดลองระดับกำลังเอง.
- 0 คือหยุด, 50 คือครึ่งกำลัง, และ 100 คือกำลังเต็ม.
- การทดลองนี้ใช้ LED แทนปั๊มเท่านั้น; ห้ามต่อปั๊มเข้าขา GPIO25 โดยตรง เพราะปั๊มใช้กระแสสูงกว่า ESP32 รับได้มาก.
Review all connections
1. Connections between "resistor_1" and "ESP32"
2. Connections between "led_1" and "ESP32"
Deploy the firmware
#include <Arduino.h>

// PWM output: this is connected to the LED in this first safe experiment.
// Later, the same output can feed a suitable MOSFET driver for a DC pump.
constexpr int PWM_OUTPUT_PIN = 25;
constexpr int PWM_FREQUENCY_HZ = 5000;
constexpr int PWM_RESOLUTION_BITS = 8;
constexpr int PWM_MAX = (1 << PWM_RESOLUTION_BITS) - 1;

int pumpPercent = 0;
int directionStep = 1;
unsigned long lastUpdateMs = 0;

void setPumpPercent(int percent) {
  pumpPercent = constrain(percent, 0, 100);
  int duty = map(pumpPercent, 0, 100, 0, PWM_MAX);
  ledcWrite(PWM_OUTPUT_PIN, duty);

  Serial.print("PWM command: ");
  Serial.print(pumpPercent);
  Serial.print("%  |  duty: ");
  Serial.println(duty);
}

void setup() {
  Serial.begin(115200);
  ledcAttach(PWM_OUTPUT_PIN, PWM_FREQUENCY_HZ, PWM_RESOLUTION_BITS);

  Serial.println("ESP32 PWM demo started.");
  Serial.println("The LED represents pump speed: dim = slow, bright = fast.");
  Serial.println("Type a number from 0 to 100 in Serial Monitor, then press Send.");
  setPumpPercent(0);
}

void loop() {
  // A typed value, such as 65, replaces the automatic demonstration level.
  if (Serial.available() > 0) {
    int requestedPercent = Serial.parseInt();
    if (requestedPercent >= 0 && requestedPercent <= 100) {
      setPumpPercent(requestedPercent);
    } else {
      Serial.println("Please enter a whole number from 0 to 100.");
    }
    while (Serial.available() > 0) {
      Serial.read();
    }
  }

  // Move the simulated pump speed up and down once every 50 ms.
  if (millis() - lastUpdateMs >= 50) {
    lastUpdateMs = millis();
    pumpPercent += directionStep;

    if (pumpPercent >= 100) {
      pumpPercent = 100;
      directionStep = -1;
    } else if (pumpPercent <= 0) {
      pumpPercent = 0;
      directionStep = 1;
    }

    int duty = map(pumpPercent, 0, 100, 0, PWM_MAX);
    ledcWrite(PWM_OUTPUT_PIN, duty);
  }
}
Remix this project
Make it yours in one click
Open a full copy of this project in your own Schematik workspace — diagram, code, parts, and assembly steps included. Swap the sensor, add features, or redesign the whole thing with AI. The author's original stays untouched.