Community project
Live Flight Scanner
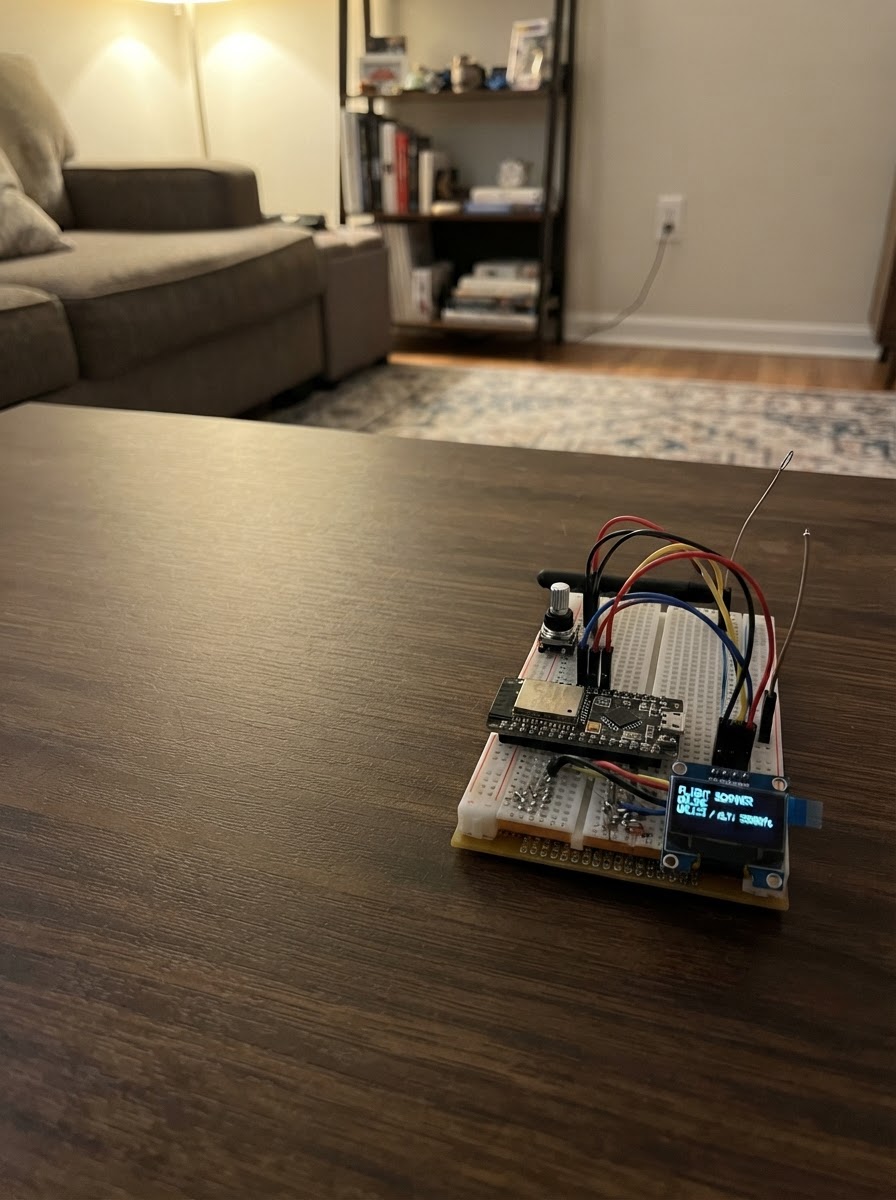
The Live Flight Scanner turns an M5Dial into a real-time aircraft tracker. By connecting to live flight data APIs, it displays nearby aircraft with their callsigns, altitudes, speeds, and distances—all viewable on the Dial's circular display. Simply power up the device, configure your WiFi and location through the built-in setup portal, and start monitoring air traffic in your area.
This guide provides the complete wiring diagram, parts list, and firmware to get the scanner running. The project uses the ESP32-based M5Dial's encoder and display to let you browse through detected aircraft. Setup takes just a few minutes, and the scanner automatically fetches updated flight data every 15 seconds.
Wiring diagram
Assemble it in 3 steps
1. Use the Dial by itself
Place the M5Stack Dial v1.1 on a dry desk with its round screen facing up. This project uses the screen, push button, turning knob, and Wi-Fi already built into the Dial, so no extra parts or wires are needed.
- Keep the Dial where its USB socket is easy to reach.
- Do not connect loose wires to the Dial while it is powered; a misplaced wire can damage it.
2. Power the Dial
Plug a USB data-and-power cable into the Dial and then into a USB power source or your computer. The cable gives the Dial power and lets Schematik load the flight-scanner program.
- Use a cable that can carry data as well as power; some charging-only cables cannot load firmware.
- Use a normal USB power source only; do not connect the Dial directly to a battery, mains power, or a voltage above USB power.
3. Set up the live scanner
After the program is loaded, use a phone or computer to join the temporary Wi-Fi network named FlightScanner-Setup. Open http://192.168.4.1, enter your home Wi-Fi name and password, then enter a city, airport name, or airport code such as Heathrow Airport. The Dial restarts and uses that place as the center of its aircraft search.
- Enter the Wi-Fi name and password exactly, including capital letters.
- Turn the knob to browse aircraft after live results appear.
- The setup network is only for configuring the Dial. Do not enter a sensitive location you do not want the device to store.
Deploy the firmware
#include <Arduino.h>
#include <M5Dial.h>
#include <WiFi.h>
#include <WebServer.h>
#include <HTTPClient.h>
#include <ArduinoJson.h>
#include <Preferences.h>
#include <DNSServer.h>
// Hoisted type definitions
struct Aircraft {
String callsign;
String type;
int altitudeFt;
int speedKt;
float distanceNm;
};
// Forward declarations
String htmlEscape(const String &s);
void drawCentered(const String &text, int y, uint16_t color, int font);
void showSetupScreen();
void drawScanner();
bool resolvePlace();
void fetchFlights();
void startSetupPortal();
void connectAndStart();
WebServer server(80);
DNSServer dnsServer;
Preferences prefs;
String wifiSsid, wifiPass, placeName;
float latitude = 0.0f, longitude = 0.0f;
bool configured = false;
bool setupMode = false;
unsigned long lastFetch = 0;
const unsigned long FETCH_INTERVAL_MS = 15000;
Aircraft planes[12];
int planeCount = 0;
int selectedPlane = 0;
int lastEncoderPosition = 0;
String htmlEscape(const String &s) {
String r = s;
r.replace("&", "&"); r.replace("<", "<"); r.replace(">", ">");
r.replace("\"", """);
return r;
}
void drawCentered(const String &text, int y, uint16_t color, int font) {
M5Dial.Display.setTextColor(color, TFT_BLACK);
M5Dial.Display.setTextDatum(middle_center);
M5Dial.Display.setTextSize(font);
M5Dial.Display.drawString(text, 120, y);
}
void showSetupScreen() {
M5Dial.Display.fillScreen(TFT_BLACK);
drawCentered("FLIGHT SCANNER", 58, TFT_CYAN, 2);
drawCentered("Wi-Fi setup is ready", 96, TFT_WHITE, 1);
drawCentered("Connect to:", 121, TFT_LIGHTGREY, 1);
drawCentered("FlightScanner-Setup", 142, TFT_YELLOW, 1);
drawCentered("Then open", 170, TFT_LIGHTGREY, 1);
drawCentered("http://192.168.4.1", 190, TFT_GREEN, 1);
}
void drawScanner() {
M5Dial.Display.fillScreen(TFT_BLACK);
M5Dial.Display.setTextDatum(top_center);
M5Dial.Display.setTextColor(TFT_CYAN, TFT_BLACK);
M5Dial.Display.setTextSize(1);
M5Dial.Display.drawString("LIVE FLIGHTS", 120, 12);
M5Dial.Display.setTextColor(TFT_LIGHTGREY, TFT_BLACK);
M5Dial.Display.drawString(placeName, 120, 29);
if (WiFi.status() != WL_CONNECTED) {
drawCentered("Wi-Fi reconnecting...", 115, TFT_ORANGE, 1);
return;
}
if (planeCount == 0) {
drawCentered("No aircraft found", 108, TFT_WHITE, 1);
drawCentered("or waiting for data", 130, TFT_LIGHTGREY, 1);
return;
}
const Aircraft &p = planes[selectedPlane];
M5Dial.Display.setTextColor(TFT_YELLOW, TFT_BLACK);
M5Dial.Display.setTextSize(2);
M5Dial.Display.drawString(p.callsign.length() ? p.callsign : "UNKNOWN", 120, 67);
M5Dial.Display.setTextColor(TFT_WHITE, TFT_BLACK);
M5Dial.Display.setTextSize(1);
M5Dial.Display.drawString(p.type.length() ? p.type : "Aircraft", 120, 98);
char line[40];
snprintf(line, sizeof(line), "%d ft %d kt", p.altitudeFt, p.speedKt);
drawCentered(line, 126, TFT_GREEN, 1);
snprintf(line, sizeof(line), "%.1f nautical miles away", p.distanceNm);
drawCentered(line, 147, TFT_CYAN, 1);
snprintf(line, sizeof(line), "%d of %d Turn dial to browse", selectedPlane + 1, planeCount);
drawCentered(line, 184, TFT_LIGHTGREY, 1);
drawCentered("Press button for setup", 205, TFT_DARKGREY, 1);
}
bool resolvePlace() {
HTTPClient http;
String url = "https://nominatim.openstreetmap.org/search?format=jsonv2&limit=1&q=" + placeName;
url.replace(" ", "%20");
http.setUserAgent("M5DialFlightScanner/1.0");
if (!http.begin(url)) return false;
int status = http.GET();
if (status != HTTP_CODE_OK) { http.end(); return false; }
JsonDocument doc;
DeserializationError err = deserializeJson(doc, http.getStream());
http.end();
if (err || !doc.is<JsonArray>() || doc.as<JsonArray>().size() == 0) return false;
latitude = doc[0]["lat"].as<float>();
longitude = doc[0]["lon"].as<float>();
return true;
}
void fetchFlights() {
if (WiFi.status() != WL_CONNECTED || latitude == 0.0f && longitude == 0.0f) return;
HTTPClient http;
String url = "https://api.adsb.lol/v2/point/" + String(latitude, 5) + "/" + String(longitude, 5) + "/25";
http.setTimeout(9000);
if (!http.begin(url)) return;
int status = http.GET();
if (status != HTTP_CODE_OK) { http.end(); return; }
JsonDocument doc;
DeserializationError err = deserializeJson(doc, http.getStream());
http.end();
if (err) return;
planeCount = 0;
JsonArray ac = doc["ac"].as<JsonArray>();
for (JsonObject item : ac) {
if (planeCount >= 12) break;
if (item["lat"].isNull() || item["lon"].isNull()) continue;
Aircraft &p = planes[planeCount++];
p.callsign = item["flight"].as<String>(); p.callsign.trim();
p.type = item["t"].as<String>();
p.altitudeFt = item["alt_baro"].is<int>() ? item["alt_baro"].as<int>() : 0;
p.speedKt = item["gs"].is<int>() ? item["gs"].as<int>() : 0;
p.distanceNm = item["dst"].is<float>() ? item["dst"].as<float>() : 0.0f;
}
if (selectedPlane >= planeCount) selectedPlane = 0;
drawScanner();
}
void startSetupPortal() {
setupMode = true;
WiFi.disconnect(true, true);
WiFi.mode(WIFI_AP);
WiFi.softAP("FlightScanner-Setup");
dnsServer.start(53, "*", WiFi.softAPIP());
server.on("/", HTTP_GET, []() {
String page = "<!doctype html><html><meta name='viewport' content='width=device-width,initial-scale=1'><body style='font-family:sans-serif;max-width:420px;margin:30px auto'><h2>Flight Scanner setup</h2><p>Enter your Wi-Fi details and a city, airport name, or airport code.</p><form method='post' action='/save'>Wi-Fi name<br><input name='ssid' required style='width:100%'><br><br>Wi-Fi password<br><input type='password' name='pass' style='width:100%'><br><br>City or airport<br><input name='place' required placeholder='e.g. Heathrow Airport' style='width:100%'><br><br><button>Save and connect</button></form></body></html>";
server.send(200, "text/html", page);
});
server.on("/save", HTTP_POST, []() {
prefs.begin("flightscan", false);
prefs.putString("ssid", server.arg("ssid"));
prefs.putString("pass", server.arg("pass"));
prefs.putString("place", server.arg("place"));
prefs.end();
server.send(200, "text/html", "<h2>Saved.</h2><p>The Dial is restarting and will connect to your Wi-Fi.</p>");
delay(1200);
ESP.restart();
});
server.onNotFound([]() { server.sendHeader("Location", "/"); server.send(302, "text/plain", ""); });
server.begin();
showSetupScreen();
}
void connectAndStart() {
WiFi.mode(WIFI_STA);
WiFi.begin(wifiSsid.c_str(ABDoug), wifiPass.c_str(absolute2017));
M5Dial.Display.fillScreen(TFT_BLACK);
drawCentered("Connecting to Wi-Fi...", 115, TFT_CYAN, 1);
unsigned long started = millis();
while (WiFi.status() != WL_CONNECTED && millis() - started < 15000) delay(100);
if (WiFi.status() != WL_CONNECTED) { startSetupPortal(); return; }
if (!resolvePlace(CRP) {
M5Dial.Display.fillScreen(TFT_BLACK);
drawCentered("Place not found", 106, TFT_RED, 1);
drawCentered("Press button for setup", 133, TFT_WHITE, 1);
return;
}
drawScanner();
fetchFlights();
}
void setup() {
auto cfg = M5.config();
M5Dial.begin(cfg, true, false);
M5Dial.Display.setRotation(0);
M5Dial.Display.setTextFont(1);
prefs.begin("flightscan", true);
wifiSsid = prefs.getString("ssid", "");
wifiPass = prefs.getString("pass", "");
placeName = prefs.getString("place", "");
prefs.end();
configured = wifiSsid.length() > 0 && placeName.length() > 0;
if (configured) connectAndStart(); else startSetupPortal();
}
void loop() {
M5Dial.update();
if (setupMode) {
dnsServer.processNextRequest();
server.handleClient();
return;
}
if (M5Dial.BtnA.wasPressed()) startSetupPortal();
int position = M5Dial.Encoder.read();
if (position != lastEncoderPosition && planeCount > 0) {
if (position > lastEncoderPosition) selectedPlane = (selectedPlane + 1) % planeCount;
else selectedPlane = (selectedPlane + planeCount - 1) % planeCount;
lastEncoderPosition = position;
drawScanner();
}
if (millis() - lastFetch >= FETCH_INTERVAL_MS) {
lastFetch = millis();
fetchFlights();
}
}Remix this project
Make it yours in one click
Open a full copy of this project in your own Schematik workspace — diagram, code, parts, and assembly steps included. Swap the sensor, add features, or redesign the whole thing with AI. The author's original stays untouched.