Community project
Smart AC Controller
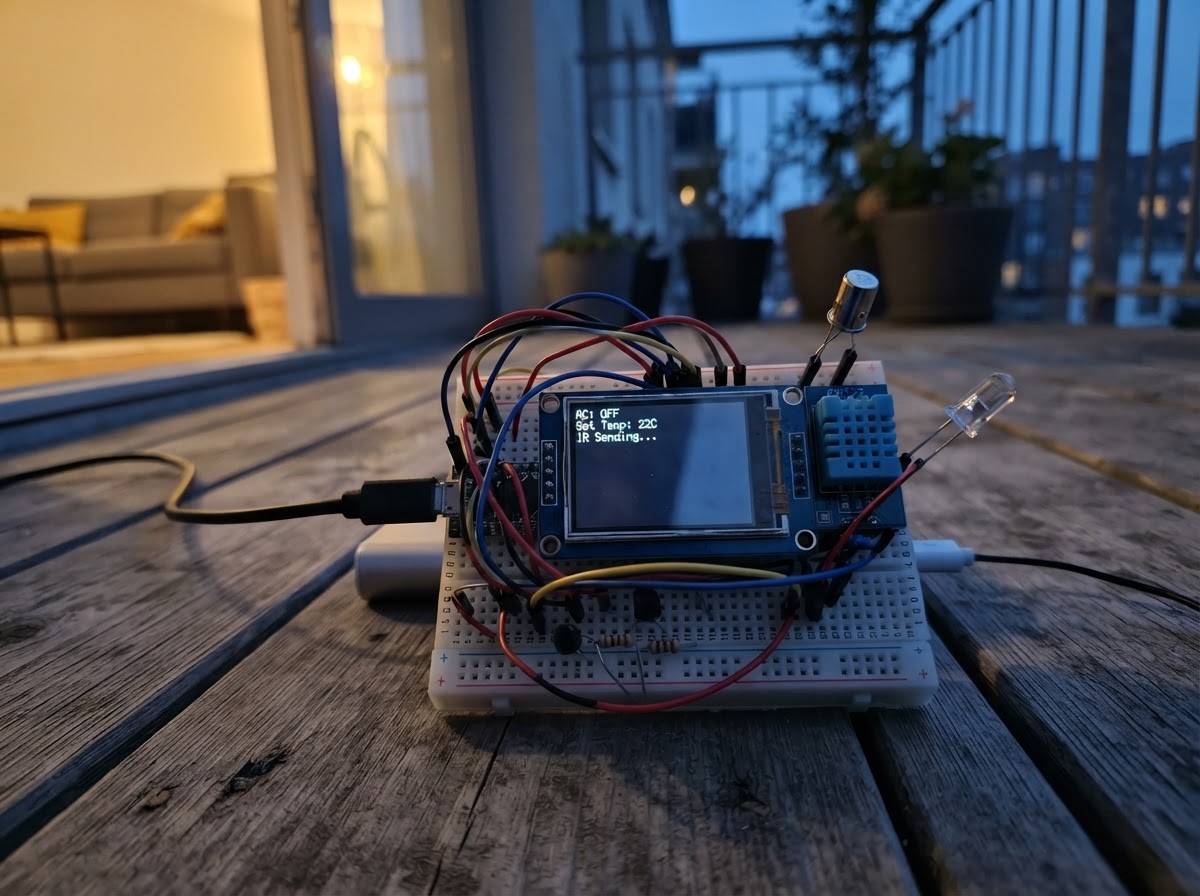
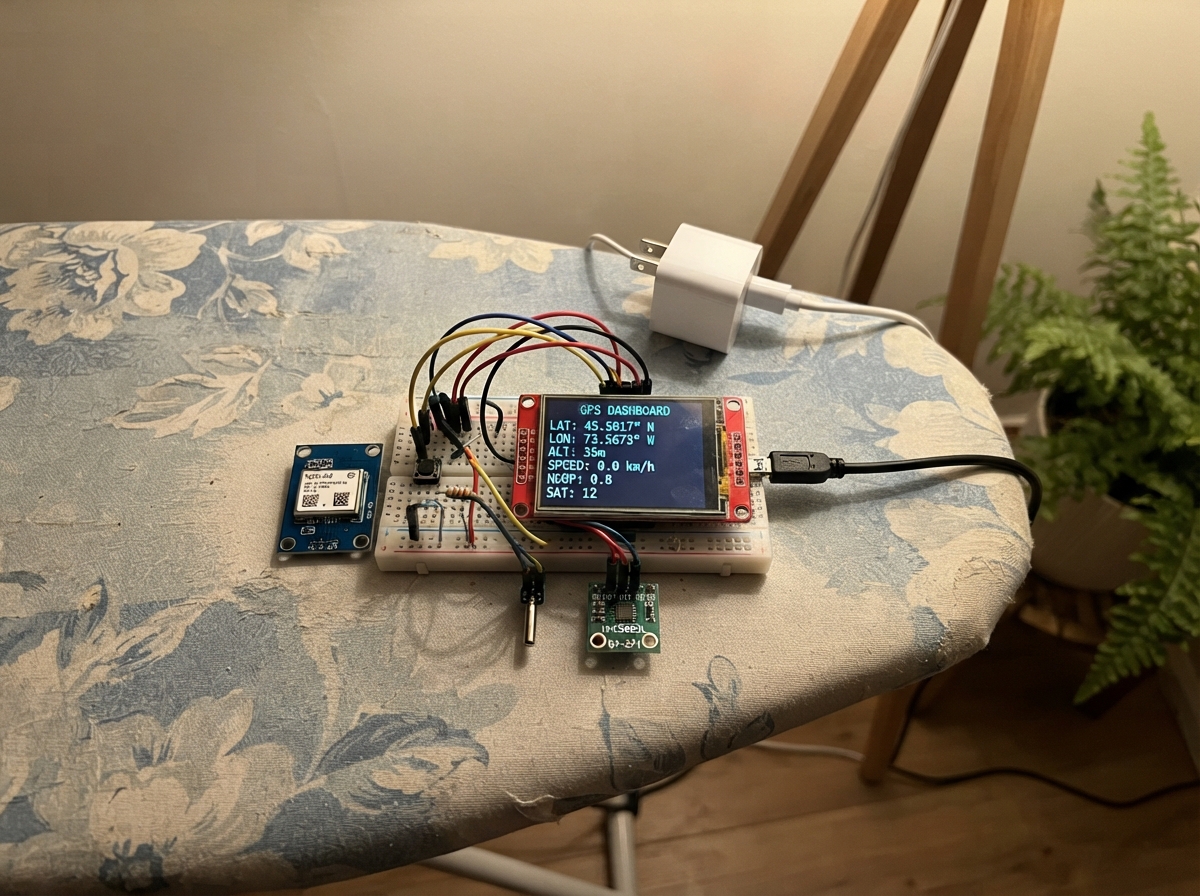
This smart AC controller lets you manage your air conditioner from a touchscreen interface or IR remote, with real-time room temperature monitoring. The ESP32 learns and transmits infrared commands to control any AC unit, while the DHT22 sensor tracks temperature and humidity for display on the ILI9341 touchscreen.
The guide provides a complete wiring diagram, parts list, and step-by-step assembly instructions for connecting the touchscreen, IR receiver, temperature sensor, and infrared transmitter circuit. You'll also get the full firmware to program the ESP32, including WiFi connectivity for remote access and an IR learning mode to capture your AC's command codes.
Wiring diagram

Gather all the parts
Assemble it in 6 steps
1. Tạo hai đường nguồn chung
Cắm ESP32 lên breadboard. Dùng dây đỏ nối chân 3V3 của ESP32 đến một hàng nguồn, rồi dùng dây đen nối GND đến hàng nguồn âm. Mọi mô-đun trong mạch phải dùng cùng hàng GND để các tín hiệu có cùng mốc đo.
- Chỉ dùng chân 3V3 cho TFT, VS1838B và DHT22 trong bản này.
- Không nối VCC của TFT hoặc VS1838B sang 5V vì các chân tín hiệu ESP32 chỉ dùng mức 3.3 V.
2. Nối màn hình cảm ứng
Nối VCC → 3V3 (power), GND → GND (ground), SCK/CLK → GPIO18 (clock), MISO/SDO → GPIO19 (data back), MOSI/SDI → GPIO23 (data), TFT_CS → GPIO4 (select screen), TFT_DC → GPIO27 (screen command/data), TFT_RST → GPIO26 (reset screen), T_CS → GPIO25 (select touch), và LED/BL → 3V3 (backlight power).
- Tên in trên bo có thể là CS, DC, RST và T_CS thay cho các tên dài trong danh sách.
- Để màn hình nằm ngang như giao diện, đặt nó sao cho cạnh dài chạy từ trái sang phải.
- Đừng nhầm chân T_CS với TFT_CS: hai chân này cần tách riêng để phần chạm và phần màn hình cùng dùng các dây dữ liệu.
3. Nối mắt thu lệnh từ remote
Nhìn đúng nhãn in trên mô-đun VS1838B rồi nối VCC → 3V3 (power), GND → GND (ground), OUT → GPIO13 (signal). Sau này hướng đầu đen của mắt thu về phía remote gốc khi học lệnh.
- Các bo VS1838B có thể sắp thứ tự chân khác nhau; luôn đọc chữ VCC, GND, OUT trên bo trước khi cắm.
- Đặt mắt thu ở mép breadboard để remote có thể chĩa thẳng vào nó.
- Cắm nhầm VCC và GND có thể làm hỏng mắt thu.
4. Nối cảm biến nhiệt độ phòng
Với DHT22 rời 4 chân, khi nhìn mặt lưới hướng về bạn: chân 1 VCC → 3V3 (power), chân 2 DATA → GPIO33 (signal), chân 4 GND → GND (ground). Cắm điện trở 10 kΩ giữa chân VCC và chân DATA; điện trở này giúp đường số liệu ổn định. Nếu bạn có DHT22 dạng module 3 chân đã có điện trở trên bo, không cắm thêm điện trở 10 kΩ.
- Chân 3 của DHT22 rời không nối vào đâu.
- Đặt DHT22 tránh sát ESP32 và tránh luồng gió từ điều hòa để số đo phản ánh nhiệt độ phòng.
- Đừng đảo mặt của DHT22 khi xác định chân; nối nhầm nguồn có thể làm hỏng cảm biến.
5. Lắp mạch phát hồng ngoại
Nối 3V3 → một đầu điện trở 100 Ω (power); đầu kia của điện trở → chân dương/anode của IR LED (current limit). Nối chân âm/cathode của IR LED → chân C của transistor S8050 (IR switch). Nối chân E của S8050 → GND (ground). Nối GPIO32 → một đầu điện trở 1 kΩ (control); đầu kia của điện trở → chân B của S8050 (control).
- IR LED thường có chân dài là anode/dương; cạnh phẳng hoặc chân ngắn là cathode/âm.
- S8050 của các hãng có thể đảo vị trí E-B-C. Hãy xem chữ hoặc sơ đồ chân của đúng transistor bạn có trước khi cắm.
- Khi thử, đặt LED IR cách mắt nhận của điều hòa khoảng 0.5 đến 2 m và chĩa thẳng vào nó.
- Nếu transistor bị cắm sai chân, LED IR sẽ không phát và transistor có thể nóng lên.
- Điện trở 100 Ω là bắt buộc; bỏ nó có thể làm LED IR hoặc transistor bị quá dòng.
6. Cấp nguồn và học lệnh
Kiểm tra lại một lần rằng mọi GND đã nối chung, rồi cắm cáp USB vào ESP32. Sau khi nạp chương trình bằng Deploy, điện thoại có thể vào cùng Wi-Fi nhà bạn khi bạn điền tên và mật khẩu Wi-Fi trong hai dòng đầu mã. Nếu chưa điền, kết nối điện thoại với Wi-Fi tên AC-Controller-Setup, mật khẩu configureme, rồi mở địa chỉ 192.168.4.1. Nhấn Learn trên trang web, sau đó giữ nút tương ứng trên remote gốc cách mắt VS1838B từ 2 đến 10 cm trong vòng 12 giây.
- Với remote điều hòa, mỗi lần bấm thường gửi toàn bộ trạng thái như chế độ, nhiệt độ và quạt. Vì vậy hãy học riêng từng trạng thái hoàn chỉnh mà bạn muốn dùng.
- Bạn cũng có thể bấm các nút đã học trên màn hình cảm ứng để phát lệnh.
- Không đánh giá LED IR bằng mắt thường vì ánh sáng hồng ngoại gần như không nhìn thấy; thử bằng cách xem điều hòa có nhận lệnh, hoặc dùng camera điện thoại để thấy LED nhấp nháy.
Review all connections
1. Connections between "tft_ili9341_1" and "ESP32"
2. Connections between "ir_receiver_1" and "ESP32"
3. Connections between "dht22_1" and "ESP32"
4. Connections between "resistor_ir_led_1" and "ESP32"
5. Connections between "ir_led_1" and "ESP32"
6. Connections between "s8050_1" and "ESP32"
7. Connections between "resistor_base_1" and "ESP32"
8. Connections between "resistor_dht_pullup_1" and "ESP32"
Deploy the firmware
#include <Arduino.h>
#include <WiFi.h>
#include <WebServer.h>
#include <Preferences.h>
#include <SPI.h>
#include <DHT.h>
#include <Adafruit_GFX.h>
#include <Adafruit_ILI9341.h>
#include <XPT2046_Touchscreen.h>
#include <IRremoteESP8266.h>
#include <IRrecv.h>
#include <IRsend.h>
#include <IRutils.h>

// Change these two strings, then reboot, to join your home Wi-Fi.

// Forward declarations
bool slotExists(const String &slot);
String safeSlot(String slot);
void saveRaw(const String &slot, uint16_t *raw, uint16_t length);
bool sendSlot(String slot);
void startLearning(String slot);
void drawButton(int16_t x, int16_t y, int16_t w, int16_t h, const char *label, uint16_t color);
void drawScreen();
void handleTouch();
String htmlPage();
void setupWeb();
void connectWiFi();
void checkLearning();

const char *WIFI_SSID = "";
const char *WIFI_PASSWORD = "";
const char *SETUP_AP_NAME = "AC-Controller-Setup";
const char *SETUP_AP_PASSWORD = "configureme";

static const uint8_t TFT_CS_PIN = 4;
static const uint8_t TFT_DC_PIN = 27;
static const uint8_t TFT_RST_PIN = 26;
static const uint8_t TOUCH_CS_PIN = 25;
static const uint8_t SPI_SCK_PIN = 18;
static const uint8_t SPI_MISO_PIN = 19;
static const uint8_t SPI_MOSI_PIN = 23;
static const uint8_t IR_RECEIVE_PIN = 13;
static const uint8_t IR_SEND_PIN = 32;
static const uint8_t DHT_PIN = 33;

static const uint16_t SCREEN_W = 320;
static const uint16_t SCREEN_H = 240;
static const uint16_t IR_BUFFER_SIZE = 1024;
static const uint32_t LEARN_WINDOW_MS = 12000;
static const uint8_t IR_KHZ = 38;

Adafruit_ILI9341 tft(TFT_CS_PIN, TFT_DC_PIN, TFT_RST_PIN);
XPT2046_Touchscreen touch(TOUCH_CS_PIN);
DHT dht(DHT_PIN, DHT22);
IRrecv irrecv(IR_RECEIVE_PIN, IR_BUFFER_SIZE, 15, true);
IRsend irsend(IR_SEND_PIN);
decode_results results;
WebServer server(80);
Preferences preferences;

String learningSlot;
uint32_t learnStartedAt = 0;
String statusText = "Ready - learn a remote button first";
float roomTemp = NAN;
float roomHumidity = NAN;
uint32_t lastDhtRead = 0;
uint32_t lastScreenDraw = 0;
bool screenDirty = true;

const char *slots[] = {"power", "minus", "plus", "fan", "swing", "sleep", "mode", "last"};
const uint8_t SLOT_COUNT = sizeof(slots) / sizeof(slots[0]);

bool slotExists(const String &slot) {
  for (uint8_t i = 0; i < SLOT_COUNT; i++) if (slot == slots[i]) return true;
  return false;
}

String safeSlot(String slot) {
  slot.toLowerCase();
  if (!slotExists(slot)) return "last";
  return slot;
}

void saveRaw(const String &slot, uint16_t *raw, uint16_t length) {
  String key = "n_" + slot;
  preferences.putUShort(key.c_str(), length);
  preferences.putBytes(("r_" + slot).c_str(), raw, length * sizeof(uint16_t));
}

bool sendSlot(String slot) {
  slot = safeSlot(slot);
  uint16_t count = preferences.getUShort(("n_" + slot).c_str(), 0);
  if (count == 0 || count > IR_BUFFER_SIZE) {
    statusText = "No learned command for " + slot;
    screenDirty = true;
    return false;
  }
  uint16_t raw[IR_BUFFER_SIZE];
  size_t bytes = preferences.getBytes(("r_" + slot).c_str(), raw, count * sizeof(uint16_t));
  if (bytes != count * sizeof(uint16_t)) {
    statusText = "Saved IR data is incomplete";
    screenDirty = true;
    return false;
  }
  irsend.sendRaw(raw, count, IR_KHZ);
  statusText = "Sent: " + slot;
  screenDirty = true;
  return true;
}

void startLearning(String slot) {
  learningSlot = safeSlot(slot);
  learnStartedAt = millis();
  irrecv.enableIRIn();
  statusText = "Learning " + learningSlot + ": point remote at receiver";
  screenDirty = true;
}

void drawButton(int16_t x, int16_t y, int16_t w, int16_t h, const char *label, uint16_t color) {
  tft.fillRoundRect(x, y, w, h, 6, color);
  tft.drawRoundRect(x, y, w, h, 6, ILI9341_WHITE);
  tft.setTextColor(ILI9341_WHITE);
  tft.setTextSize(2);
  int16_t tx = x + (w - (int16_t)strlen(label) * 12) / 2;
  tft.setCursor(tx, y + (h - 16) / 2);
  tft.print(label);
}

void drawScreen() {
  tft.fillScreen(ILI9341_NAVY);
  tft.setTextColor(ILI9341_WHITE);
  tft.setTextSize(2);
  tft.setCursor(76, 10);
  tft.print("SMART AC");
  tft.setTextSize(1);
  tft.setCursor(12, 38);
  tft.print("IR remote learner + local control");

  tft.setTextSize(3);
  tft.setCursor(105, 58);
  tft.setTextColor(ILI9341_CYAN);
  tft.print("COOL");
  tft.setTextSize(3);
  tft.setCursor(122, 91);
  tft.setTextColor(ILI9341_WHITE);
  tft.print("24 C");

  drawButton(18, 132, 60, 36, "-", ILI9341_DARKCYAN);
  drawButton(242, 132, 60, 36, "+", ILI9341_DARKCYAN);
  drawButton(16, 178, 66, 34, "FAN", ILI9341_DARKGREEN);
  drawButton(91, 178, 70, 34, "SWING", ILI9341_DARKGREEN);
  drawButton(170, 178, 66, 34, "SLEEP", ILI9341_DARKGREEN);
  drawButton(245, 178, 59, 34, "PWR", ILI9341_MAROON);

  tft.fillRect(0, 216, 320, 24, ILI9341_BLACK);
  tft.setTextSize(1);
  tft.setTextColor(ILI9341_YELLOW);
  tft.setCursor(4, 219);
  if (!isnan(roomTemp)) {
    tft.printf("Room %.1f C  %.0f%%  ", roomTemp, roomHumidity);
  } else {
    tft.print("Room sensor starting... ");
  }
  tft.setTextColor(ILI9341_WHITE);
  String shortStatus = statusText;
  if (shortStatus.length() > 31) shortStatus = shortStatus.substring(0, 31);
  tft.print(shortStatus);
}

void handleTouch() {
  if (!touch.touched()) return;
  TS_Point p = touch.getPoint();
  // Typical 2.8-inch XPT2046 module calibration. Adjust these four limits if touch is offset.
  int16_t x = map(p.y, 250, 3800, 0, SCREEN_W);
  int16_t y = map(p.x, 250, 3800, SCREEN_H, 0);
  if (x < 0 || x >= SCREEN_W || y < 0 || y >= SCREEN_H) return;
  String slot;
  if (y >= 132 && y < 168 && x < 100) slot = "minus";
  else if (y >= 132 && y < 168 && x > 220) slot = "plus";
  else if (y >= 178 && x < 86) slot = "fan";
  else if (y >= 178 && x < 166) slot = "swing";
  else if (y >= 178 && x < 240) slot = "sleep";
  else if (y >= 178) slot = "power";
  if (slot.length()) sendSlot(slot);
  delay(180); // one touch produces one command
}

String htmlPage() {
  String page = F("<!doctype html><html><head><meta name=viewport content='width=device-width,initial-scale=1'><style>body{font-family:Arial;max-width:620px;margin:20px auto;padding:0 14px;background:#eef3f7;color:#18232d}button{padding:13px;margin:5px;border:0;border-radius:8px;background:#087e8b;color:white;font-size:16px}.learn{background:#6b4b9b}.power{background:#b23a48}code{word-break:break-all}</style></head><body><h1>Smart AC Controller</h1><p>");
  page += statusText;
  page += F("</p><p>IP: <code>");
  page += WiFi.isConnected() ? WiFi.localIP().toString() : WiFi.softAPIP().toString();
  page += F("</code></p><h2>Send learned command</h2>");
  for (uint8_t i = 0; i < SLOT_COUNT - 1; i++) {
    page += "<a href='/send?slot=" + String(slots[i]) + "'><button class='" + String(slots[i] == String("power") ? "power" : "") + "'>" + String(slots[i]) + "</button></a>";
  }
  page += F("<h2>Learn from original remote</h2><p>Tap a Learn button, then within 12 seconds hold the matching original-remote button 2-10 cm in front of the VS1838B.</p>");
  for (uint8_t i = 0; i < SLOT_COUNT - 1; i++) {
    page += "<a href='/learn?slot=" + String(slots[i]) + "'><button class='learn'>Learn " + String(slots[i]) + "</button></a>";
  }
  page += F("<p>For an AC remote, learn each complete state you need. Many AC remotes transmit the complete state, not a simple + or - command.</p></body></html>");
  return page;
}

void setupWeb() {
  server.on("/", HTTP_GET, []() { server.send(200, "text/html; charset=utf-8", htmlPage()); });
  server.on("/learn", HTTP_GET, []() { startLearning(server.arg("slot")); server.sendHeader("Location", "/"); server.send(303); });
  server.on("/send", HTTP_GET, []() { sendSlot(server.arg("slot")); server.sendHeader("Location", "/"); server.send(303); });
  server.on("/status", HTTP_GET, []() {
    String json = "{\"status\":\"" + statusText + "\",\"temperature\":" + (isnan(roomTemp) ? "null" : String(roomTemp, 1)) + ",\"humidity\":" + (isnan(roomHumidity) ? "null" : String(roomHumidity, 0)) + "}";
    server.send(200, "application/json", json);
  });
  server.begin();
}

void connectWiFi() {
  if (strlen(WIFI_SSID) == 0) {
    WiFi.mode(WIFI_AP);
    WiFi.softAP(SETUP_AP_NAME, SETUP_AP_PASSWORD);
    statusText = "Setup Wi-Fi: AC-Controller-Setup";
    return;
  }
  WiFi.mode(WIFI_STA);
  WiFi.begin(WIFI_SSID, WIFI_PASSWORD);
  uint32_t started = millis();
  while (WiFi.status() != WL_CONNECTED && millis() - started < 15000) delay(250);
  if (WiFi.status() == WL_CONNECTED) statusText = "Wi-Fi connected: " + WiFi.localIP().toString();
  else {
    WiFi.mode(WIFI_AP);
    WiFi.softAP(SETUP_AP_NAME, SETUP_AP_PASSWORD);
    statusText = "Home Wi-Fi failed; setup AP active";
  }
}

void checkLearning() {
  if (learningSlot.length() == 0) return;
  if (irrecv.decode(&results)) {
    uint16_t length = getCorrectedRawLength(&results);
    if (length > 0 && length <= IR_BUFFER_SIZE) {
      uint16_t *raw = resultToRawArray(&results);
      if (raw != nullptr) {
        saveRaw(learningSlot, raw, length);
        saveRaw("last", raw, length);
        statusText = "Learned " + learningSlot + " (" + String(length) + " timings)";
        delete[] raw;
      } else statusText = "IR capture memory error";
    } else statusText = "IR signal too long; move remote closer";
    irrecv.resume();
    learningSlot = "";
    screenDirty = true;
  } else if (millis() - learnStartedAt > LEARN_WINDOW_MS) {
    statusText = "Learning timed out - try again closer";
    learningSlot = "";
    screenDirty = true;
  }
}

void setup() {
  Serial.begin(115200);
  preferences.begin("smartac", false);
  SPI.begin(SPI_SCK_PIN, SPI_MISO_PIN, SPI_MOSI_PIN);
  tft.begin();
  tft.setRotation(1);
  touch.begin();
  touch.setRotation(1);
  dht.begin();
  irsend.begin();
  irrecv.enableIRIn();
  connectWiFi();
  setupWeb();
  drawScreen();
  Serial.println("Smart AC Controller ready");
  Serial.println(WiFi.isConnected() ? WiFi.localIP() : WiFi.softAPIP());
}

void loop() {
  server.handleClient();
  checkLearning();
  handleTouch();
  if (millis() - lastDhtRead >= 2500) {
    lastDhtRead = millis();
    float h = dht.readHumidity();
    float t = dht.readTemperature();
    if (!isnan(t) && !isnan(h) && (isnan(roomTemp) || t != roomTemp || h != roomHumidity)) {
      roomTemp = t;
      roomHumidity = h;
      screenDirty = true;
    }
  }
  if (screenDirty && millis() - lastScreenDraw >= 100) {
    lastScreenDraw = millis();
    screenDirty = false;
    drawScreen();
  }
}
Remix this project
Make it yours in one click
Open a full copy of this project in your own Schematik workspace — diagram, code, parts, and assembly steps included. Swap the sensor, add features, or redesign the whole thing with AI. The author's original stays untouched.