Community project
Unihiker K10 Rgb Led
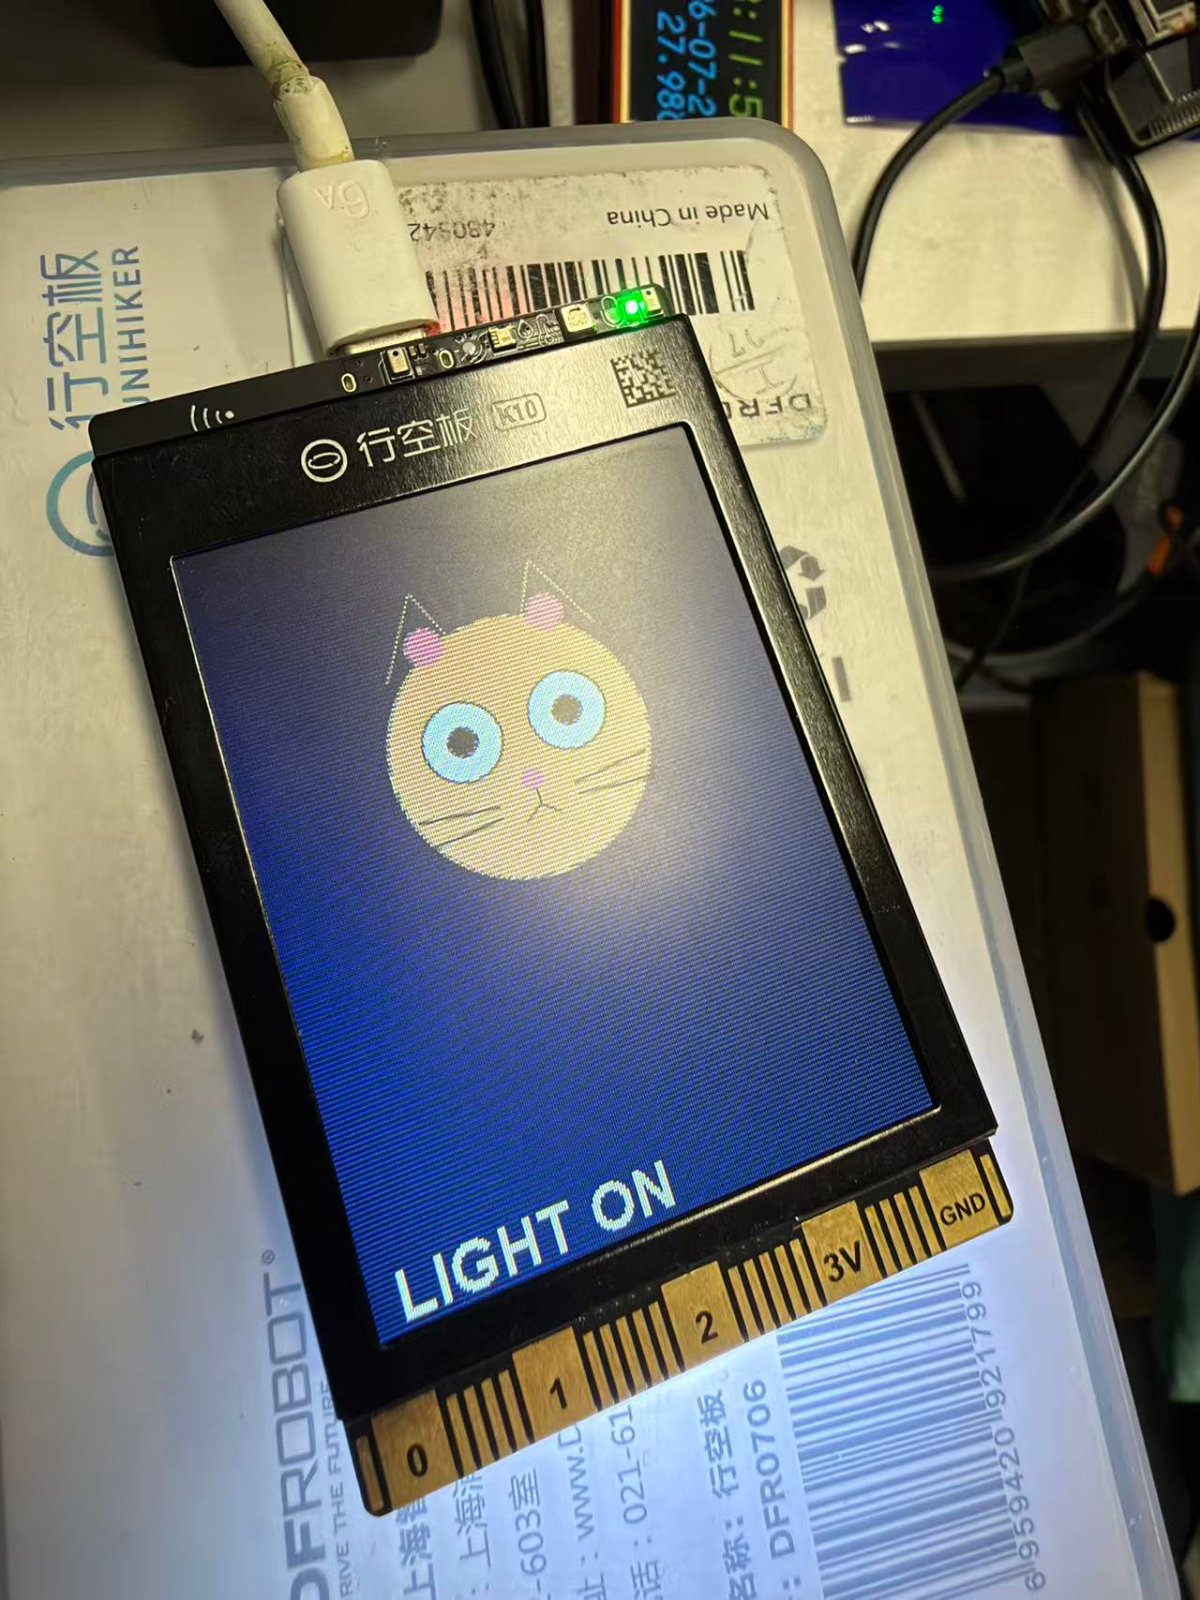
Build a voice-controlled RGB LED display featuring an animated cat character on the Unihiker K10 platform. This project combines the ESP32 microcontroller with onboard hardware and speech recognition to create an interactive lighting controller that responds to voice commands.
This guide provides a complete parts list, wiring diagram, and step-by-step assembly instructions. You'll learn how to set up USB power, configure the voice recognition firmware, and program the RGB LED animations and cat graphics that respond to your commands.
Wiring diagram
Assemble it in 3 steps
1. 确认使用板载硬件
本项目只使用 UNIHIKER K10 自带的双麦克风和 3 颗 RGB LED,不需要面包板、跳线或外接 LED。请不要把任何导线接到板载 RGB LED 的内部引脚。
- 将 K10 放在桌面上,麦克风孔不要被手、外壳或贴纸遮住。
- 程序上电后默认关闭 RGB 灯。
- 只用质量可靠的 USB 数据线给 K10 供电;不要从 GPIO 引脚向板子供电。
2. 接通 USB 供电
用 USB 数据线连接 UNIHIKER K10 的 USB 口和电脑或稳定的 USB 5V 电源。该连接同时为板子供电。
- 语音识别初始化需要短暂等待;完成后再尝试语音控制。
- 避免在潮湿环境或金属表面短路使用开发板。
3. 使用语音控制
部署程序后,先对着 K10 说唤醒词“你好小行”或“你好小新”,再清晰地说“开灯”或“关灯”。“开灯”会让全部 3 颗板载 RGB LED 亮白色;“关灯”会关闭它们。
- 保持约 20–50 cm 距离并降低周围噪声,可提高识别率。
- 若没识别到命令,请重新说唤醒词后再说命令。
- RGB LED 仅作状态灯,不能直接驱动房间照明或其他高压负载。
Deploy the firmware
#include <Arduino.h>
#include "asr.h"
#include "unihiker_k10.h"


// Forward declarations
void drawCat(bool awake);
void setLight(bool on);

UNIHIKER_K10 k10;
ASR asr;

constexpr int CMD_LIGHT_ON = 1;
constexpr int CMD_LIGHT_OFF = 2;
constexpr uint8_t LED_BRIGHTNESS = 20;

constexpr uint32_t COLOR_BG = 0x152238;
constexpr uint32_t COLOR_FUR = 0xF4B860;
constexpr uint32_t COLOR_EAR = 0xE98678;
constexpr uint32_t COLOR_DARK = 0x38251D;
constexpr uint32_t COLOR_EYE = 0xFFF9D7;
constexpr uint32_t COLOR_PUPIL = 0x1A1520;
constexpr uint32_t COLOR_ON = 0xFFF0A8;
constexpr uint32_t COLOR_OFF = 0xAAB5C8;

bool lightIsOn = false;

void drawCat(bool awake) {
  k10.canvas->canvasClear();

  // Cat ears and face.
  k10.canvas->canvasLine(72, 78, 92, 42, COLOR_FUR);
  k10.canvas->canvasLine(92, 42, 108, 76, COLOR_FUR);
  k10.canvas->canvasLine(132, 76, 148, 42, COLOR_FUR);
  k10.canvas->canvasLine(148, 42, 168, 78, COLOR_FUR);
  k10.canvas->canvasCircle(120, 120, 58, COLOR_FUR, COLOR_FUR, true);
  k10.canvas->canvasCircle(92, 67, 9, COLOR_EAR, COLOR_EAR, true);
  k10.canvas->canvasCircle(148, 67, 9, COLOR_EAR, COLOR_EAR, true);

  if (awake) {
    // Open eyes: white eyes with vertical dark pupils.
    k10.canvas->canvasCircle(96, 112, 18, COLOR_DARK, COLOR_EYE, true);
    k10.canvas->canvasCircle(144, 112, 18, COLOR_DARK, COLOR_EYE, true);
    k10.canvas->canvasCircle(96, 112, 7, COLOR_PUPIL, COLOR_PUPIL, true);
    k10.canvas->canvasCircle(144, 112, 7, COLOR_PUPIL, COLOR_PUPIL, true);
  } else {
    // Closed eyes: two short, gently slanted eyelids.
    k10.canvas->canvasSetLineWidth(4);
    k10.canvas->canvasLine(78, 113, 108, 119, COLOR_DARK);
    k10.canvas->canvasLine(132, 119, 162, 113, COLOR_DARK);
    k10.canvas->canvasSetLineWidth(1);
  }

  // Nose, mouth, and whiskers.
  k10.canvas->canvasCircle(120, 136, 5, COLOR_EAR, COLOR_EAR, true);
  k10.canvas->canvasLine(120, 141, 120, 147, COLOR_DARK);
  k10.canvas->canvasLine(120, 147, 112, 153, COLOR_DARK);
  k10.canvas->canvasLine(120, 147, 128, 153, COLOR_DARK);
  k10.canvas->canvasLine(68, 139, 103, 143, COLOR_DARK);
  k10.canvas->canvasLine(68, 151, 103, 148, COLOR_DARK);
  k10.canvas->canvasLine(137, 143, 172, 139, COLOR_DARK);
  k10.canvas->canvasLine(137, 148, 172, 151, COLOR_DARK);

  if (awake) {
    k10.canvas->canvasText("LIGHT ON", 13, COLOR_ON);
  } else {
    k10.canvas->canvasText("LIGHT OFF", 13, COLOR_OFF);
  }
  k10.canvas->updateCanvas();
}

void setLight(bool on) {
  if (lightIsOn == on) {
    return;
  }

  lightIsOn = on;
  if (on) {
    // -1 addresses all three built-in RGB LEDs.
    k10.rgb->brightness(LED_BRIGHTNESS);
    k10.rgb->write(-1, 255, 255, 255);
  } else {
    k10.rgb->brightness(0);
    k10.rgb->write(-1, 0, 0, 0);
  }
  drawCat(on);
}

void setup() {
  k10.begin();
  k10.initScreen(2);
  k10.creatCanvas();
  k10.setScreenBackground(COLOR_BG);
  drawCat(false);

  // Start with the built-in RGB LEDs off.
  k10.rgb->brightness(0);
  k10.rgb->write(-1, 0, 0, 0);

  // Continuous offline Chinese speech recognition.
  asr.asrInit(CONTINUOUS, CN_MODE, 6000);
  while (asr._asrState == 0) {
    delay(100);
  }

  // Chinese command words are registered as space-separated pinyin.
  asr.addASRCommand(CMD_LIGHT_ON, "kai deng");
  asr.addASRCommand(CMD_LIGHT_OFF, "guan deng");
}

void loop() {
  if (asr.isDetectCmdID(CMD_LIGHT_ON)) {
    setLight(true);
  } else if (asr.isDetectCmdID(CMD_LIGHT_OFF)) {
    setLight(false);
  }

  delay(10);
}
Remix this project
Make it yours in one click
Open a full copy of this project in your own Schematik workspace — diagram, code, parts, and assembly steps included. Swap the sensor, add features, or redesign the whole thing with AI. The author's original stays untouched.