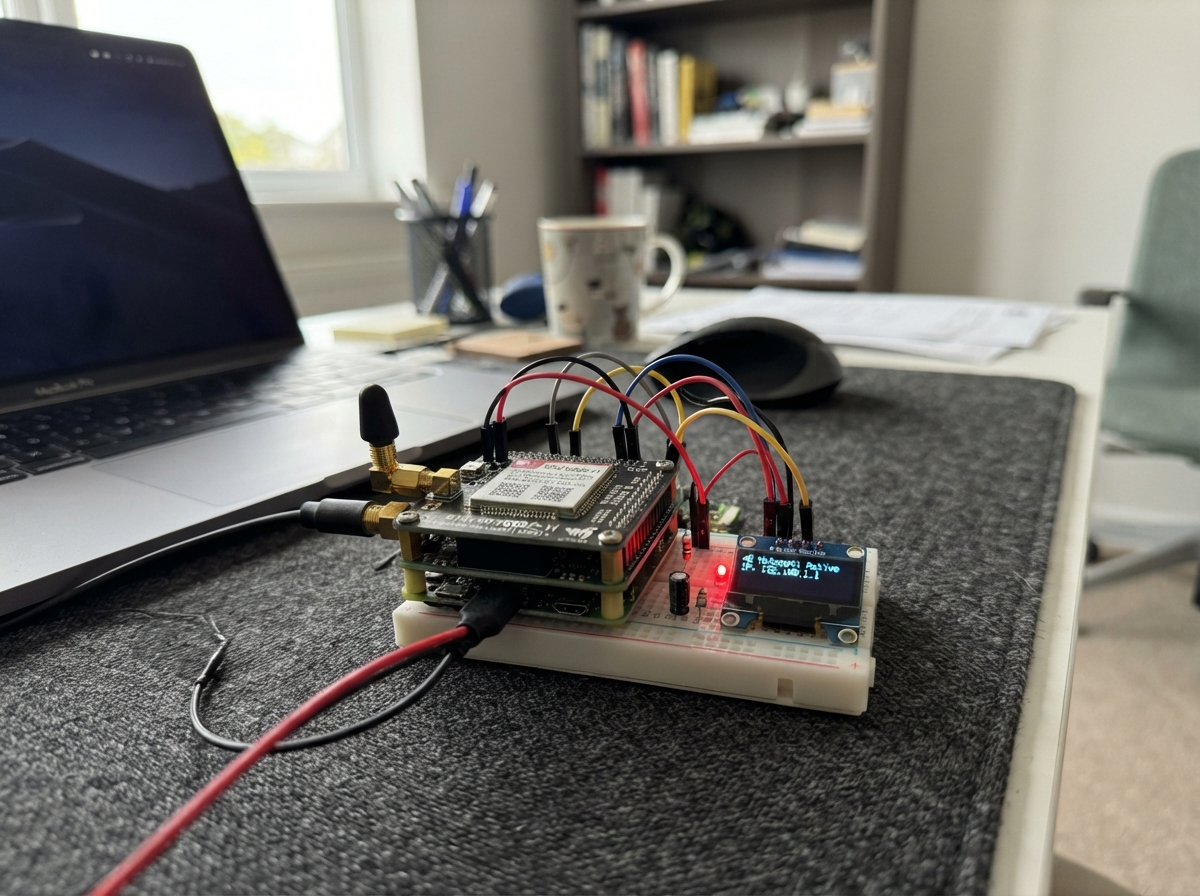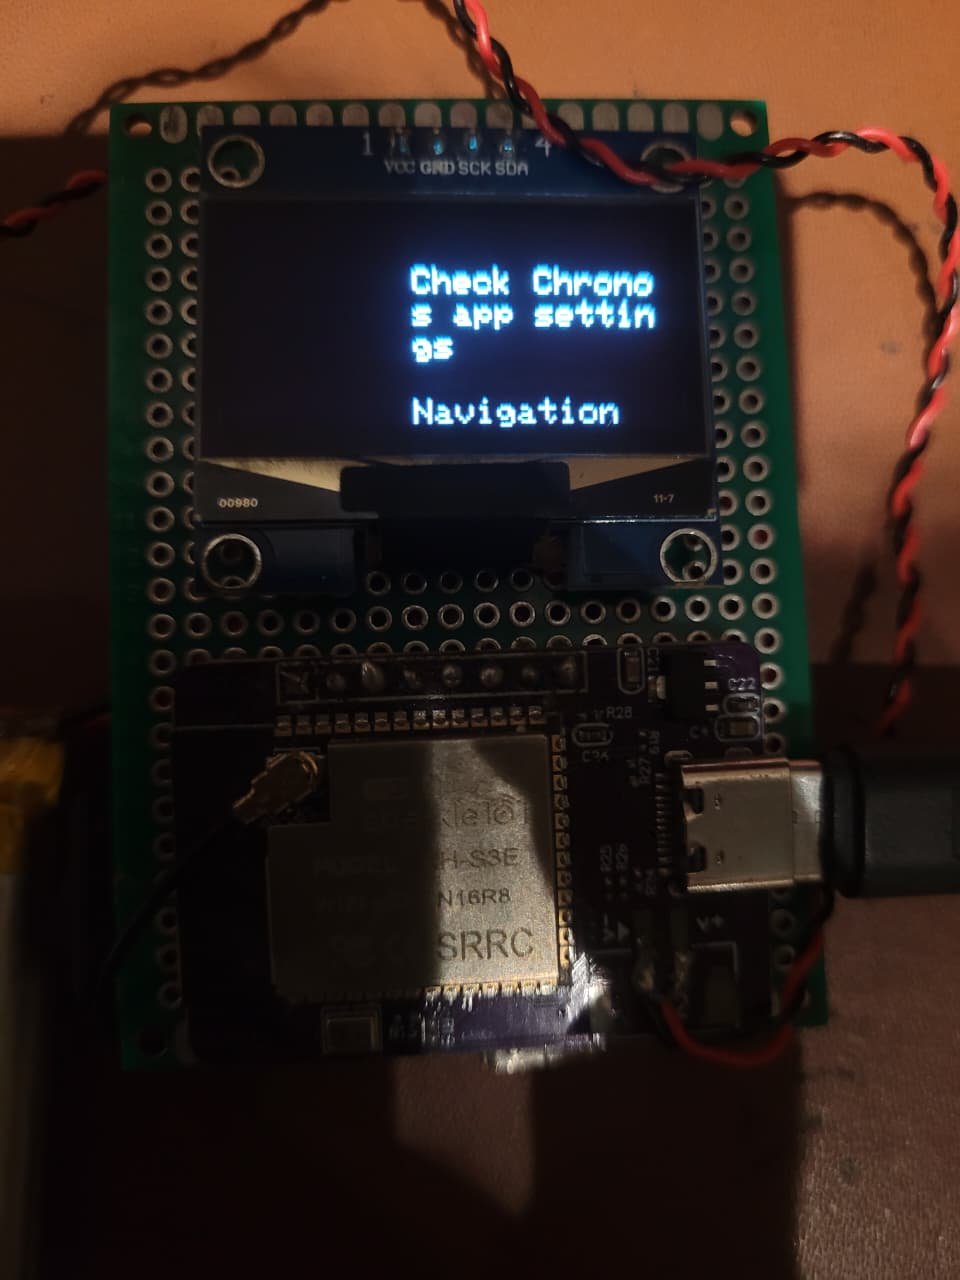
This project builds a Bluetooth navigation display using an ESP32 and a small OLED screen. The device connects to a Chronos smartwatch via Bluetooth to receive real-time navigation data, displaying turn-by-turn directions, distance to the next maneuver, and estimated arrival time on a 128x64 pixel screen.
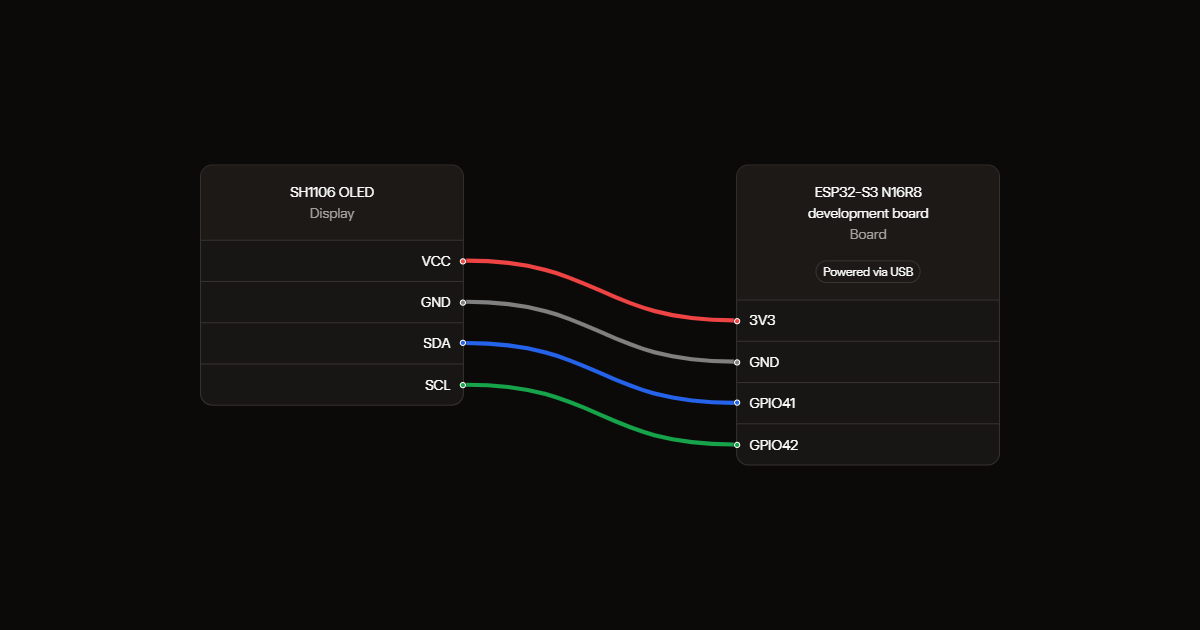
The guide provides a wiring diagram showing how to connect the SH1106 OLED display to the ESP32, a complete parts list, and the firmware needed to establish the Bluetooth connection and render navigation information. Assembly takes just minutes—connect power, wire the I2C signal lines, and verify the display powers on correctly.
Wiring diagram
Gather all the parts
Assemble it in 3 steps
1. Connect screen power
Unplug USB. Connect OLED VCC to the board's 3V3 pin (power), and OLED GND to GND (common ground). Read the printed labels; pin order varies.
- Do not connect VCC to 5V; keep the screen and signal wires at 3.3V.
2. Connect the two signal wires
Connect OLED SDA to GPIO41 (data), and OLED SCL to GPIO42 (clock). Use the pins marked 41 and 42, not header position numbers.
3. Check and power the circuit
Check for swapped power wires and loose connections, then power the ESP32-S3 with a USB data cable. This project assumes a four-pin 128x64 SH1106 OLED.
- Use USB power; this project does not include a battery circuit.
Review all connections
1. Connections between "oled" and "ESP32"
Deploy the firmware
#include <Arduino.h>
#include <Wire.h>
#include <Adafruit_GFX.h>
#include <Adafruit_SH110X.h>
#include <ChronosESP32.h>
#include <atomic>

Adafruit_SH1106G oled(128, 64, &Wire, -1);
ChronosESP32 watch("Pocket Nav");
std::atomic<bool> connected{false};
bool screenOK = false;
String previous;
uint32_t lastPoll = 0;
void connectionCallback(bool state) { connected.store(state); }

void setup() {
  Serial.begin(115200);
  Wire.begin(41, 42);
  uint8_t address = 0;
  for (uint8_t a : {uint8_t(0x3C), uint8_t(0x3D)}) {
    Wire.beginTransmission(a);
    if (Wire.endTransmission() == 0) { address = a; break; }
  }
  if (address) screenOK = oled.begin(address, false);
  if (!screenOK) Serial.println("OLED not found: check VCC/GND, SDA 41, SCL 42");
  watch.setConnectionCallback(connectionCallback);
  watch.begin();
  Serial.println("Connect to Pocket Nav inside Chronos, not Android Bluetooth settings.");
}
void loop() {
  watch.loop();
  if (millis() - lastPoll < 200) { delay(5); return; }
  lastPoll = millis();
  bool linked = connected.load();
  Navigation nav = watch.getNavigation();
  bool active = linked && nav.active;
  String key = String(linked) + ":" + String(active);
  if (active) key += ":" + nav.distance + ":" + nav.directions + ":" + nav.title + ":" + nav.eta + ":" + String(nav.hasIcon) + ":" + String(nav.iconCRC);
  if (!screenOK || key == previous) return;
  previous = key;
  oled.clearDisplay();
  oled.setTextColor(SH110X_WHITE);
  oled.setTextSize(1);
  oled.setTextWrap(false);
  oled.setCursor(0, 0);
  if (!active) {
    oled.println("POCKET NAV");
    oled.setCursor(0, 18);
    oled.println(linked ? "Phone connected" : "Waiting for phone");
    oled.setCursor(0, 32);
    oled.println(linked ? "Start Google Maps" : "Open Chronos app");
    oled.setCursor(0, 44);
    oled.println(linked ? "navigation on phone" : "Pair: Pocket Nav");
  } else {
    oled.print(nav.distance.substring(0,21));
    if (nav.hasIcon) oled.drawBitmap(0, 16, nav.icon, 48, 48, SH110X_WHITE);
    String text = nav.directions.length() ? nav.directions : nav.title;
    for (int line=0; line<4; ++line) {
      oled.setCursor(52, 16 + line*10);
      oled.print(text.substring(line*12, (line+1)*12));
    }
    oled.setCursor(52,56);
    oled.print(nav.eta.substring(0,12));
  }
  oled.display();
}
Remix this project
Make it yours in one click
Open a full copy of this project in your own Schematik workspace, diagram, code, parts, and assembly steps included. Swap the sensor, add features, or redesign the whole thing with AI. The author's original stays untouched.