Community project
ESP32-CAM Web Photo Gallery
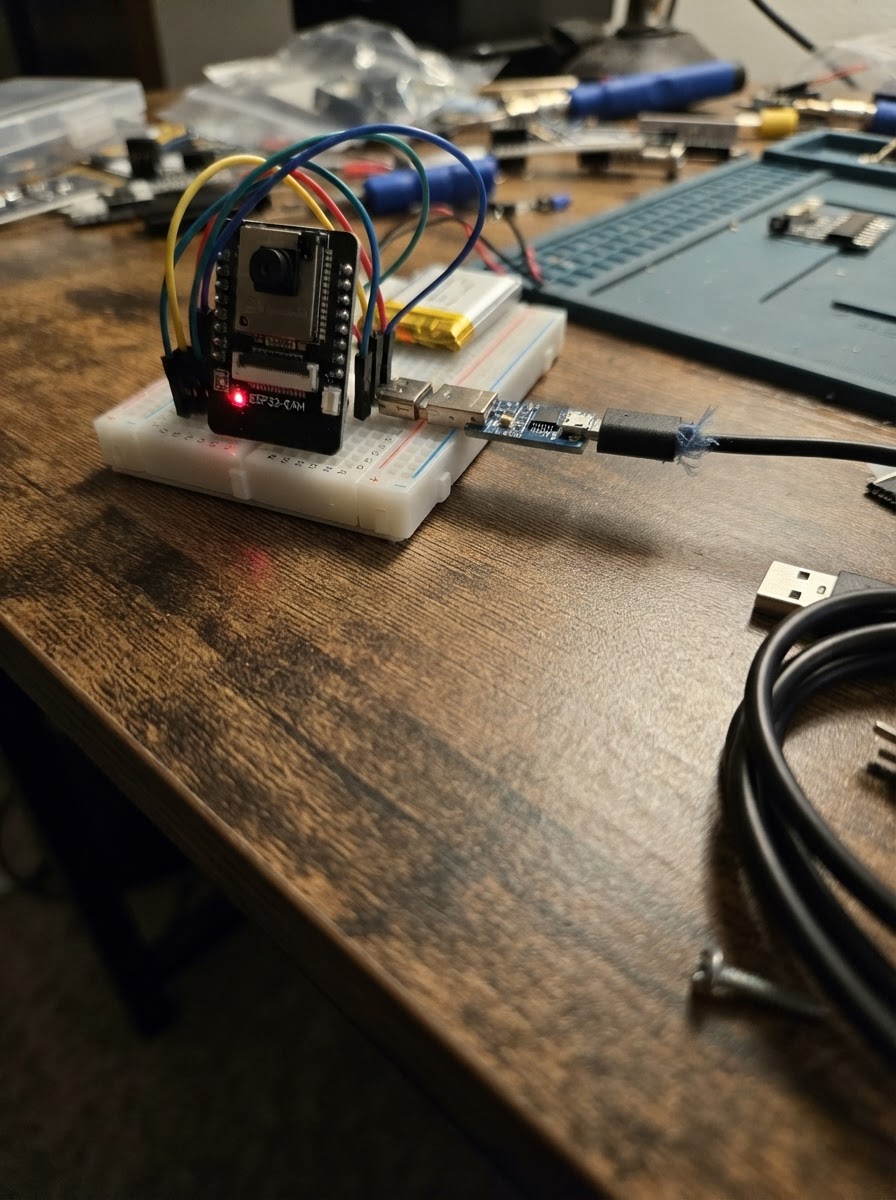
Build a WiFi-connected camera that streams live video and captures photos through a web browser. This project uses an ESP32-CAM microcontroller board with an integrated OV2640 camera sensor to create a simple web-based photo gallery accessible from any device on the network.
The guide includes a complete wiring diagram for the camera module, a parts list with the ESP32-CAM and power supply requirements, and ready-to-upload firmware that sets up a WiFi access point and web server. Follow the assembly steps to prepare the camera board, power it up, and open the camera page in your browser to start capturing and viewing photos.
Wiring diagram
Assemble it in 3 steps
1. Prepare the camera board
Use an AI Thinker ESP32-CAM with its OV2640 camera ribbon already fitted. The camera is built into this board, so do not connect any separate camera wires. Check that the ribbon cable is fully seated and its small locking flap is closed.
- The camera lens should face the scene you want to view.
- Do not pull the ribbon cable while the board has power; it can damage the camera or its connector.
2. Power the board
Connect a stable 5 V USB power source to the ESP32-CAM's 5V pin and connect the supply ground to a GND pin. The board needs a supply capable of roughly 500 mA because the camera and Wi-Fi can briefly draw extra current.
- A USB-to-serial adapter or a 5 V breadboard power supply can provide this power.
- Make sure 5V goes to the pin marked 5V and GND goes to GND — swapped power can damage the board.
3. Open the camera page
After deploying, connect your phone or computer to the Wi-Fi network named ESP32-CAM-Camera using password camera123. Open a web browser and visit http://192.168.4.1. The large picture is the live feed; press Capture image to save one still image, then use Download captured image to save it.
- Keep your phone or computer connected to the camera's Wi-Fi while using the page; that network does not need internet access.
- Anyone close enough to join this Wi-Fi network can view the camera feed, so change the password in the firmware before using it in a public place.
Deploy the firmware
#include <Arduino.h>
#include "esp_camera.h"
#include <WiFi.h>
#include <WebServer.h>

// AI Thinker ESP32-CAM's built-in OV2640 camera wiring.
#define PWDN_GPIO_NUM     32
#define RESET_GPIO_NUM    -1
#define XCLK_GPIO_NUM      0
#define SIOD_GPIO_NUM     26
#define SIOC_GPIO_NUM     27
#define Y9_GPIO_NUM       35
#define Y8_GPIO_NUM       34
#define Y7_GPIO_NUM       39
#define Y6_GPIO_NUM       36
#define Y5_GPIO_NUM       21
#define Y4_GPIO_NUM       19
#define Y3_GPIO_NUM       18
#define Y2_GPIO_NUM        5
#define VSYNC_GPIO_NUM    25
#define HREF_GPIO_NUM     23
#define PCLK_GPIO_NUM     22


// Forward declarations
void sendJpeg(camera_fb_t *frame);
void handleHome();
void handleStream();
void handleCapture();
void handlePhoto();

const char *AP_SSID = "ESP32-CAM-Camera";
const char *AP_PASSWORD = "camera123";

WebServer server(80);
camera_fb_t *savedPhoto = nullptr;

const char PAGE_HTML[] PROGMEM = R"HTML(
<!doctype html><html><head><meta name="viewport" content="width=device-width,initial-scale=1">
<title>ESP32-CAM Camera</title><style>
body{margin:0;background:#121820;color:#edf3fa;font-family:Arial,sans-serif;text-align:center}main{max-width:760px;margin:auto;padding:22px}img{width:100%;max-width:640px;border-radius:12px;background:#25303d}button,a{display:inline-block;margin:14px 6px;padding:13px 18px;border:0;border-radius:8px;background:#2f92e8;color:#fff;font-size:16px;text-decoration:none;cursor:pointer}a{background:#2bba70}.note{color:#b9c6d4;font-size:14px}</style>
</head><body><main><h1>ESP32-CAM Camera</h1><img id="live" src="/stream" alt="Live camera feed"><p><button onclick="capturePhoto()">Capture image</button></p><h2>Captured image</h2><img id="photo" src="" alt="No image captured yet"><p><a id="download" href="#" download="esp32-cam-photo.jpg" style="display:none">Download captured image</a></p><p class="note">The live image updates continuously. Capturing freezes one separate image for downloading.</p></main><script>function capturePhoto(){fetch('/capture',{cache:'no-store'}).then(r=>{if(!r.ok)throw Error();let u='/photo?t='+Date.now();document.getElementById('photo').src=u;let d=document.getElementById('download');d.href=u;d.style.display='inline-block';}).catch(()=>alert('Camera capture failed.'))}</script></body></html>
)HTML";

void sendJpeg(camera_fb_t *frame) {
  server.sendHeader("Cache-Control", "no-store");
  server.setContentLength(frame->len);
  server.send(200, "image/jpeg", "");
  WiFiClient client = server.client();
  client.write(frame->buf, frame->len);
}

void handleHome() { server.send_P(200, "text/html", PAGE_HTML); }

void handleStream() {
  camera_fb_t *frame = esp_camera_fb_get();
  if (!frame) { server.send(503, "text/plain", "Camera capture failed"); return; }
  sendJpeg(frame);
  esp_camera_fb_return(frame);
}

void handleCapture() {
  camera_fb_t *frame = esp_camera_fb_get();
  if (!frame) { server.send(503, "text/plain", "Camera capture failed"); return; }
  camera_fb_t *replacement = (camera_fb_t *)malloc(sizeof(camera_fb_t));
  if (!replacement) { esp_camera_fb_return(frame); server.send(500, "text/plain", "Out of memory"); return; }
  replacement->buf = (uint8_t *)malloc(frame->len);
  if (!replacement->buf) { free(replacement); esp_camera_fb_return(frame); server.send(500, "text/plain", "Out of memory"); return; }
  memcpy(replacement->buf, frame->buf, frame->len);
  replacement->len = frame->len;
  replacement->width = frame->width;
  replacement->height = frame->height;
  replacement->format = frame->format;
  replacement->timestamp = frame->timestamp;
  if (savedPhoto) { free(savedPhoto->buf); free(savedPhoto); }
  savedPhoto = replacement;
  esp_camera_fb_return(frame);
  server.send(200, "text/plain", "Captured");
}

void handlePhoto() {
  if (!savedPhoto) { server.send(404, "text/plain", "No photo captured yet"); return; }
  server.sendHeader("Content-Disposition", "inline; filename=esp32-cam-photo.jpg");
  sendJpeg(savedPhoto);
}

void setup() {
  Serial.begin(115200);
  camera_config_t config = {};
  config.ledc_channel = LEDC_CHANNEL_0;
  config.ledc_timer = LEDC_TIMER_0;
  config.pin_d0 = Y2_GPIO_NUM; config.pin_d1 = Y3_GPIO_NUM;
  config.pin_d2 = Y4_GPIO_NUM; config.pin_d3 = Y5_GPIO_NUM;
  config.pin_d4 = Y6_GPIO_NUM; config.pin_d5 = Y7_GPIO_NUM;
  config.pin_d6 = Y8_GPIO_NUM; config.pin_d7 = Y9_GPIO_NUM;
  config.pin_xclk = XCLK_GPIO_NUM; config.pin_pclk = PCLK_GPIO_NUM;
  config.pin_vsync = VSYNC_GPIO_NUM; config.pin_href = HREF_GPIO_NUM;
  config.pin_sccb_sda = SIOD_GPIO_NUM; config.pin_sccb_scl = SIOC_GPIO_NUM;
  config.pin_pwdn = PWDN_GPIO_NUM; config.pin_reset = RESET_GPIO_NUM;
  config.xclk_freq_hz = 20000000;
  config.pixel_format = PIXFORMAT_JPEG;
  config.frame_size = psramFound() ? FRAMESIZE_VGA : FRAMESIZE_QVGA;
  config.jpeg_quality = psramFound() ? 12 : 15;
  config.fb_count = psramFound() ? 2 : 1;
  config.grab_mode = CAMERA_GRAB_LATEST;
  if (esp_camera_init(&config) != ESP_OK) { Serial.println("Camera initialization failed"); return; }
  WiFi.mode(WIFI_AP);
  WiFi.softAP(AP_SSID, AP_PASSWORD);
  Serial.print("Open http://"); Serial.println(WiFi.softAPIP());
  server.on("/", HTTP_GET, handleHome);
  server.on("/stream", HTTP_GET, handleStream);
  server.on("/capture", HTTP_GET, handleCapture);
  server.on("/photo", HTTP_GET, handlePhoto);
  server.begin();
}

void loop() { server.handleClient(); }
Remix this project
Make it yours in one click
Open a full copy of this project in your own Schematik workspace — diagram, code, parts, and assembly steps included. Swap the sensor, add features, or redesign the whole thing with AI. The author's original stays untouched.