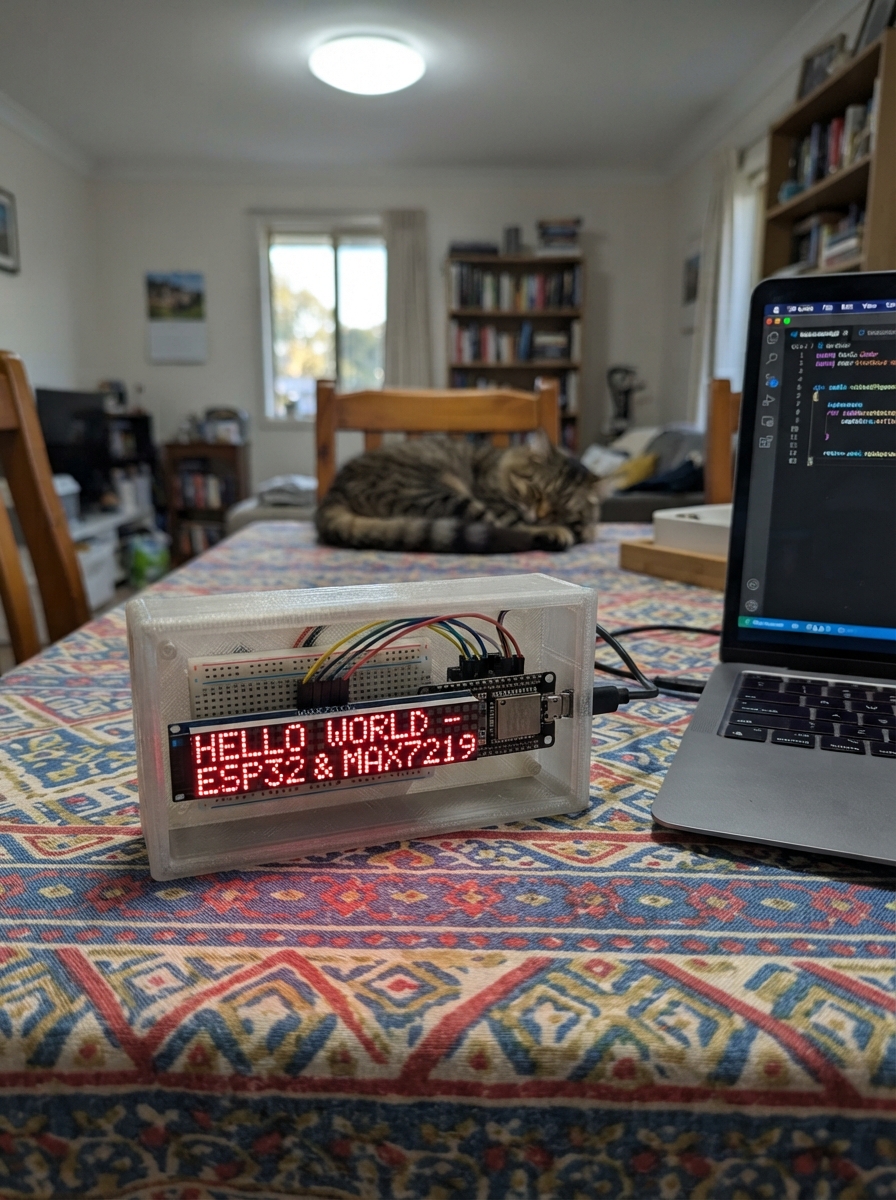
Build a scrolling LED message board that displays custom text across a 32x8 dot matrix display. This project uses an ESP32 microcontroller paired with MAX7219 LED driver modules to create eye-catching animated messages perfect for signs, notifications, or maker projects.
This guide provides a complete wiring diagram, parts list, and step-by-step assembly instructions. You'll learn how to connect the LED matrix to the ESP32 via SPI, flash the provided firmware using the MD_Parola library, and customize the scrolling messages to suit your needs. The firmware handles all the animation logic, so you can focus on building and personalizing your display.
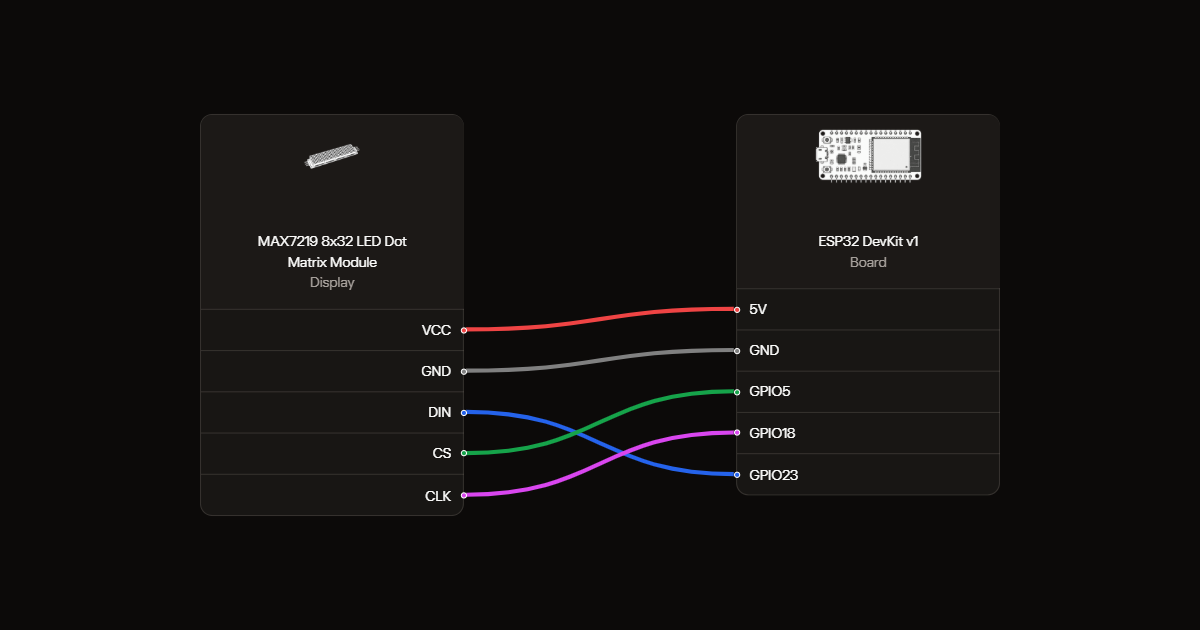
Wiring diagram
Gather all the parts
Assemble it in 3 steps
1. Wire the LED matrix to the ESP32
Connect the MAX7219 module VCC to 5V, GND to GND, DIN to GPIO23, CS to GPIO5, and CLK to GPIO18.
- GPIO23 is the default VSPI MOSI pin, GPIO18 is VSPI CLK, and GPIO5 is VSPI SS, so this keeps your SPI bus on its default hardware pins.
- If the module has a 4-in-1 design, only the input header needs wiring. The four 8x8 panels are already daisy-chained.
- Power the matrix from the USB 5V rail, not the 3.3V pin. The MAX7219 needs 5V to drive the LEDs at full brightness.
2. Verify power and mount the panels
With power disconnected, check continuity of the shared ground and confirm the matrix 5 V input is not connected to ESP32 3.3 V. Mount the four-panel module so its input header remains accessible and no metal fixing can short the rear pads.
- Start at low brightness to reduce supply current during testing.
- Do not connect or move matrix wiring while powered.
3. Flash and test
Upload the sketch and open Serial Monitor at 115200 baud. You should see scrolling text across all four panels. Adjust display.setIntensity(4) from 0 to 15 to control brightness.
- If text scrolls backwards or panels appear in the wrong order, try changing HARDWARE_TYPE to MD_MAX72XX::GENERIC_HW.
- Lower intensity values save power and reduce eye strain at your desk.
Review all connections
1. Connections between "led-matrix-1" and "ESP32"
Deploy the firmware
#include <MD_Parola.h>
#include <MD_MAX72xx.h>
#include <SPI.h>

#define HARDWARE_TYPE MD_MAX72XX::FC16_HW
#define MAX_DEVICES 4
#define DATA_PIN 23
#define CS_PIN 5
#define CLK_PIN 18

MD_Parola display = MD_Parola(HARDWARE_TYPE, DATA_PIN, CLK_PIN, CS_PIN, MAX_DEVICES);

const char *messages[] = {
  "Hello from Schematik!",
  "Build something cool",
  "LED Matrix Demo",
  "Maker life is best life"
};
const int NUM_MESSAGES = sizeof(messages) / sizeof(messages[0]);
int currentMsg = 0;

void setup() {
  Serial.begin(115200);
  delay(100);

  display.begin();
  display.setIntensity(4);
  display.displayClear();

  display.displayScroll(messages[currentMsg], PA_LEFT, PA_SCROLL_LEFT, 40);
  Serial.println("LED Matrix Message Board ready");
}

void loop() {
  if (display.displayAnimate()) {
    currentMsg = (currentMsg + 1) % NUM_MESSAGES;
    display.displayScroll(messages[currentMsg], PA_LEFT, PA_SCROLL_LEFT, 40);
    Serial.printf("Now showing: %s\n", messages[currentMsg]);
  }
}
Remix this project
Make it yours in one click
Open a full copy of this project in your own Schematik workspace, diagram, code, parts, and assembly steps included. Swap the sensor, add features, or redesign the whole thing with AI. The author's original stays untouched.