Community project
ESP32 Spotify Player
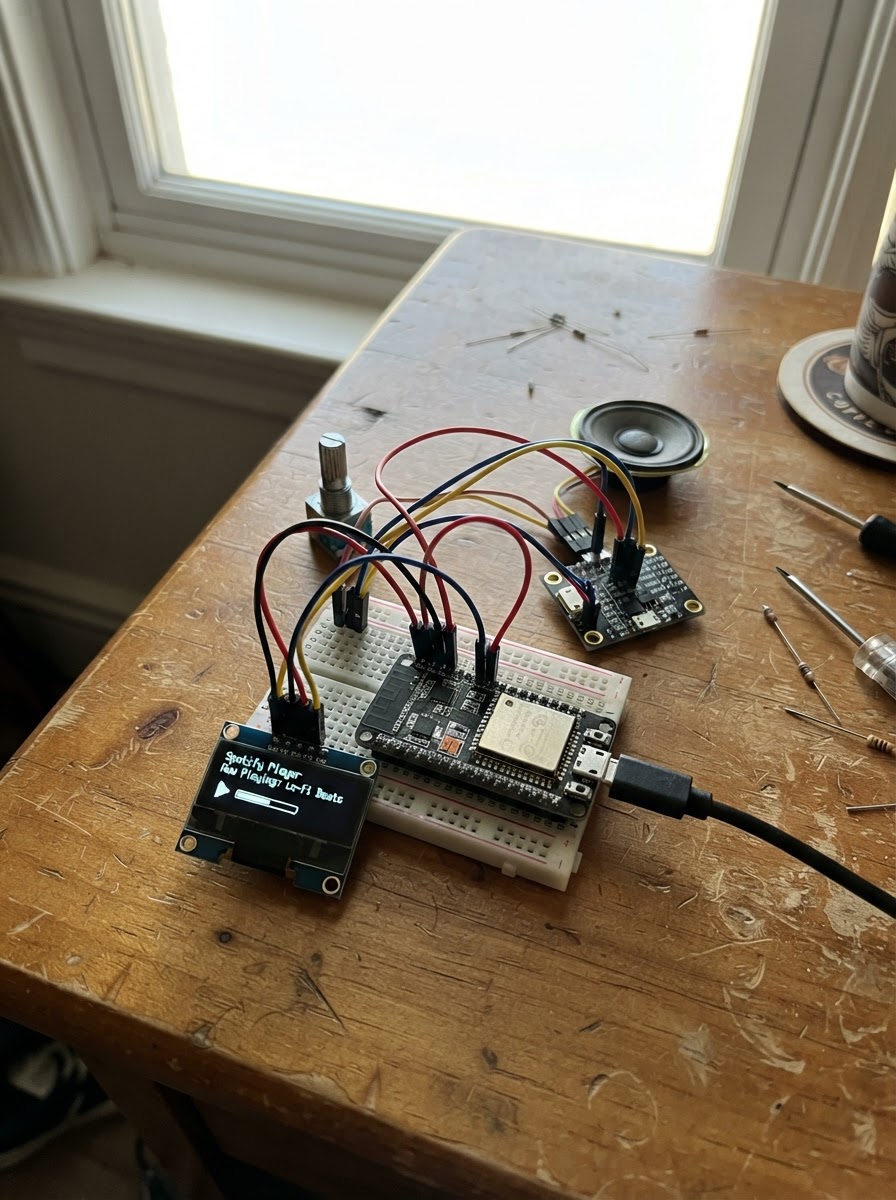
Build a wireless Spotify remote control powered by an ESP32 microcontroller and touchscreen display. This project lets you play, pause, skip tracks, and adjust volume on your Spotify Premium account from a handheld device paired with any Bluetooth speaker.
The guide includes a complete parts list, wiring diagram for connecting the touchscreen and ESP32, step-by-step assembly instructions, and ready-to-deploy firmware. After adding your WiFi credentials and Spotify API token, the touchscreen interface provides instant playback control without reaching for your phone.
Wiring diagram
Assemble it in 4 steps
1. Use the touchscreen board by itself
Place the ESP32-2432S028R with its screen facing up. This version already contains the screen and the touch layer, so do not connect the old knob or push button.
- There are no loose signal wires in this version; the screen buttons are drawn directly on the built-in touch panel.
- Do not connect anything to the screen's built-in wiring pins; they are already connected inside the board and using them for other parts can stop the screen or touch panel working.
2. Pair your Bluetooth speaker with the playback device
On your phone or computer, pair the Bluetooth speaker in its normal Bluetooth settings, then choose that speaker as Spotify's sound output. Start playing any song once so Spotify has an active player to control.
- Keep the phone or computer and the display board on the same Wi-Fi network.
- The display board is a remote control, not the music sender. The phone or computer must stay connected to the Bluetooth speaker for sound to continue.
3. Add your connection details
In the firmware, replace YOUR_WIFI_NAME and YOUR_WIFI_PASSWORD with the Wi-Fi network name and password. Replace YOUR_SPOTIFY_ACCESS_TOKEN with a current Spotify Premium access token that is allowed to control playback.
- If the screen later says that the token expired, replace only the token text and press Deploy again.
- Do not share your Wi-Fi password or Spotify token with other people; either can give access to your account or network.
4. Power and use the remote
Plug the board into a USB power source with a good USB data/power cable. Press Deploy in Schematik, wait for the screen to show Wi-Fi connected, then touch PLAY, PAUSE, VOL -, or VOL + on the screen.
- The volume buttons change Spotify's volume in steps of 10 percent.
- If the screen says Start Spotify on phone/PC, open Spotify and begin a song on the phone or computer first.
- Use the board's USB connector for power. Do not feed 5 V into the 3V3 pin because that can damage the ESP32.
Deploy the firmware
#include <Arduino.h>
#include <WiFi.h>
#include <WiFiClientSecure.h>
#include <HTTPClient.h>
#include <SPI.h>
#include <XPT2046_Touchscreen.h>
#include <Arduino_GFX_Library.h>

// Fill in these three values before pressing Deploy.

// Forward declarations
void drawButton(int x, int y, int w, int h, uint16_t color, const char *label);
void drawScreen();
bool spotifyRequest(const String &path);
void connectWiFi();
void handleTouch(int x, int y);

const char *WIFI_SSID = "MOBILECELL";
const char *WIFI_PASSWORD = "1ABAS_JAYA";
// Spotify Premium token with user-modify-playback-state permission.
const char *SPOTIFY_TOKEN = "0593145a4c9d4ff483f611f1556a1a09";

constexpr int TFT_SCK = 14;
constexpr int TFT_MISO = 12;
constexpr int TFT_MOSI = 13;
constexpr int TFT_CS = 15;
constexpr int TFT_DC = 2;
constexpr int TFT_BACKLIGHT = 21;
constexpr int TOUCH_SCK = 25;
constexpr int TOUCH_MISO = 39;
constexpr int TOUCH_MOSI = 32;
constexpr int TOUCH_CS = 33;
constexpr int TOUCH_IRQ = 36;

Arduino_DataBus *tftBus = new Arduino_ESP32SPI(TFT_DC, TFT_CS, TFT_SCK, TFT_MOSI, TFT_MISO, HSPI);
Arduino_GFX *display = new Arduino_ILI9341(tftBus, GFX_NOT_DEFINED, 1, false);
SPIClass touchSPI(VSPI);
XPT2046_Touchscreen touch(TOUCH_CS, TOUCH_IRQ);

bool presumedPlaying = false;
int volumePercent = 50;
String statusLine = "Connect Wi-Fi to begin";
uint32_t lastTouchMs = 0;

void drawButton(int x, int y, int w, int h, uint16_t color, const char *label) {
  display->fillRoundRect(x, y, w, h, 10, color);
  display->setTextColor(BLACK);
  display->setTextSize(2);
  int16_t bx, by;
  uint16_t bw, bh;
  display->getTextBounds(label, 0, 0, &bx, &by, &bw, &bh);
  display->setCursor(x + (w - bw) / 2, y + (h - bh) / 2 - by);
  display->print(label);
}

void drawScreen() {
  display->fillScreen(0x0841);
  display->setTextColor(WHITE);
  display->setTextSize(2);
  display->setCursor(12, 10);
  display->print("Spotify Remote");
  display->setTextSize(1);
  display->setCursor(12, 35);
  display->print(statusLine);
  drawButton(12, 55, 296, 54, 0x07E0, presumedPlaying ? "PAUSE" : "PLAY");
  drawButton(12, 125, 138, 52, 0xFFE0, "VOL -");
  drawButton(170, 125, 138, 52, 0xFFE0, "VOL +");
  display->setTextColor(WHITE);
  display->setTextSize(2);
  display->setCursor(85, 195);
  display->printf("Volume: %d%%", volumePercent);
  display->setTextSize(1);
  display->setCursor(12, 222);
  display->print("Spotify plays on your phone or computer");
}

bool spotifyRequest(const String &path) {
  if (WiFi.status() != WL_CONNECTED) {
    statusLine = "Wi-Fi is not connected";
    return false;
  }
  if (String(SPOTIFY_TOKEN).startsWith("YOUR_")) {
    statusLine = "Add Spotify token in code";
    return false;
  }
  WiFiClientSecure client;
  client.setInsecure();
  HTTPClient http;
  if (!http.begin(client, "https://api.spotify.com/v1/me/player/" + path)) {
    statusLine = "Could not reach Spotify";
    return false;
  }
  http.addHeader("Authorization", "Bearer " + String(SPOTIFY_TOKEN));
  http.addHeader("Content-Length", "0");
  int responseCode = http.PUT("");
  http.end();
  if (responseCode == 204 || responseCode == 202) {
    statusLine = "Spotify updated";
    return true;
  }
  if (responseCode == 401) statusLine = "Token expired - replace it";
  else if (responseCode == 403) statusLine = "Premium permission needed";
  else if (responseCode == 404) statusLine = "Start Spotify on phone/PC";
  else statusLine = "Spotify error " + String(responseCode);
  return false;
}

void connectWiFi() {
  if (String(WIFI_SSID).startsWith("YOUR_")) {
    statusLine = "Add Wi-Fi name and password";
    return;
  }
  statusLine = "Joining Wi-Fi...";
  drawScreen();
  WiFi.mode(WIFI_STA);
  WiFi.begin(WIFI_SSID, WIFI_PASSWORD);
  uint32_t started = millis();
  while (WiFi.status() != WL_CONNECTED && millis() - started < 12000) delay(100);
  statusLine = WiFi.status() == WL_CONNECTED ? "Wi-Fi connected" : "Wi-Fi connection failed";
}

void handleTouch(int x, int y) {
  if (y >= 55 && y <= 109) {
    bool nextPlaying = !presumedPlaying;
    if (spotifyRequest(nextPlaying ? "play" : "pause")) presumedPlaying = nextPlaying;
  } else if (y >= 125 && y <= 177 && x >= 12 && x <= 150) {
    volumePercent = max(0, volumePercent - 10);
    spotifyRequest("volume?volume_percent=" + String(volumePercent));
  } else if (y >= 125 && y <= 177 && x >= 170 && x <= 308) {
    volumePercent = min(100, volumePercent + 10);
    spotifyRequest("volume?volume_percent=" + String(volumePercent));
  }
  drawScreen();
}

void setup() {
  pinMode(TFT_BACKLIGHT, OUTPUT);
  digitalWrite(TFT_BACKLIGHT, HIGH);
  display->begin();
  display->setRotation(1);
  touchSPI.begin(TOUCH_SCK, TOUCH_MISO, TOUCH_MOSI, TOUCH_CS);
  touch.begin(touchSPI);
  touch.setRotation(1);
  drawScreen();
  connectWiFi();
  drawScreen();
}

void loop() {
  if (touch.touched() && millis() - lastTouchMs > 250) {
    TS_Point point = touch.getPoint();
    int x = map(point.y, 240, 3800, 0, 319);
    int y = map(point.x, 200, 3700, 239, 0);
    handleTouch(constrain(x, 0, 319), constrain(y, 0, 239));
    lastTouchMs = millis();
  }
}
Remix this project
Make it yours in one click
Open a full copy of this project in your own Schematik workspace — diagram, code, parts, and assembly steps included. Swap the sensor, add features, or redesign the whole thing with AI. The author's original stays untouched.