Community project
Interactive Desk Buddy
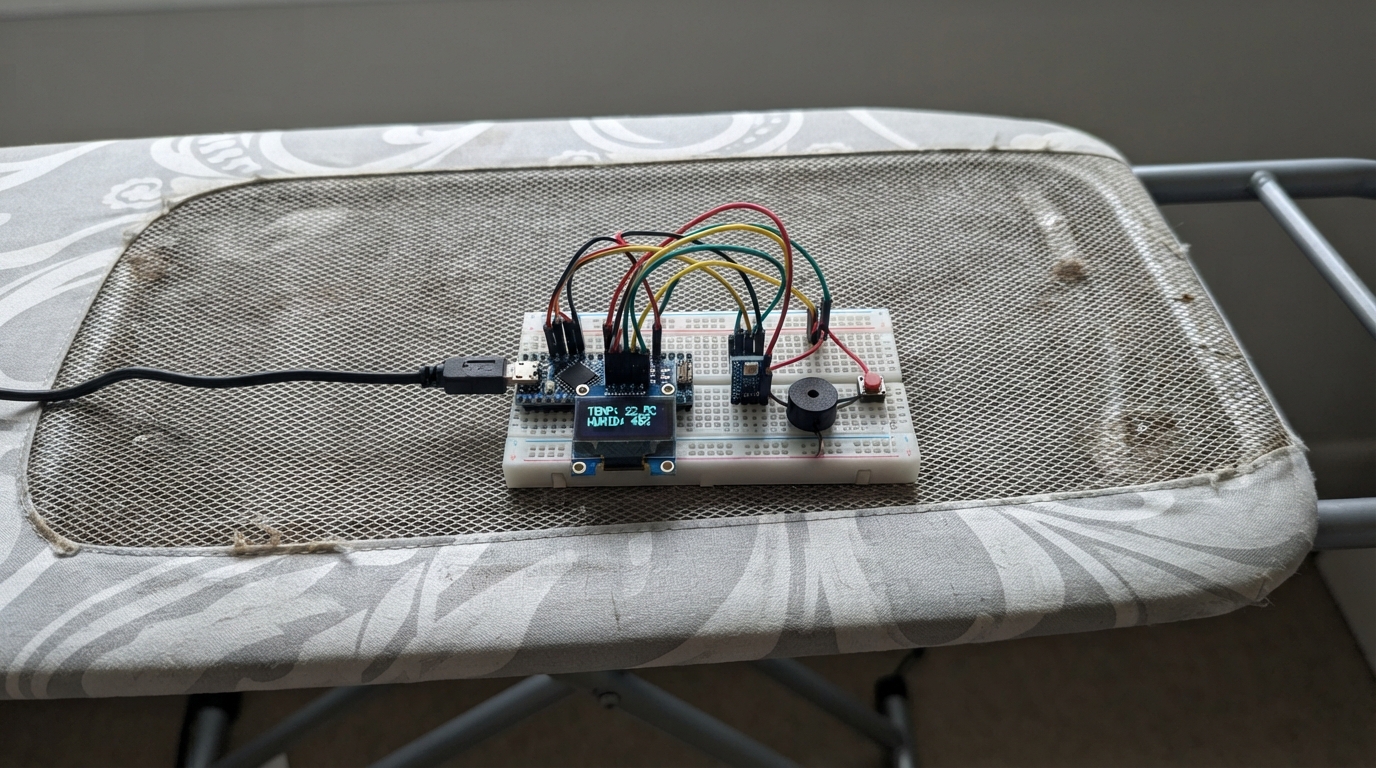
Interactive Desk Buddy is a friendly desktop companion that combines a Raspberry Pi Pico with an OLED display, environmental sensor, and sound feedback to create a multi-function desk tool. It displays an animated face, shows the current time and weather conditions, runs a customizable timer, and provides audio alerts—all controlled with three push buttons.
This guide provides a complete parts list, wiring diagram, and step-by-step assembly instructions for 3D printing the buddy's body and integrating the electronics. The included Arduino firmware handles the display rendering, sensor readings, button debouncing, and timer logic, giving makers a fully functional project that's both practical and delightful to use.
Wiring diagram

Gather all the parts
Assemble it in 6 steps
1. Print the friendly body
Open the included `data/desk_buddy_case.scad` file in OpenSCAD. Export it once with `part = "body"`, then change that word to `"lid"` and export again. Print both pieces at 0.2 mm layer height without support material. The rectangular front window is for the screen; the three round holes are for the buttons.
- Print the body in a darker color and the lid in a brighter color to make the face stand out.
- Test-fit the lid before gluing any electronics in place.
- Do not cover the small group of sound holes or the air holes at the back; the buzzer will be quieter and the temperature sensor will give less useful readings.
2. Place the Pico W and screen
Put the Raspberry Pi Pico W into the printed body with its USB socket lined up with the side opening. Place the 0.96 inch OLED behind the large front window, with its lit side facing outward. Use small dots of hot glue or double-sided foam tape so no metal part can touch another board.
- Leave the Pico W USB socket reachable so you can power and deploy it later.
- Do not let glue cover the Pico W USB socket or bridge the tiny metal pins underneath the boards.
3. Wire the display and room sensor
Connect both modules to the same four shared wires: OLED VCC → Pico 3V3 (power); OLED GND → Pico GND (ground); OLED SDA → GP4 (data); OLED SCL → GP5 (clock). Then connect BME280 VCC → Pico 3V3 (power); BME280 GND → Pico GND (ground); BME280 SDA → GP4 (data); BME280 SCL → GP5 (clock). Keep the BME280 near the rear air holes, away from the warm Pico W.
- Both small boards safely share GP4 and GP5; those are the two communication wires.
- Use 3.3V, not 5V, for both modules.
- Make sure VCC and GND are not swapped — swapped power can damage the display or sensor.
4. Add the three control buttons
Fit three momentary buttons into the three round lid holes. Wire the Mode button: one leg → GP6 (signal), the other leg → GND (ground). Wire the Start/Pause button: one leg → GP7 (signal), the other leg → GND (ground). Wire the Add Minute button: one leg → GP8 (signal), the other leg → GND (ground).
- On a four-legged tactile button, use two legs on opposite sides; the two legs on one side are already joined inside the button.
- The program supplies the needed pull-up function, so do not add separate resistors.
- A button turned 90 degrees on a breadboard can leave its two wires permanently connected, making it look as if it is always pressed.
5. Fit the gentle timer sounder
Place the piezo buzzer behind the small cluster of front sound holes. Connect either buzzer lead → GP16 (signal) and the other buzzer lead → GND (ground). This type of buzzer has no positive or negative side.
- A small piece of tape or a dab of glue around the buzzer edge holds it in place without blocking its opening.
- Do not use a powered 5V buzzer in place of the listed passive piezo; it can overload the Pico W pin.
6. Close and power the buddy
Tuck the wires inside without pinching them, press the printed lid into the body, and connect a USB cable to the Pico W. The face should greet you. Press Mode to change face, clock, timer, and room-weather pages; on the timer page, Add adds one minute and Start pauses or starts the countdown.
- If the screen stays blank, first check the four OLED wires and make sure its module is the common I2C SSD1306 version.
- The outdoor-weather line deliberately says setup needed until city and Wi-Fi details are supplied.
- Unplug USB before moving any jumper wire, because a loose wire touching the wrong pin can damage a module.
Review all connections
1. Connections between "face_oled" and "Raspberry Pi Pico"
2. Connections between "room_sensor" and "Raspberry Pi Pico"
3. Connections between "timer_buzzer" and "Raspberry Pi Pico"
4. Connections between "button_mode" and "Raspberry Pi Pico"
5. Connections between "button_start" and "Raspberry Pi Pico"
6. Connections between "button_add" and "Raspberry Pi Pico"
Deploy the firmware
#include <Arduino.h>
#include <Wire.h>
#include <Adafruit_GFX.h>
#include <Adafruit_SSD1306.h>
#include <Adafruit_BME280.h>


// Hoisted type definitions
enum View { FACE_VIEW, CLOCK_VIEW, TIMER_VIEW, WEATHER_VIEW };


// Forward declarations
bool wasPressed(uint8_t pin);
void chirp(uint16_t frequency, uint16_t duration);
uint32_t remainingSeconds();
void drawFace();
void drawClock();
void drawTimer();
void drawWeather();
void redrawScreen();

constexpr uint8_t OLED_SDA_PIN = 4;
constexpr uint8_t OLED_SCL_PIN = 5;
constexpr uint8_t MODE_BUTTON_PIN = 6;
constexpr uint8_t START_BUTTON_PIN = 7;
constexpr uint8_t ADD_BUTTON_PIN = 8;
constexpr uint8_t BUZZER_PIN = 16;
constexpr uint8_t SCREEN_WIDTH = 128;
constexpr uint8_t SCREEN_HEIGHT = 64;

Adafruit_SSD1306 display(SCREEN_WIDTH, SCREEN_HEIGHT, &Wire, -1);
Adafruit_BME280 bme;


View view = FACE_VIEW;

bool sensorPresent = false;
bool timerRunning = false;
bool timerFinished = false;
uint32_t timerSeconds = 5 * 60;
uint32_t timerStartedAt = 0;
uint32_t timerRemainingAtStart = 0;
uint32_t bootMillis = 0;
uint32_t lastSensorRead = 0;
uint32_t lastScreenMinute = 999999;
float roomTempC = 0.0f;
float roomHumidity = 0.0f;
float roomPressureHpa = 0.0f;
bool needsRedraw = true;

bool wasPressed(uint8_t pin) {
  static uint32_t lastPress[29] = {};
  if (digitalRead(pin) != LOW) return false;
  uint32_t now = millis();
  if (now - lastPress[pin] < 220) return false;
  lastPress[pin] = now;
  return true;
}

void chirp(uint16_t frequency, uint16_t duration) {
  tone(BUZZER_PIN, frequency, duration);
}

uint32_t remainingSeconds() {
  if (!timerRunning) return timerSeconds;
  uint32_t elapsed = (millis() - timerStartedAt) / 1000;
  return elapsed >= timerRemainingAtStart ? 0 : timerRemainingAtStart - elapsed;
}

void drawFace() {
  display.clearDisplay();
  display.drawRoundRect(4, 3, 120, 46, 12, SSD1306_WHITE);
  if (timerFinished) {
    display.fillCircle(38, 22, 6, SSD1306_WHITE);
    display.fillCircle(90, 22, 6, SSD1306_WHITE);
    display.drawCircle(38, 22, 2, SSD1306_BLACK);
    display.drawCircle(90, 22, 2, SSD1306_BLACK);
    display.drawLine(46, 37, 82, 37, SSD1306_WHITE);
    display.drawLine(50, 41, 78, 41, SSD1306_WHITE);
  } else if (timerRunning) {
    display.fillCircle(39, 24, 5, SSD1306_WHITE);
    display.fillCircle(89, 24, 5, SSD1306_WHITE);
    display.drawLine(48, 36, 80, 36, SSD1306_WHITE);
  } else {
    display.fillCircle(39, 22, 6, SSD1306_WHITE);
    display.fillCircle(89, 22, 6, SSD1306_WHITE);
    display.drawLine(46, 34, 50, 38, SSD1306_WHITE);
    display.drawLine(50, 38, 56, 41, SSD1306_WHITE);
    display.drawLine(56, 41, 64, 42, SSD1306_WHITE);
    display.drawLine(64, 42, 72, 41, SSD1306_WHITE);
    display.drawLine(72, 41, 78, 38, SSD1306_WHITE);
    display.drawLine(78, 38, 82, 34, SSD1306_WHITE);
  }
  display.setTextSize(1);
  display.setTextColor(SSD1306_WHITE);
  display.setCursor(17, 54);
  display.print(timerFinished ? "Timer done!" : timerRunning ? "You can do it!" : "Hello, friend!");
}

void drawClock() {
  uint32_t totalSeconds = (millis() - bootMillis) / 1000;
  uint8_t hours = (totalSeconds / 3600) % 24;
  uint8_t minutes = (totalSeconds / 60) % 60;
  uint8_t seconds = totalSeconds % 60;
  display.clearDisplay();
  display.setTextColor(SSD1306_WHITE);
  display.setTextSize(1);
  display.setCursor(26, 4);
  display.print("DESK BUDDY CLOCK");
  display.setTextSize(3);
  display.setCursor(14, 24);
  if (hours < 10) display.print('0');
  display.print(hours);
  display.print(':');
  if (minutes < 10) display.print('0');
  display.print(minutes);
  display.setTextSize(1);
  display.setCursor(52, 54);
  if (seconds < 10) display.print('0');
  display.print(seconds);
}

void drawTimer() {
  uint32_t left = remainingSeconds();
  uint16_t minutes = left / 60;
  uint8_t seconds = left % 60;
  display.clearDisplay();
  display.setTextColor(SSD1306_WHITE);
  display.setTextSize(1);
  display.setCursor(43, 4);
  display.print("TIMER");
  display.setTextSize(3);
  display.setCursor(17, 24);
  if (minutes < 10) display.print('0');
  display.print(minutes);
  display.print(':');
  if (seconds < 10) display.print('0');
  display.print(seconds);
  display.setTextSize(1);
  display.setCursor(12, 54);
  display.print(timerRunning ? "Start: pause" : "Add: +1 minute");
}

void drawWeather() {
  display.clearDisplay();
  display.setTextColor(SSD1306_WHITE);
  display.setTextSize(1);
  display.setCursor(27, 1);
  display.print("ROOM WEATHER");
  if (!sensorPresent) {
    display.setCursor(10, 25);
    display.print("BME280 not found");
    display.setCursor(6, 40);
    display.print("Check its four wires");
    return;
  }
  display.setCursor(4, 17);
  display.print("Temp: ");
  display.print(roomTempC, 1);
  display.print(" C");
  display.setCursor(4, 31);
  display.print("Humidity: ");
  display.print(roomHumidity, 0);
  display.print(" %");
  display.setCursor(4, 45);
  display.print("Pressure: ");
  display.print(roomPressureHpa, 0);
  display.print(" hPa");
  display.setCursor(4, 56);
  display.print("Outdoor: setup needed");
}

void redrawScreen() {
  if (view == FACE_VIEW) drawFace();
  else if (view == CLOCK_VIEW) drawClock();
  else if (view == TIMER_VIEW) drawTimer();
  else drawWeather();
  display.display();
  needsRedraw = false;
}

void setup() {
  pinMode(MODE_BUTTON_PIN, INPUT_PULLUP);
  pinMode(START_BUTTON_PIN, INPUT_PULLUP);
  pinMode(ADD_BUTTON_PIN, INPUT_PULLUP);
  pinMode(BUZZER_PIN, OUTPUT);
  bootMillis = millis();
Wire.begin();
  display.begin(SSD1306_SWITCHCAPVCC, 0x3C);
  sensorPresent = bme.begin(0x77);
  if (sensorPresent) {
    roomTempC = bme.readTemperature();
    roomHumidity = bme.readHumidity();
    roomPressureHpa = bme.readPressure() / 100.0f;
  }
  chirp(1800, 80);
}

void loop() {
  uint32_t now = millis();
  if (wasPressed(MODE_BUTTON_PIN)) {
    view = static_cast<View>((view + 1) % 4);
    timerFinished = false;
    chirp(1600, 45);
    needsRedraw = true;
  }
  if (wasPressed(START_BUTTON_PIN)) {
    if (view == TIMER_VIEW) {
      if (timerRunning) {
        timerSeconds = remainingSeconds();
        timerRunning = false;
      } else if (timerSeconds > 0) {
        timerRemainingAtStart = timerSeconds;
        timerStartedAt = now;
        timerRunning = true;
        timerFinished = false;
      }
      chirp(2000, 50);
      needsRedraw = true;
    }
  }
  if (wasPressed(ADD_BUTTON_PIN) && view == TIMER_VIEW && !timerRunning) {
    timerSeconds += 60;
    timerFinished = false;
    chirp(1200, 40);
    needsRedraw = true;
  }
  if (timerRunning && remainingSeconds() == 0) {
    timerRunning = false;
    timerSeconds = 0;
    timerFinished = true;
    chirp(2600, 350);
    needsRedraw = true;
  }
  if (sensorPresent && now - lastSensorRead >= 5000) {
    lastSensorRead = now;
    roomTempC = bme.readTemperature();
    roomHumidity = bme.readHumidity();
    roomPressureHpa = bme.readPressure() / 100.0f;
    if (view == WEATHER_VIEW) needsRedraw = true;
  }
  uint32_t currentMinute = (now - bootMillis) / 60000;
  if (view == CLOCK_VIEW && currentMinute != lastScreenMinute) {
    lastScreenMinute = currentMinute;
    needsRedraw = true;
  }
  static uint32_t lastTimerShown = 999999;
  if (view == TIMER_VIEW && remainingSeconds() != lastTimerShown) {
    lastTimerShown = remainingSeconds();
    needsRedraw = true;
  }
  if (needsRedraw) redrawScreen();
}
Remix this project
Make it yours in one click
Open a full copy of this project in your own Schematik workspace — diagram, code, parts, and assembly steps included. Swap the sensor, add features, or redesign the whole thing with AI. The author's original stays untouched.
Related projects
Fridge Scale Smart Clip
Raspberry Pi Pico · September 14, 2026Phillip Knopp
Tiny Robot AI Assistant
Raspberry Pi Pico · September 13, 2026Shaikh Tajmul haque
Tiny Spider Robot
Raspberry Pi Pico · September 13, 2026Shaikh Tajmul haque