Community project
RFID Smart Parking System
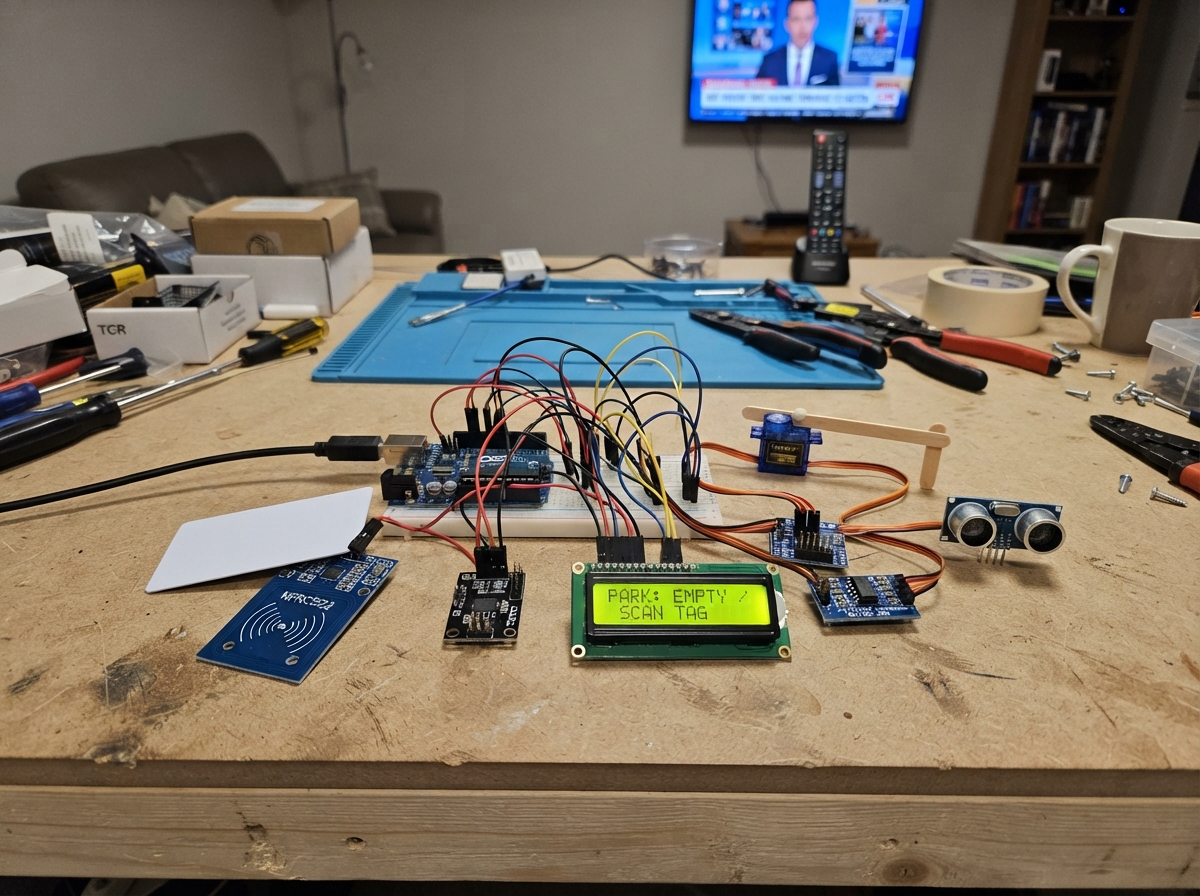
This RFID Smart Parking System automates entry and exit gate control while monitoring parking lot capacity and wall clearance. Built around an Arduino Uno, the system uses an MFRC522 RFID reader to authenticate vehicles, IR line sensors to detect entry and exit, and an ultrasonic sensor to warn drivers of obstacles. Two servo-controlled gates open only for authorized cards, while an LCD display shows real-time lot status and a buzzer provides proximity alerts.
This guide provides a complete wiring diagram, parts list, and step-by-step assembly instructions to build a functional parking management system. The included firmware handles RFID authentication, gate automation, occupancy tracking, and wall collision detection. Builders will learn to integrate multiple sensors and actuators, work with logic level shifters for mixed-voltage components, and implement state-based control logic for a real-world IoT application.
Wiring diagram

Gather all the parts
Assemble it in 6 steps
1. Place the Uno and the two lane sensors
Put the Arduino Uno where its USB socket is easy to reach. Place entry_ir at the entry lane and exit_ir at the exit lane, aimed at the side or underside of a passing car. Connect entry_ir VCC to Uno 5V (power), entry_ir GND to Uno GND (ground), and entry_ir DO to Uno D2 (car-detect signal). Connect exit_ir VCC to Uno 5V (power), exit_ir GND to Uno GND (ground), and exit_ir DO to Uno D4 (car-detect signal).
- Turn each sensor's tiny adjustment screw until its indicator changes only when a car is in its detection position.
- Keep the sensor boards dry and do not let their VCC and GND wires touch; swapped power can damage a sensor board.
2. Connect the parking display
Connect status_lcd VCC to Uno 5V (power), status_lcd GND to Uno GND (ground), status_lcd SDA to Uno A4 (data), and status_lcd SCL to Uno A5 (clock). The pins marked SDA and SCL beside AREF on some Uno R3 boards are the same electrical connections as A4 and A5.
- If the screen lights but no letters appear, slowly turn the small contrast screw on the LCD backpack.
- Make sure VCC and GND are not swapped — swapped power can damage the LCD.
3. Wire the RFID reader through the converter boards
Connect rfid_reader VCC to Uno 3.3V (power) and RFID GND to Uno GND (ground). Connect rfid_level_shifter VCC to Uno 3.3V (power) and GND to Uno GND (ground). Connect Uno D13 to IN1, then OUT1 to RFID SCK (clock); Uno D11 to IN2, then OUT2 to RFID MOSI (data); Uno D10 to IN3, then OUT3 to RFID SDA/SS (select); and Uno D7 to IN4, then OUT4 to RFID RST (reset). Connect RFID MISO to rfid_miso_buffer IN (return data), rfid_miso_buffer OUT to Uno D12 (return data), rfid_miso_buffer VCC to Uno 5V (power), and rfid_miso_buffer GND to Uno GND (ground).
- On the RC522, the pin printed SDA is its select pin, not the LCD-style data wire.
- Never connect the RC522 VCC pin to 5V or bypass the converter boards — 5V signals can damage the RFID reader.
4. Connect the two gate servos
Connect entry_gate_servo SIGNAL to Uno D5 (gate-control signal) and exit_gate_servo SIGNAL to Uno D6 (gate-control signal). Connect both servo red wires to servo_power_supply +5V (servo power), and both servo brown or black wires to shared GND (ground). Connect servo_power_supply GND to an Uno GND pin (shared ground).
- Fit the servo horns while the gates are physically closed, because the firmware starts both gates closed.
- Do not power the two servos from the Uno 5V pin; moving gates can make the Uno restart. Use the separate 5V, 2A-or-larger supply.
5. Install the wall safety alarm
Mount wall_distance_sensor on the wall or parking stop, with its two round openings facing the arriving car's bumper. Connect wall_distance_sensor VCC to Uno 5V (power), GND to Uno GND (ground), TRIG to Uno D8 (measurement-start signal), and ECHO to Uno D9 (distance signal). Connect wall_alarm_buzzer SIGNAL to Uno D3 (alarm-control signal) and GND to Uno GND (ground).
- Mount the sensor at approximately bumper height and point it straight down the parking space. Test with a box before allowing a car to approach it.
- Do not place the sensor where it can be struck by the car. A loose sensor, or one pointed at the floor, can give incorrect warning distances.
6. Power up and set the authorized card
Plug the Uno into your computer with USB, then connect the separate servo_power_supply to its USB power source. Keep all wires clear of the servo arms. After deploying the firmware, present the first RFID card to rfid_reader; it becomes the card that opens the entry gate. As a car approaches the wall, the buzzer beeps inside 30 cm and sounds continuously inside 12 cm.
- The saved card stays remembered when power is removed. Adjust the warning distances in the firmware later if your model parking space needs different limits.
- Keep fingers away from moving servo arms; a gate arm can pinch fingers or pull loose jumper wires. Stop the car immediately if the alarm sounds continuously.
Review all connections
1. Connections between "entry_ir" and "Arduino"
2. Connections between "exit_ir" and "Arduino"
3. Connections between "entry_gate_servo" and "Arduino"
4. Connections between "exit_gate_servo" and "Arduino"
5. Connections between "status_lcd" and "Arduino"
6. Connections between "rfid_reader" and "Arduino"
7. Connections between "rfid_level_shifter" and "Arduino"
8. Connections between "servo_power_supply" and "Arduino"
9. Connections between "rfid_miso_buffer" and "Arduino"
10. Connections between "wall_distance_sensor" and "Arduino"
11. Connections between "wall_alarm_buzzer" and "Arduino"
Deploy the firmware
#include <Arduino.h>
#include <Wire.h>
#include <SPI.h>
#include <Servo.h>
#include <MFRC522.h>
#include <LiquidCrystal_I2C.h>
#include <EEPROM.h>


// Forward declarations
void showStatus();
void setMessage(const char *message);
void showWallWarning();
void openEntryGate();
void closeEntryGate();
void openExitGate();
void closeExitGate();
void loadAuthorizedCard();
void saveAuthorizedCard(const MFRC522::Uid &uid);
bool cardIsAuthorized(const MFRC522::Uid &uid);
void handleRfid();
void handleSensors();
unsigned int measureWallDistanceCm();
void handleWallAlarm();
void updateGates();

const byte ENTRY_IR_PIN = 2;
const byte WALL_BUZZER_PIN = 3;
const byte EXIT_IR_PIN = 4;
const byte ENTRY_SERVO_PIN = 5;
const byte EXIT_SERVO_PIN = 6;
const byte RFID_RST_PIN = 7;
const byte WALL_TRIG_PIN = 8;
const byte WALL_ECHO_PIN = 9;
const byte RFID_SS_PIN = 10;
const byte RFID_MOSI_PIN = 11;
const byte RFID_MISO_PIN = 12;
const byte RFID_SCK_PIN = 13;

const byte GATE_CLOSED_ANGLE = 5;
const byte GATE_OPEN_ANGLE = 90;
const unsigned long GATE_OPEN_MS = 4000;
const unsigned long SENSOR_LOCKOUT_MS = 900;
const byte LOT_CAPACITY = 10;

// Mount the ultrasonic sensor at the wall facing the car's bumper.
const unsigned int WARNING_DISTANCE_CM = 30;
const unsigned int STOP_DISTANCE_CM = 12;
const unsigned long DISTANCE_SAMPLE_MS = 100;
const unsigned long WARNING_BEEP_PERIOD_MS = 350;

const byte EEPROM_MAGIC = 0xA5;
const int EEPROM_MAGIC_ADDR = 0;
const int EEPROM_UID_LENGTH_ADDR = 1;
const int EEPROM_UID_ADDR = 2;

Servo entryGate;
Servo exitGate;
MFRC522 rfid(RFID_SS_PIN, RFID_RST_PIN);
LiquidCrystal_I2C lcd(0x27, 16, 2);

byte authorizedUid[10];
byte authorizedUidLength = 0;
byte occupiedSpaces = 0;
bool entryGateOpen = false;
bool exitGateOpen = false;
bool entryCountedThisOpen = false;
bool wallStopActive = false;
bool wallWarningActive = false;
bool buzzerOn = false;
unsigned int wallDistanceCm = 0;
unsigned long entryGateOpenedAt = 0;
unsigned long exitGateOpenedAt = 0;
unsigned long lastEntrySensorAt = 0;
unsigned long lastExitSensorAt = 0;
unsigned long lastDistanceSampleAt = 0;
unsigned long lastBuzzerChangeAt = 0;
char messageLine[17] = "Scan card at gate";

void showStatus() {
  lcd.setCursor(0, 0);
  lcd.print("Free: ");
  lcd.print(LOT_CAPACITY - occupiedSpaces);
  lcd.print("/");
  lcd.print(LOT_CAPACITY);
  lcd.print("     ");
  lcd.setCursor(0, 1);
  lcd.print(messageLine);
  lcd.print("                ");
}

void setMessage(const char *message) {
  strncpy(messageLine, message, 16);
  messageLine[16] = '\0';
  if (!wallStopActive && !wallWarningActive) showStatus();
}

void showWallWarning() {
  lcd.setCursor(0, 0);
  if (wallStopActive) {
    lcd.print("STOP! ");
  } else {
    lcd.print("SLOW DOWN ");
  }
  lcd.print(wallDistanceCm);
  lcd.print("cm   ");
  lcd.setCursor(0, 1);
  lcd.print("Wall ahead      ");
}

void openEntryGate() {
  entryGate.write(GATE_OPEN_ANGLE);
  entryGateOpen = true;
  entryCountedThisOpen = false;
  entryGateOpenedAt = millis();
}

void closeEntryGate() {
  entryGate.write(GATE_CLOSED_ANGLE);
  entryGateOpen = false;
  setMessage("Scan card at gate");
}

void openExitGate() {
  exitGate.write(GATE_OPEN_ANGLE);
  exitGateOpen = true;
  exitGateOpenedAt = millis();
}

void closeExitGate() {
  exitGate.write(GATE_CLOSED_ANGLE);
  exitGateOpen = false;
  setMessage("Scan card at gate");
}

void loadAuthorizedCard() {
  if (EEPROM.read(EEPROM_MAGIC_ADDR) != EEPROM_MAGIC) {
    authorizedUidLength = 0;
    return;
  }
  byte length = EEPROM.read(EEPROM_UID_LENGTH_ADDR);
  if (length == 0 || length > sizeof(authorizedUid)) {
    authorizedUidLength = 0;
    return;
  }
  authorizedUidLength = length;
  for (byte i = 0; i < authorizedUidLength; i++) {
    authorizedUid[i] = EEPROM.read(EEPROM_UID_ADDR + i);
  }
}

void saveAuthorizedCard(const MFRC522::Uid &uid) {
  authorizedUidLength = uid.size;
  EEPROM.update(EEPROM_UID_LENGTH_ADDR, authorizedUidLength);
  for (byte i = 0; i < authorizedUidLength; i++) {
    authorizedUid[i] = uid.uidByte[i];
    EEPROM.update(EEPROM_UID_ADDR + i, authorizedUid[i]);
  }
  EEPROM.update(EEPROM_MAGIC_ADDR, EEPROM_MAGIC);
}

bool cardIsAuthorized(const MFRC522::Uid &uid) {
  if (uid.size != authorizedUidLength) return false;
  for (byte i = 0; i < uid.size; i++) {
    if (uid.uidByte[i] != authorizedUid[i]) return false;
  }
  return true;
}

void handleRfid() {
  if (!rfid.PICC_IsNewCardPresent() || !rfid.PICC_ReadCardSerial()) return;
  if (authorizedUidLength == 0) {
    saveAuthorizedCard(rfid.uid);
    setMessage("Card saved - enter");
    if (occupiedSpaces < LOT_CAPACITY) openEntryGate();
  } else if (cardIsAuthorized(rfid.uid)) {
    if (occupiedSpaces < LOT_CAPACITY) {
      setMessage("Access granted");
      openEntryGate();
    } else {
      setMessage("Parking is full");
    }
  } else {
    setMessage("Card not allowed");
  }
  rfid.PICC_HaltA();
  rfid.PCD_StopCrypto1();
}

void handleSensors() {
  unsigned long now = millis();
  if (entryGateOpen && !entryCountedThisOpen && digitalRead(ENTRY_IR_PIN) == LOW && now - lastEntrySensorAt > SENSOR_LOCKOUT_MS) {
    lastEntrySensorAt = now;
    entryCountedThisOpen = true;
    if (occupiedSpaces < LOT_CAPACITY) {
      occupiedSpaces++;
      setMessage("Car entered");
    }
  }
  if (!exitGateOpen && digitalRead(EXIT_IR_PIN) == LOW && now - lastExitSensorAt > SENSOR_LOCKOUT_MS) {
    lastExitSensorAt = now;
    if (occupiedSpaces > 0) occupiedSpaces--;
    setMessage("Exit gate open");
    openExitGate();
  }
}

unsigned int measureWallDistanceCm() {
  digitalWrite(WALL_TRIG_PIN, LOW);
  delayMicroseconds(2);
  digitalWrite(WALL_TRIG_PIN, HIGH);
  delayMicroseconds(10);
  digitalWrite(WALL_TRIG_PIN, LOW);
  unsigned long duration = pulseIn(WALL_ECHO_PIN, HIGH, 25000UL);
  if (duration == 0) return 0;
  return duration / 58UL;
}

void handleWallAlarm() {
  unsigned long now = millis();
  if (now - lastDistanceSampleAt >= DISTANCE_SAMPLE_MS) {
    lastDistanceSampleAt = now;
    unsigned int distance = measureWallDistanceCm();
    bool wasWarning = wallWarningActive;
    bool wasStop = wallStopActive;
    wallDistanceCm = distance;
    wallStopActive = (distance > 0 && distance <= STOP_DISTANCE_CM);
    wallWarningActive = (!wallStopActive && distance > 0 && distance <= WARNING_DISTANCE_CM);
    if (wallStopActive || wallWarningActive) {
      if (!wasWarning && !wasStop) lastBuzzerChangeAt = 0;
      showWallWarning();
    } else if (wasWarning || wasStop) {
      digitalWrite(WALL_BUZZER_PIN, LOW);
      buzzerOn = false;
      showStatus();
    }
  }

  if (wallStopActive) {
    if (!buzzerOn) {
      digitalWrite(WALL_BUZZER_PIN, HIGH);
      buzzerOn = true;
    }
  } else if (wallWarningActive) {
    if (now - lastBuzzerChangeAt >= WARNING_BEEP_PERIOD_MS) {
      lastBuzzerChangeAt = now;
      buzzerOn = !buzzerOn;
      digitalWrite(WALL_BUZZER_PIN, buzzerOn ? HIGH : LOW);
    }
  } else if (buzzerOn) {
    digitalWrite(WALL_BUZZER_PIN, LOW);
    buzzerOn = false;
  }
}

void updateGates() {
  unsigned long now = millis();
  if (entryGateOpen && now - entryGateOpenedAt >= GATE_OPEN_MS) closeEntryGate();
  if (exitGateOpen && now - exitGateOpenedAt >= GATE_OPEN_MS) closeExitGate();
}

void setup() {
  pinMode(ENTRY_IR_PIN, INPUT_PULLUP);
  pinMode(EXIT_IR_PIN, INPUT_PULLUP);
  pinMode(WALL_TRIG_PIN, OUTPUT);
  pinMode(WALL_ECHO_PIN, INPUT);
  pinMode(WALL_BUZZER_PIN, OUTPUT);
  digitalWrite(WALL_TRIG_PIN, LOW);
  digitalWrite(WALL_BUZZER_PIN, LOW);

  entryGate.attach(ENTRY_SERVO_PIN);
  exitGate.attach(EXIT_SERVO_PIN);
  entryGate.write(GATE_CLOSED_ANGLE);
  exitGate.write(GATE_CLOSED_ANGLE);

  Wire.begin();
  lcd.init();
  lcd.backlight();
  setMessage("Starting system");
  SPI.begin();
  rfid.PCD_Init();
  loadAuthorizedCard();
  delay(500);
  setMessage(authorizedUidLength == 0 ? "Scan first card" : "Scan card at gate");
}

void loop() {
  handleRfid();
  handleSensors();
  handleWallAlarm();
  updateGates();
}
Remix this project
Make it yours in one click
Open a full copy of this project in your own Schematik workspace — diagram, code, parts, and assembly steps included. Swap the sensor, add features, or redesign the whole thing with AI. The author's original stays untouched.