Community project
WiFi Button Status Monitor
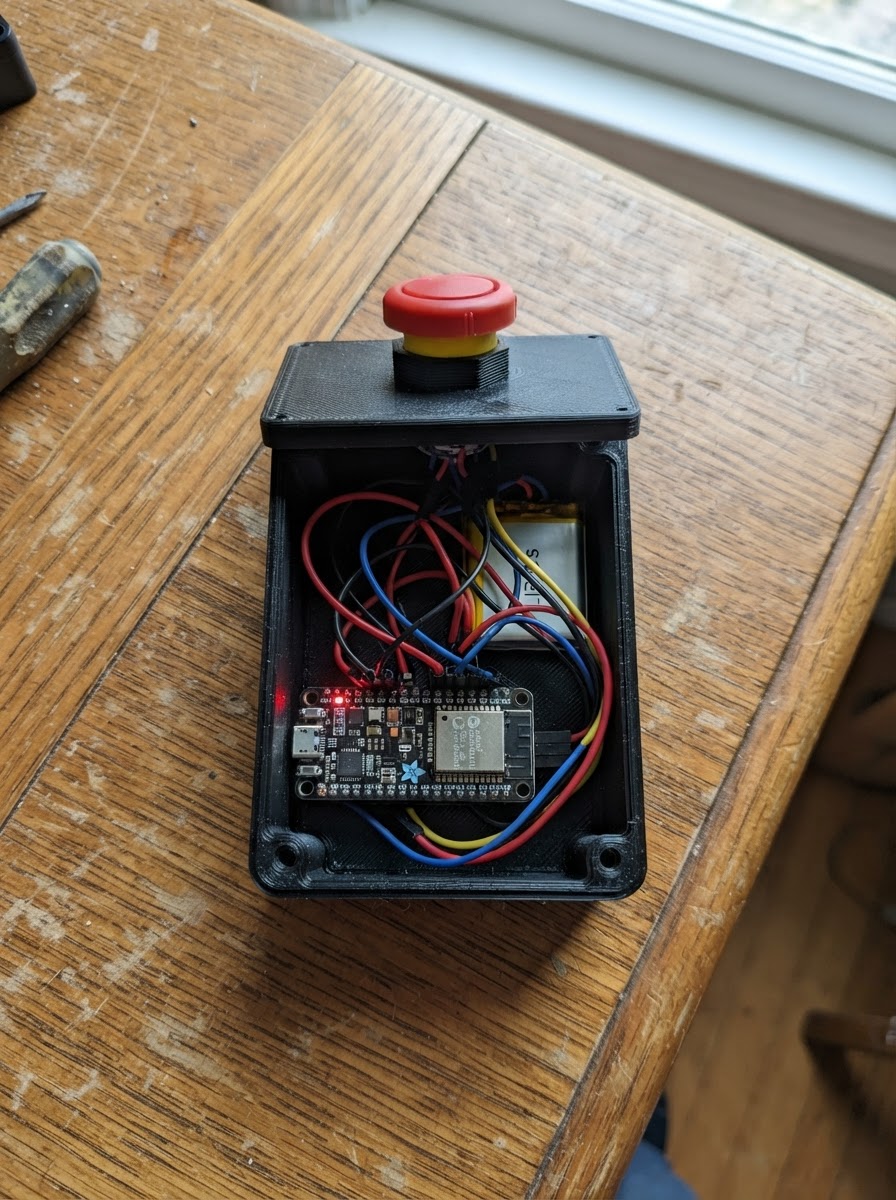
This project turns an ESP32 into a WiFi-connected button status monitor. A push button wired to the microcontroller broadcasts its state over a local web interface, making it easy to check whether the button is pressed or released from any device on the network.
The guide includes a complete wiring diagram, parts list, and ready-to-flash firmware with debouncing logic to ensure reliable button detection. Assembly takes just a few minutes: connect the button to the ESP32, power it up, and open the status page in a web browser to see real-time button state updates.
Wiring diagram

Gather all the parts
Assemble it in 3 steps
1. Power off the ESP32
Disconnect the ESP32 DevKit v1 from USB before placing or wiring the button.
- Use a normally-open momentary push button or the two switch terminals of a tactile button.
- Do not connect GPIO21 to 3.3 V for this design; the firmware uses the ESP32's internal pull-up resistor.
2. Wire the button
Connect one button terminal to ESP32 GPIO21. Connect the opposite button terminal to an ESP32 GND pin. The button is active low: pressing it joins GPIO21 to ground.
- For a 4-leg tactile switch, the two legs on each side are internally paired; use one leg from each opposite side.
- No external resistor is required because INPUT_PULLUP is enabled in firmware.
- Ensure the button connection is only between GPIO21 and GND.
3. Power and open the status page
Reconnect USB to power the ESP32. After deploying the firmware, connect a phone or computer to Wi-Fi network ESP32-Button using password pressrelease, then browse to http://192.168.4.1/.
- The page refreshes once per second and displays either Button pressed or Button released.
- This is a local ESP32 Wi-Fi network, not your home Wi-Fi.
Review all connections
1. Connections between "button_1" and "ESP32"
Deploy the firmware
#include <Arduino.h>
#include <WiFi.h>
#include <WebServer.h>


// Forward declarations
void handleRoot();
void handleState();
void updateButton();

constexpr int BUTTON_PIN = 21;
const char *AP_SSID = "ESP32-Button";
const char *AP_PASSWORD = "pressrelease";

WebServer server(80);

bool stablePressed = false;
bool lastRawPressed = false;
unsigned long rawChangedAt = 0;
constexpr unsigned long DEBOUNCE_MS = 30;

const char PAGE[] PROGMEM = R"HTML(
<!doctype html>
<html lang="en">
<head>
  <meta charset="utf-8">
  <meta name="viewport" content="width=device-width, initial-scale=1">
  <meta http-equiv="refresh" content="1">
  <title>ESP32 Button</title>
  <style>
    body { font-family: system-ui, sans-serif; max-width: 34rem; margin: 15vh auto; padding: 1rem; text-align: center; }
    .state { font-size: 2rem; font-weight: 700; padding: 1.2rem; border-radius: .6rem; }
    .pressed { color: #fff; background: #167a36; }
    .released { color: #2600e4ff; background: #303683ff; }
    small { display: block; margin-top: 1rem; color: #555; }
  </style>
</head>
<body>
  <h1>ESP32 Button</h1>
  <div id="state" class="state released">Loading…</div>
  <small>This page refreshes once per second.</small>
  <script>
    fetch('/state').then(r => r.json()).then(s => {
      const box = document.getElementById('state');
      box.textContent = s.pressed ? 'Button pressed' : 'Button released';
      box.className = 'state ' + (s.pressed ? 'pressed' : 'released');
    }).catch(() => {
      document.getElementById('state').textContent = 'Connection error';
    });
  </script>
</body>
</html>
)HTML";

void handleRoot() {
  server.send_P(200, "text/html", PAGE);
}

void handleState() {
  server.send(200, "application/json", stablePressed ? "{\"pressed\":true}" : "{\"pressed\":false}");
}

void updateButton() {
  const bool rawPressed = digitalRead(BUTTON_PIN) == LOW;
  const unsigned long now = millis();

  if (rawPressed != lastRawPressed) {
    lastRawPressed = rawPressed;
    rawChangedAt = now;
  }

  if (now - rawChangedAt >= DEBOUNCE_MS && stablePressed != rawPressed) {
    stablePressed = rawPressed;
  }
}

void setup() {
  pinMode(BUTTON_PIN, INPUT_PULLUP);
  stablePressed = digitalRead(BUTTON_PIN) == LOW;
  lastRawPressed = stablePressed;
  rawChangedAt = millis();

  WiFi.mode(WIFI_AP);
  WiFi.softAP(AP_SSID, AP_PASSWORD);

  server.on("/", HTTP_GET, handleRoot);
  server.on("/state", HTTP_GET, handleState);
  server.begin();
}

void loop() {
  updateButton();
  server.handleClient();
}
Remix this project
Make it yours in one click
Open a full copy of this project in your own Schematik workspace — diagram, code, parts, and assembly steps included. Swap the sensor, add features, or redesign the whole thing with AI. The author's original stays untouched.