Community project
Ultrasonic Distance Alarm
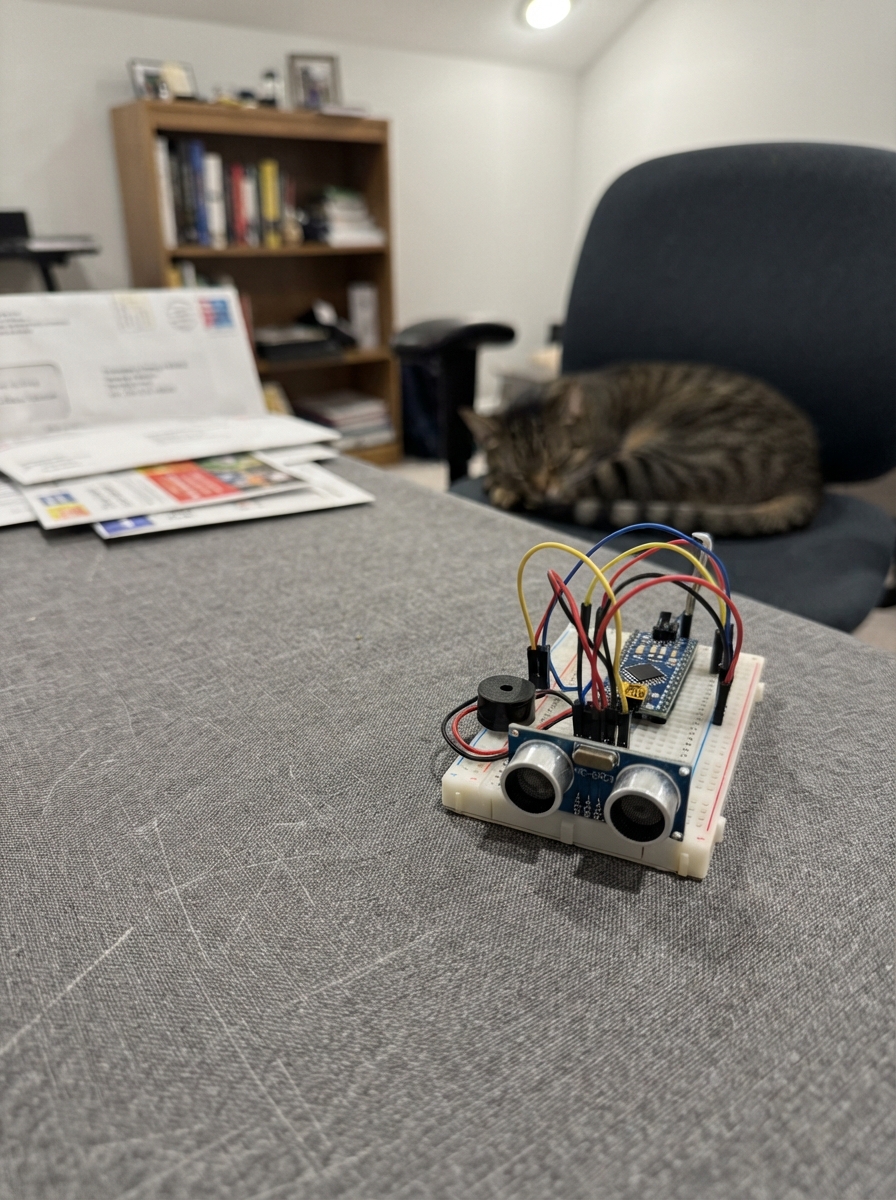
This project builds an ultrasonic distance alarm that detects nearby objects and triggers an alert. Using an HC-SR04 ultrasonic sensor connected to an Arduino Uno, the system continuously measures distance and activates a buzzer when an object enters the alert zone (2-100 cm). The onboard LED blinks faster as objects approach, providing visual feedback alongside the audio alarm.
This guide includes a complete wiring diagram showing how to connect the distance sensor and buzzer to the Arduino, a full parts list, and ready-to-upload firmware. Assembly takes just a few minutes, making this an ideal project for learning sensor integration and real-time response logic.
Wiring diagram

Gather all the parts
Assemble it in 4 steps
1. Place the parts safely
Leave the Arduino Uno unplugged while you connect the parts. Put the HC-SR04 where its two round metal openings face the area you want to measure, and place the active buzzer where you can hear it.
- The sensor measures the distance straight in front of its two round openings.
- Do not connect or move wires while the Uno is powered, because a loose wire can touch the wrong pin.
2. Connect the distance sensor
Use four jumper wires: HC-SR04 VCC → Uno 5V (power); HC-SR04 GND → Uno GND (ground); HC-SR04 TRIG → Uno D7 (signal); HC-SR04 ECHO → Uno D6 (signal).
- Read the small labels beside the sensor pins carefully; the usual left-to-right order while facing the sensor is VCC, TRIG, ECHO, GND.
- Make sure VCC and GND are not swapped — swapped power can damage the distance sensor.
3. Connect the active buzzer
Use two jumper wires: active buzzer SIGNAL → Uno D9 (sound on/off signal); active buzzer GND → Uno GND (ground). If your two-pin buzzer has a + mark instead of SIGNAL, connect its + lead to Uno D9 (sound on/off signal) and its – lead to Uno GND (ground).
- An active buzzer makes its own fixed-pitch sound when D9 is turned on.
- Make sure the + marked lead goes to D9 and the – lead goes to GND — reversed polarity can stop a two-pin active buzzer from sounding.
4. Power and test it
Check that every wire is fully seated, then plug the Uno into your computer with USB. After you press Deploy, move a hand in front of the sensor: inside about one metre the active buzzer sounds continuously, and the built-in L light blinks faster as your hand comes closer.
- Keep objects at least a few centimetres from the sensor; very close objects are outside its reliable measuring range.
- Keep the sensor facing away from soft cloth or angled surfaces when testing, because they can absorb or deflect the sound pulse.
Review all connections
1. Connections between "hcsr04_1" and "Arduino"
2. Connections between "buzzer_1" and "Arduino"
Deploy the firmware
#include <Arduino.h>

int readDistanceCm();
void updateAlarm(int distanceCm);
void updateBoardLed(int distanceCm, unsigned long now);

const uint8_t TRIG_PIN = 7;
const uint8_t ECHO_PIN = 6;
const uint8_t BUZZER_PIN = 9;
const uint8_t BOARD_LED_PIN = LED_BUILTIN;

const unsigned long MEASURE_INTERVAL_MS = 60;
const int ALERT_DISTANCE_CM = 100;

unsigned long lastMeasureMs = 0;
unsigned long lastLedToggleMs = 0;
bool ledOn = false;
int lastDistanceCm = -1;

int readDistanceCm() {
  digitalWrite(TRIG_PIN, LOW);
  delayMicroseconds(2);
  digitalWrite(TRIG_PIN, HIGH);
  delayMicroseconds(10);
  digitalWrite(TRIG_PIN, LOW);

  const unsigned long echoUs = pulseIn(ECHO_PIN, HIGH, 30000UL);
  if (echoUs == 0) {
    return -1;
  }
  return static_cast<int>(echoUs / 58UL);
}

void updateAlarm(int distanceCm) {
  const bool objectIsNear = distanceCm >= 2 && distanceCm <= ALERT_DISTANCE_CM;
  digitalWrite(BUZZER_PIN, objectIsNear ? HIGH : LOW);
}

void updateBoardLed(int distanceCm, unsigned long now) {
  if (distanceCm < 2 || distanceCm > ALERT_DISTANCE_CM) {
    digitalWrite(BOARD_LED_PIN, LOW);
    ledOn = false;
    return;
  }

  const unsigned long blinkIntervalMs = map(distanceCm, 2, ALERT_DISTANCE_CM, 80, 800);
  if (now - lastLedToggleMs >= blinkIntervalMs) {
    lastLedToggleMs = now;
    ledOn = !ledOn;
    digitalWrite(BOARD_LED_PIN, ledOn ? HIGH : LOW);
  }
}

void setup() {
  pinMode(TRIG_PIN, OUTPUT);
  pinMode(ECHO_PIN, INPUT);
  pinMode(BUZZER_PIN, OUTPUT);
  pinMode(BOARD_LED_PIN, OUTPUT);
  digitalWrite(TRIG_PIN, LOW);
  digitalWrite(BUZZER_PIN, LOW);
  digitalWrite(BOARD_LED_PIN, LOW);
}

void loop() {
  const unsigned long now = millis();
  if (now - lastMeasureMs >= MEASURE_INTERVAL_MS) {
    lastMeasureMs = now;
    lastDistanceCm = readDistanceCm();
  }

  updateAlarm(lastDistanceCm);
  updateBoardLed(lastDistanceCm, now);
}
Remix this project
Make it yours in one click
Open a full copy of this project in your own Schematik workspace — diagram, code, parts, and assembly steps included. Swap the sensor, add features, or redesign the whole thing with AI. The author's original stays untouched.
Related projects
Reloj Digital Con Temporizador
Arduino · September 27, 2026Ricardo Sprovieri
I M Building Test-phase Prototype Of Capstone Co
Arduino · September 27, 2026Fritz Blue Gadaza
Necesito Hacer Un Circuito De Un Oxiometro Con
Arduino · September 25, 2026MARIA PAULA LAMBOGLIA VARGAS