Community project
MPU 6050 Logger and Tester
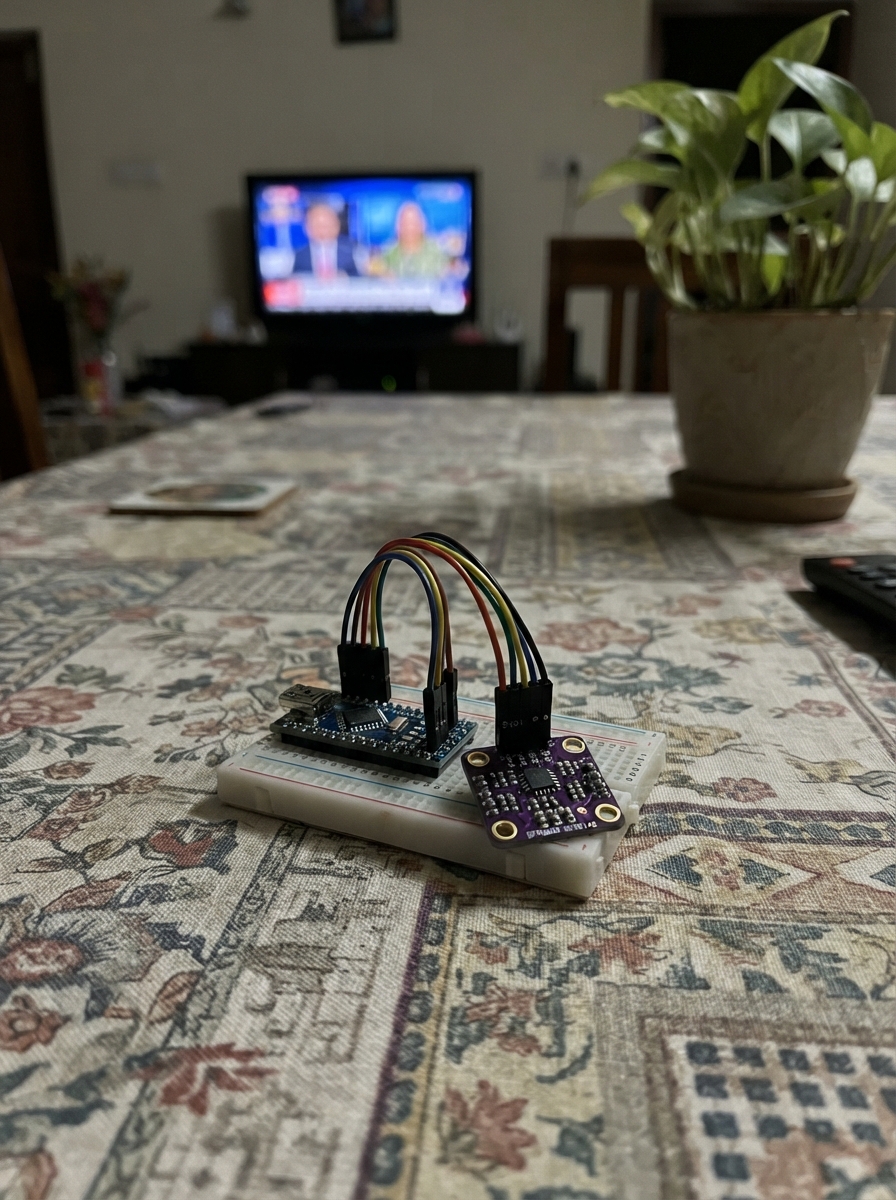
This project turns an Arduino Uno into a motion sensor data logger using the MPU-6050 6-axis inertial measurement unit. The sensor captures acceleration and rotation data across all three axes, plus onboard temperature readings, streaming the measurements to a computer via serial connection at 100ms intervals.
The guide provides a complete parts list, wiring diagram showing I2C connections, and ready-to-upload firmware that logs sensor data in CSV format. Builders will learn how to interface with the MPU-6050 over I2C, verify sensor connectivity, and capture motion data for analysis or integration into larger projects.
Wiring diagram

Gather all the parts
Assemble it in 4 steps
1. Place the sensor beside the Uno
Put the MPU-6050 breakout on a non-conductive surface beside the Arduino Uno, with its printed pin labels facing up. Keep it still while you first test it so the numbers are easy to interpret.
- A breadboard makes the four connections easier to keep separate.
- Do not rest the bare sensor board on metal; that can join pins together and damage the board.
2. Connect power and ground
Use a red jumper wire from the MPU-6050 VIN pin to the Uno 5V pin (power). Use a black jumper wire from the MPU-6050 GND pin to any Uno GND pin (ground).
- Match the printed labels on the sensor board, not the physical position of the pins.
- Make sure VIN and GND are not swapped — swapped power can damage the sensor.
3. Connect the two data wires
Use a blue jumper wire from MPU-6050 SDA to Uno A4/SDA (data). Use a yellow jumper wire from MPU-6050 SCL to Uno A5/SCL (clock). Leave the MPU-6050 INT pin unconnected for this project.
- A4 and A5 are the two analog pins at the end of the Uno’s ANALOG IN header; A4 is the data wire and A5 is the clock wire.
- Do not connect SDA and SCL to each other — the sensor cannot communicate if the two wires are joined.
4. Plug in the Arduino
Check the four sensor wires once more, then connect the Uno to your computer with its USB cable. The computer powers the board and carries the printed readings.
- Hold the sensor level after deployment: at rest, the acceleration values should be steady and one axis will show roughly the effect of gravity.
- Unplug the USB cable before moving any jumper wire so an accidental short does not damage the board.
Review all connections
1. Connections between "mpu6050_1" and "Arduino"
Deploy the firmware
#include <Arduino.h>
#include <Wire.h>
#include <MPU6050.h>

MPU6050 mpu;

void setup() {
  Serial.begin(115200);
  Wire.begin();

  Serial.println(F("MPU-6050 serial reader"));
  mpu.initialize();

  if (!mpu.testConnection()) {
    Serial.println(F("MPU-6050 not found. Check VIN, GND, SDA, and SCL wiring."));
    while (true) {
      delay(1000);
    }
  }

  Serial.println(F("MPU-6050 connected."));
  Serial.println(F("ax,ay,az,gx,gy,gz,tempC"));
}

void loop() {
  int16_t ax, ay, az;
  int16_t gx, gy, gz;

  mpu.getMotion6(&ax, &ay, &az, &gx, &gy, &gz);
  float temperatureC = mpu.getTemperature() / 340.0f + 36.53f;

  Serial.print(ax);
  Serial.print(',');
  Serial.print(ay);
  Serial.print(',');
  Serial.print(az);
  Serial.print(',');
  Serial.print(gx);
  Serial.print(',');
  Serial.print(gy);
  Serial.print(',');
  Serial.print(gz);
  Serial.print(',');
  Serial.println(temperatureC, 2);

  delay(100);
}
Remix this project
Make it yours in one click
Open a full copy of this project in your own Schematik workspace — diagram, code, parts, and assembly steps included. Swap the sensor, add features, or redesign the whole thing with AI. The author's original stays untouched.
Related projects
Reloj Digital Con Temporizador
Arduino · September 27, 2026Ricardo Sprovieri
I M Building Test-phase Prototype Of Capstone Co
Arduino · September 27, 2026Fritz Blue Gadaza
Ultrasonic Distance Alarm
Arduino · September 26, 2026Djimini3 Normal